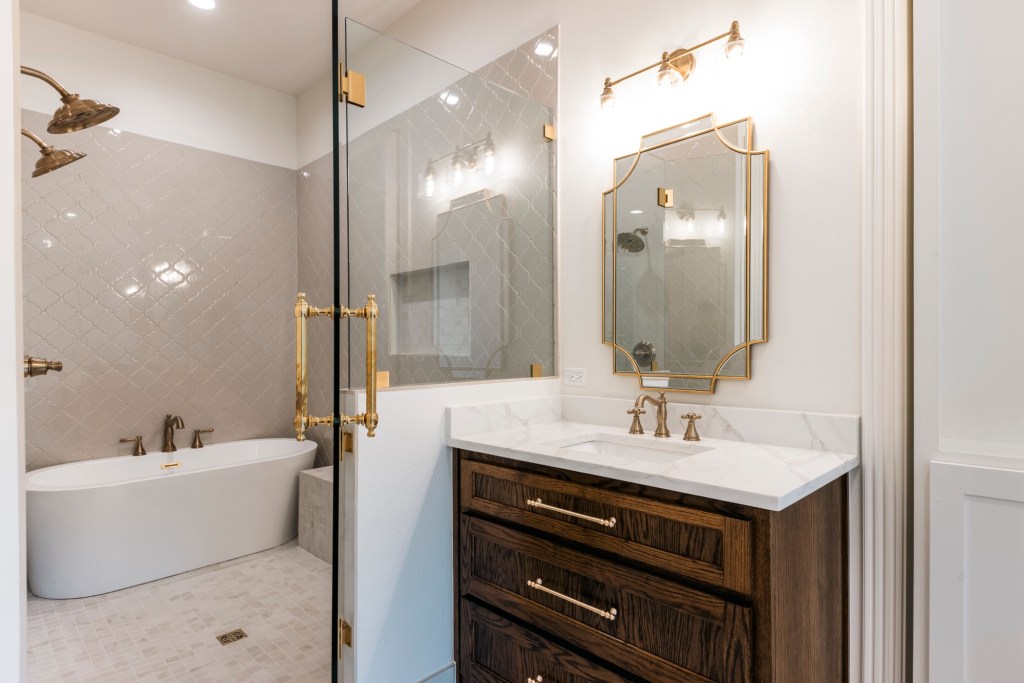
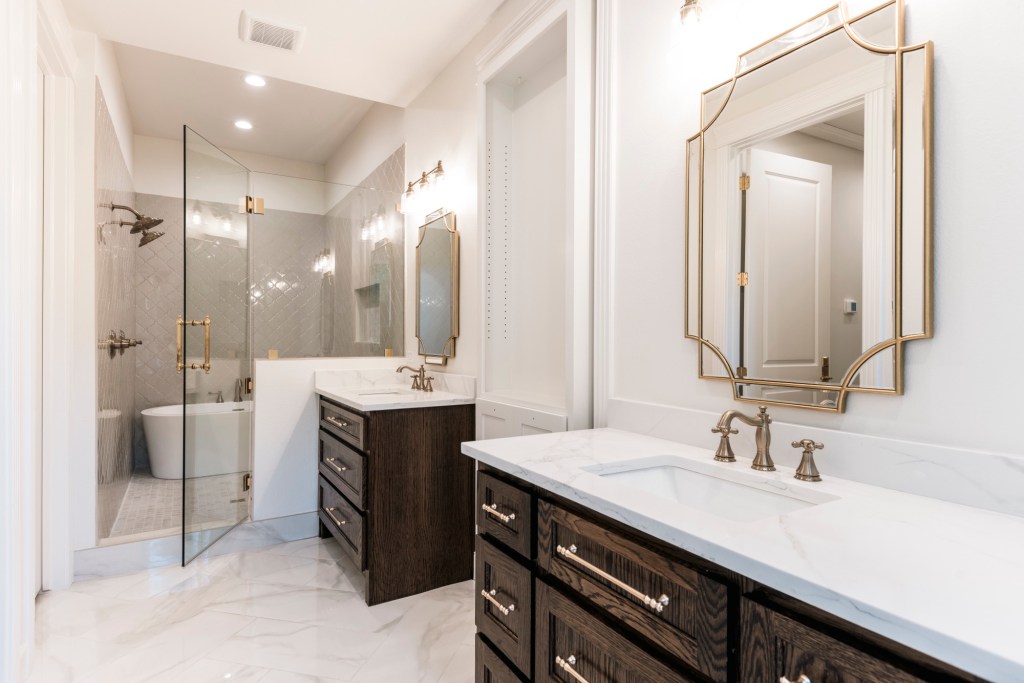
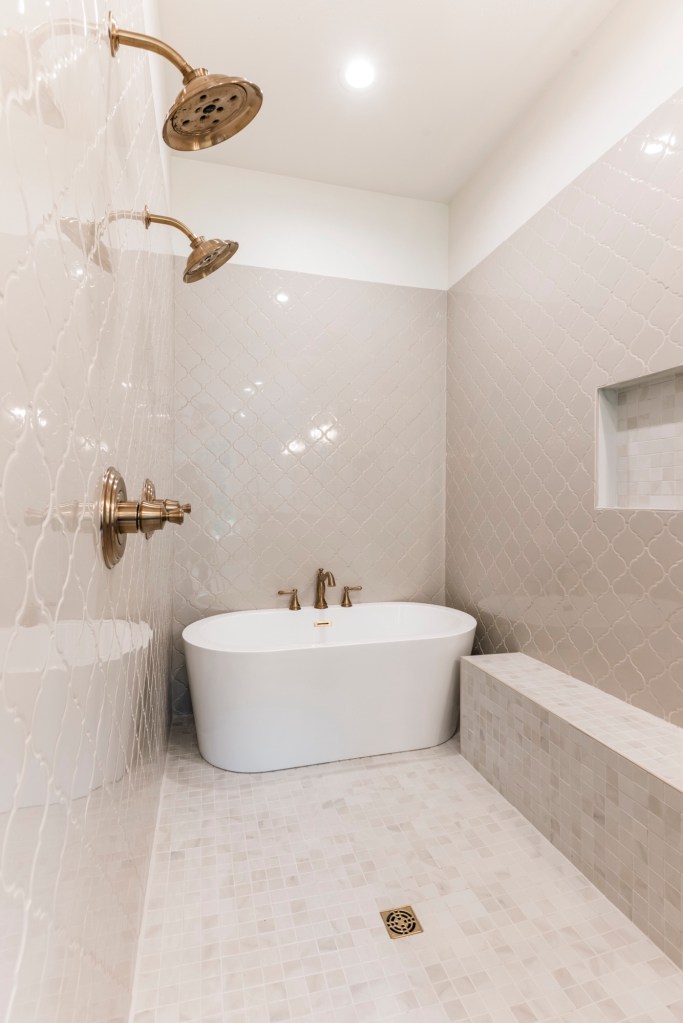
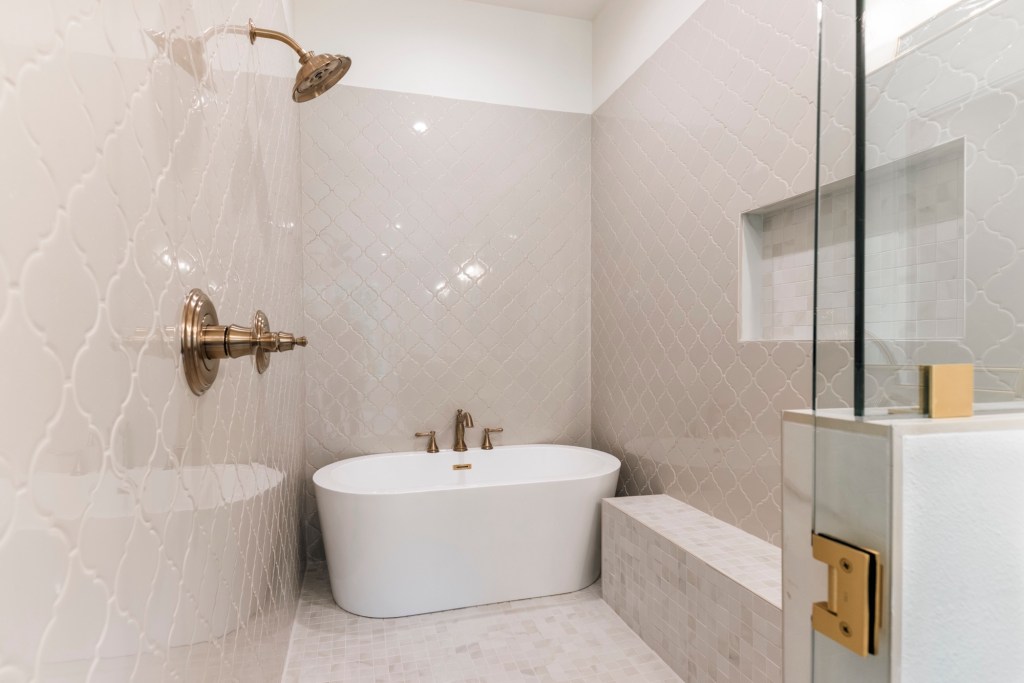
Are you ready for a dramatic transformation? I sure hope so, because this project is one of my biggest transformations to date. Designing the remodel of this space for my friends/clients (frients with a long I, maybe?) was really such a joy!
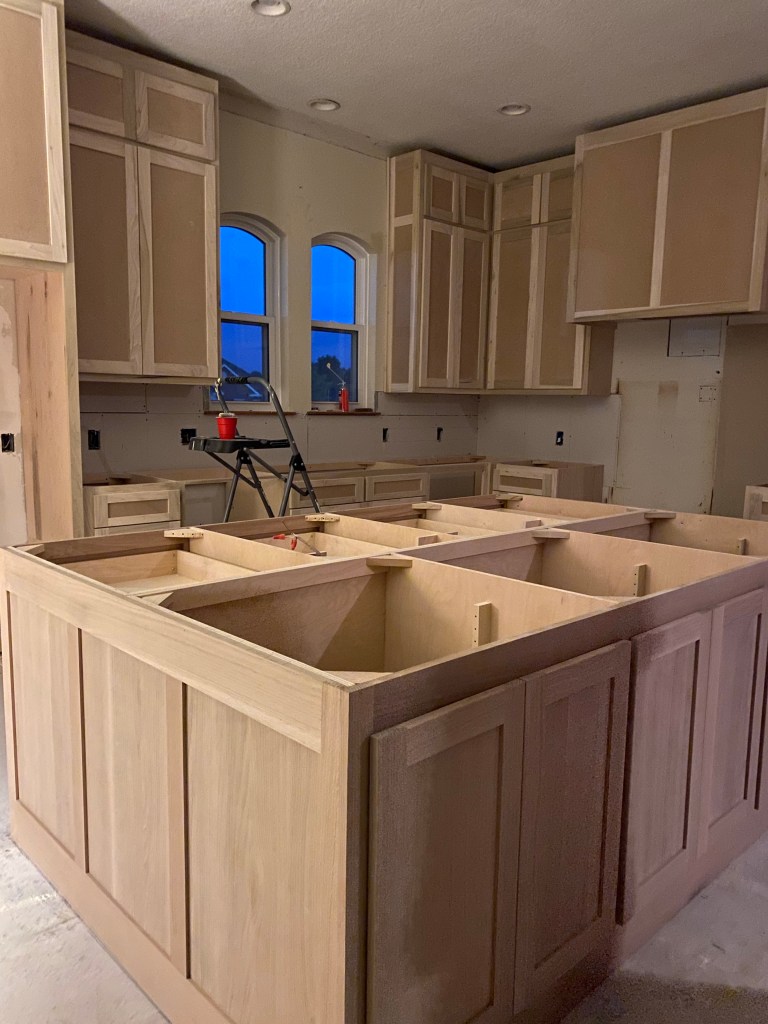
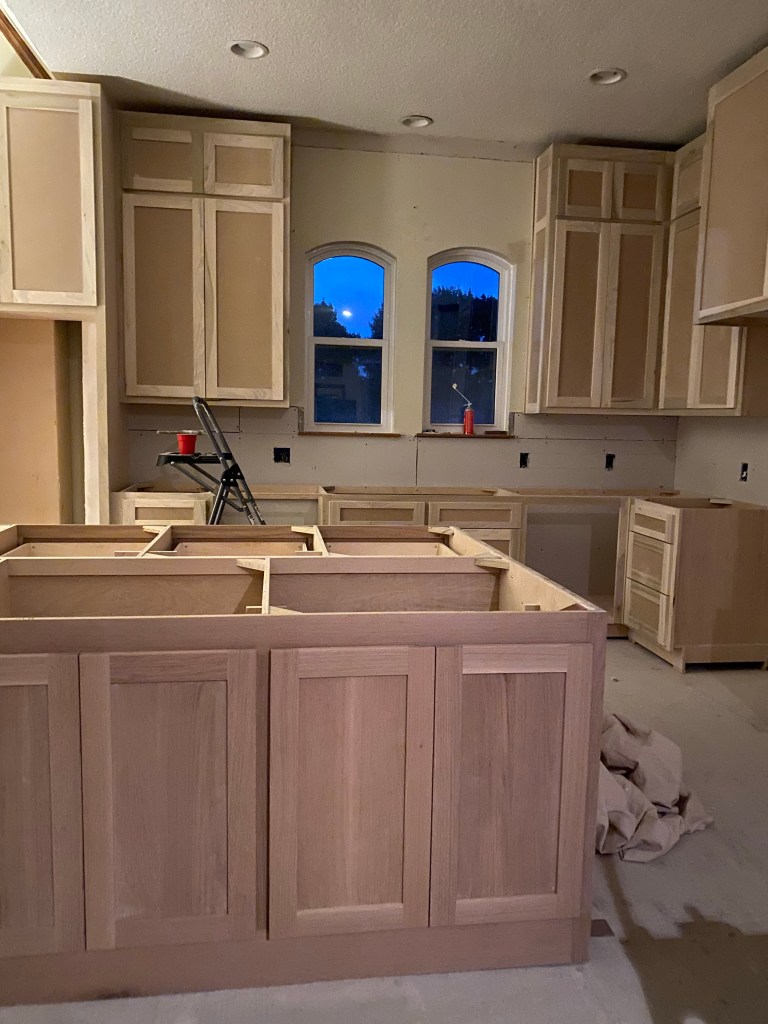
Above is the before picture and below are a couple of pictures taken during the remodel.
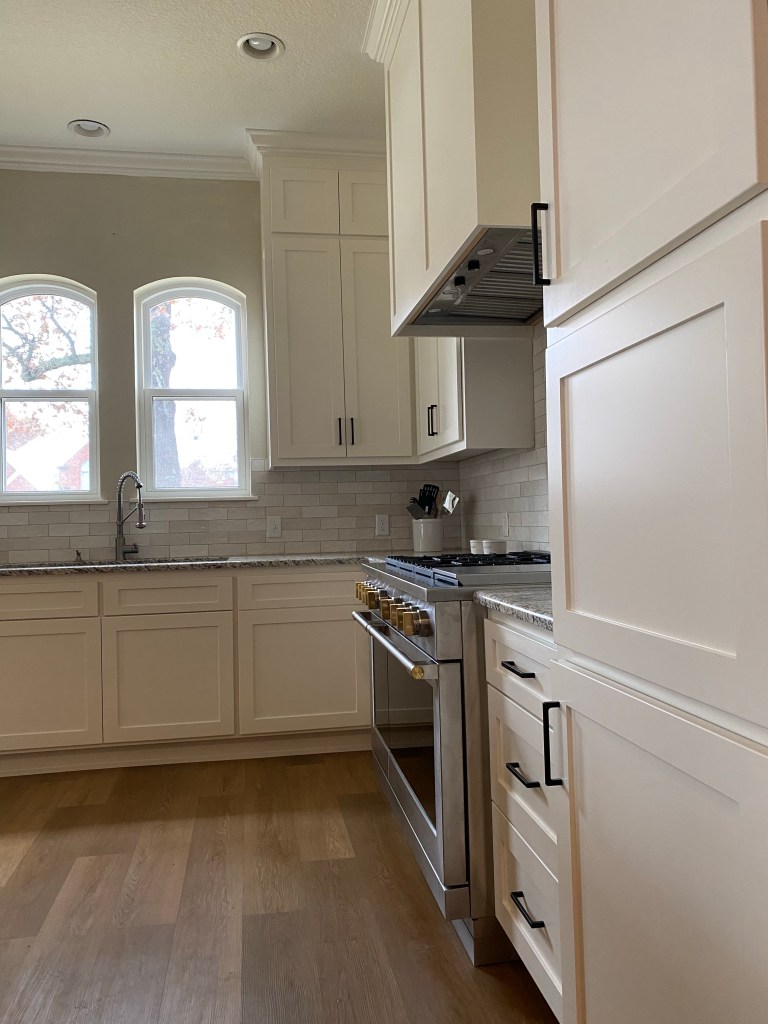
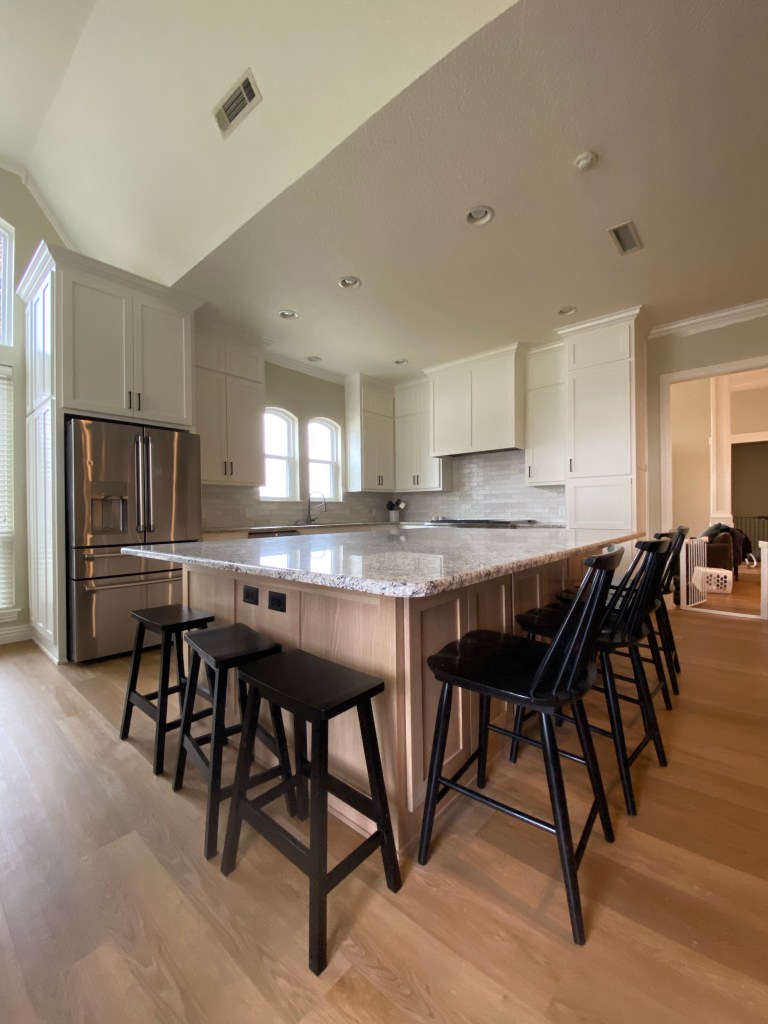
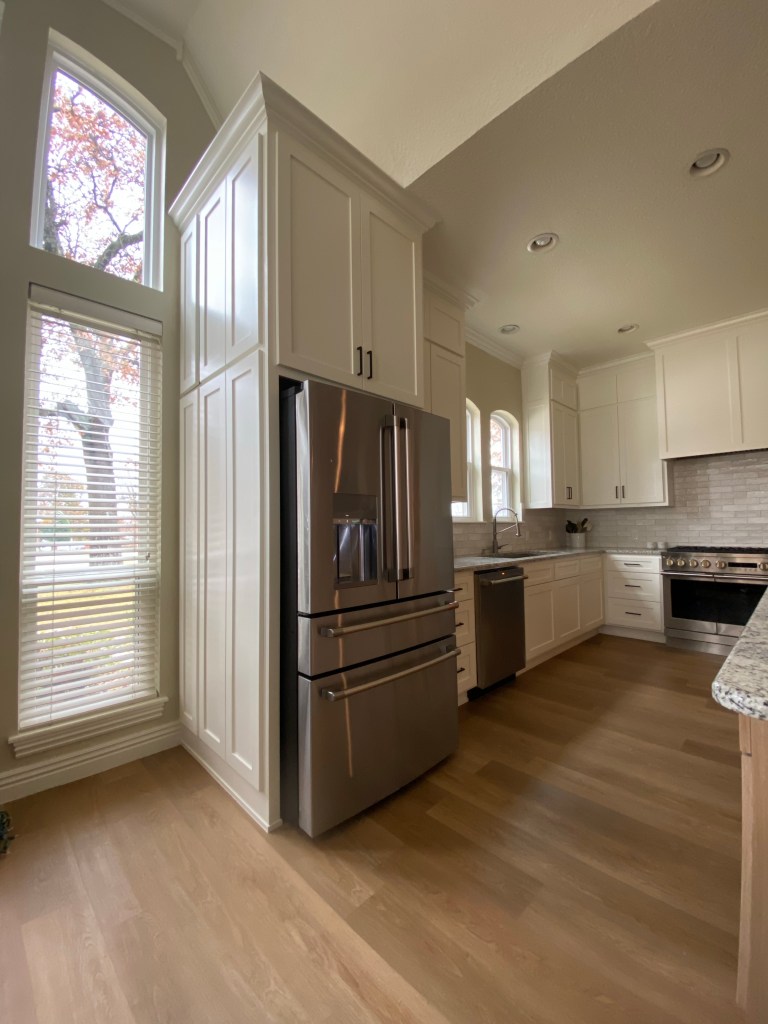
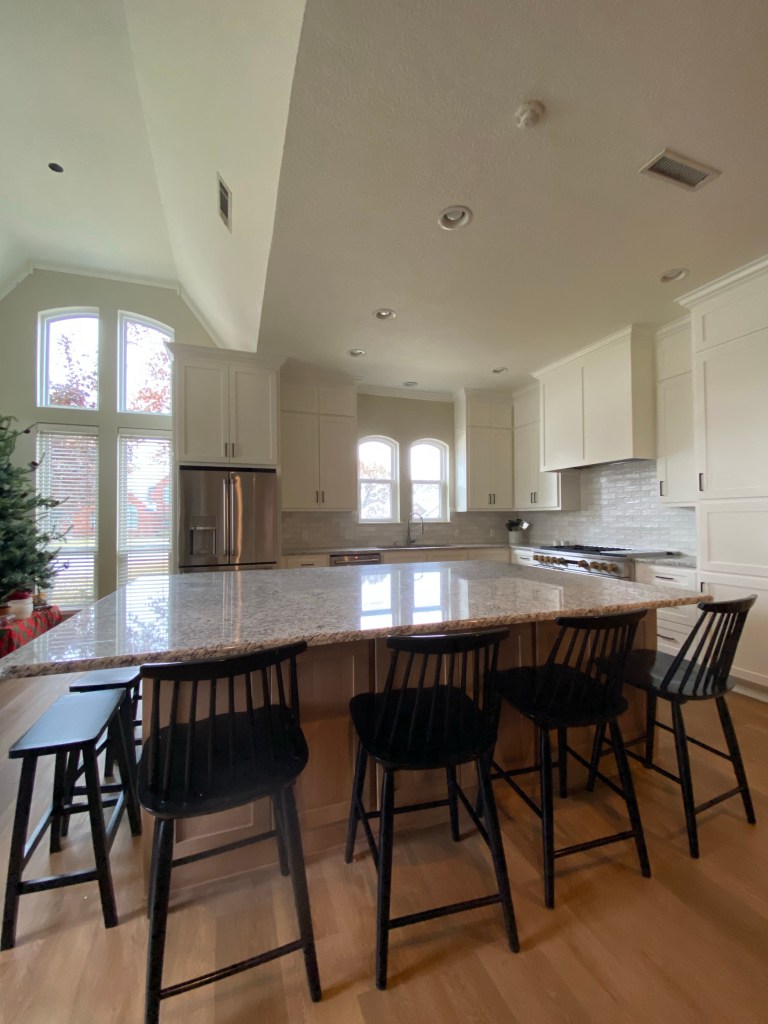
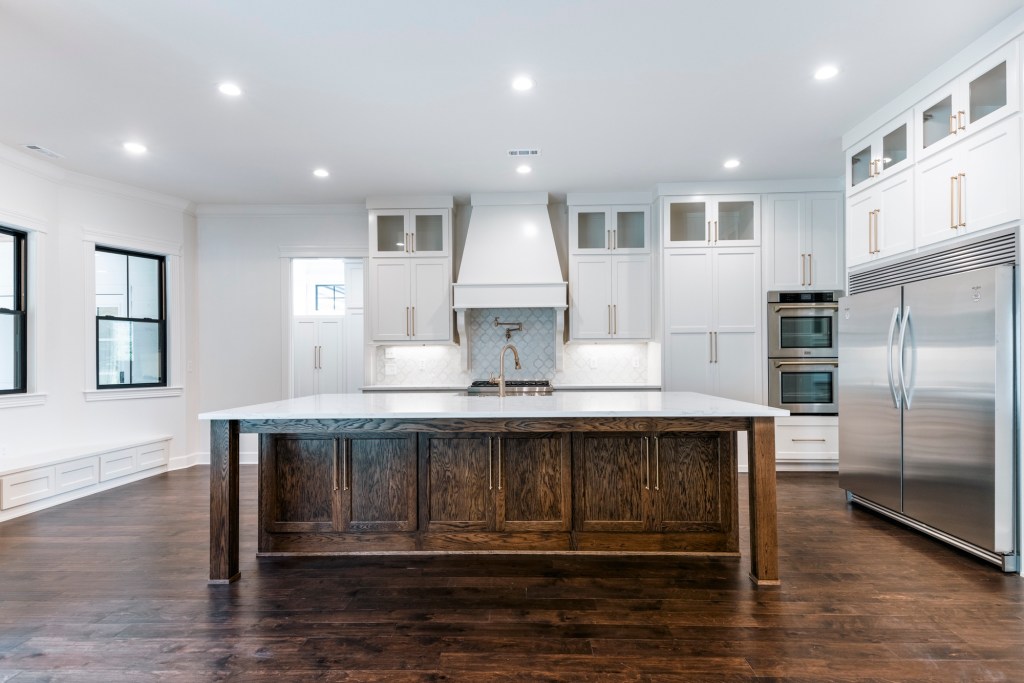
The original kitchen was cramped with two narrow islands that did not accommodate my clients and their large family.
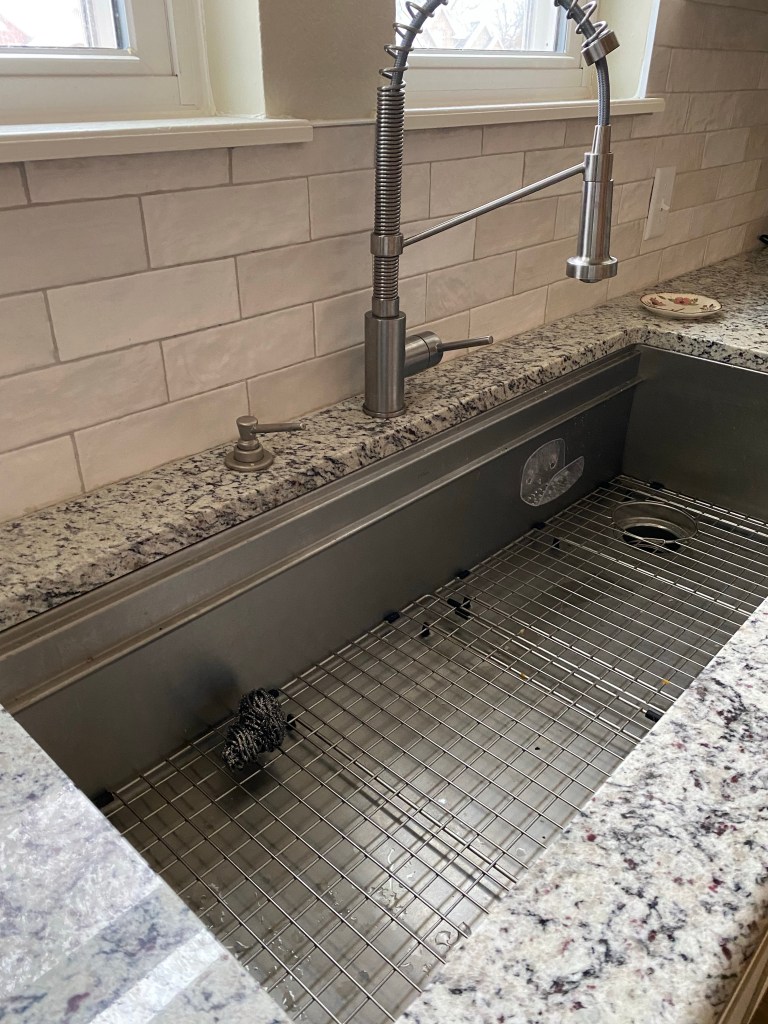
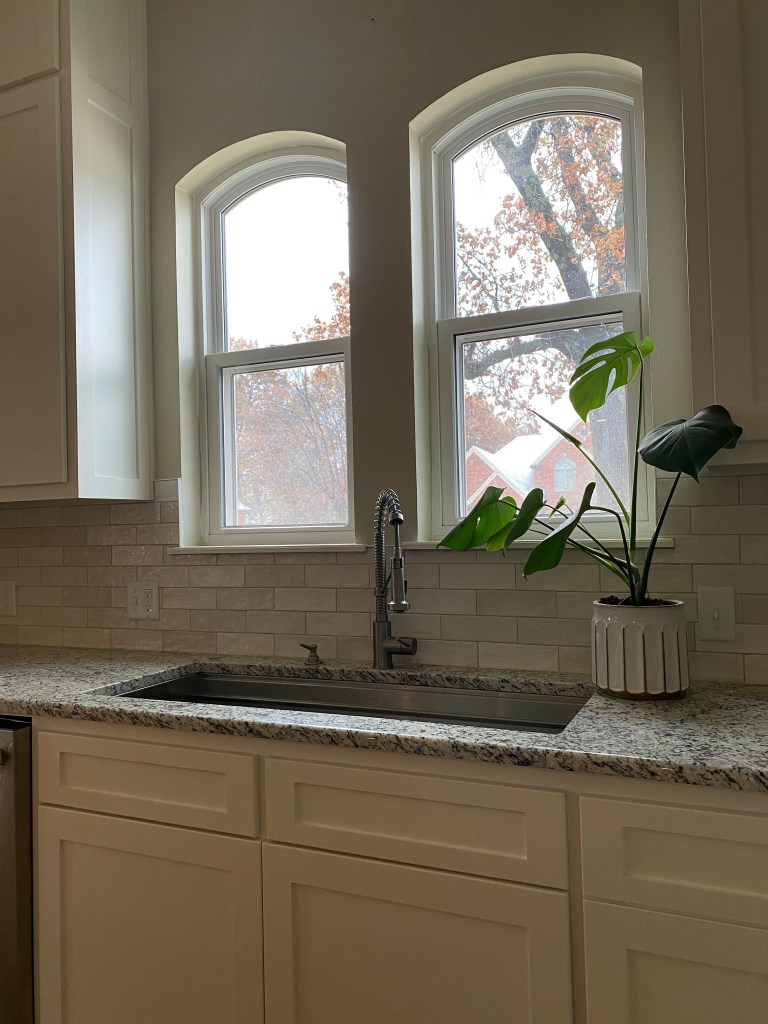
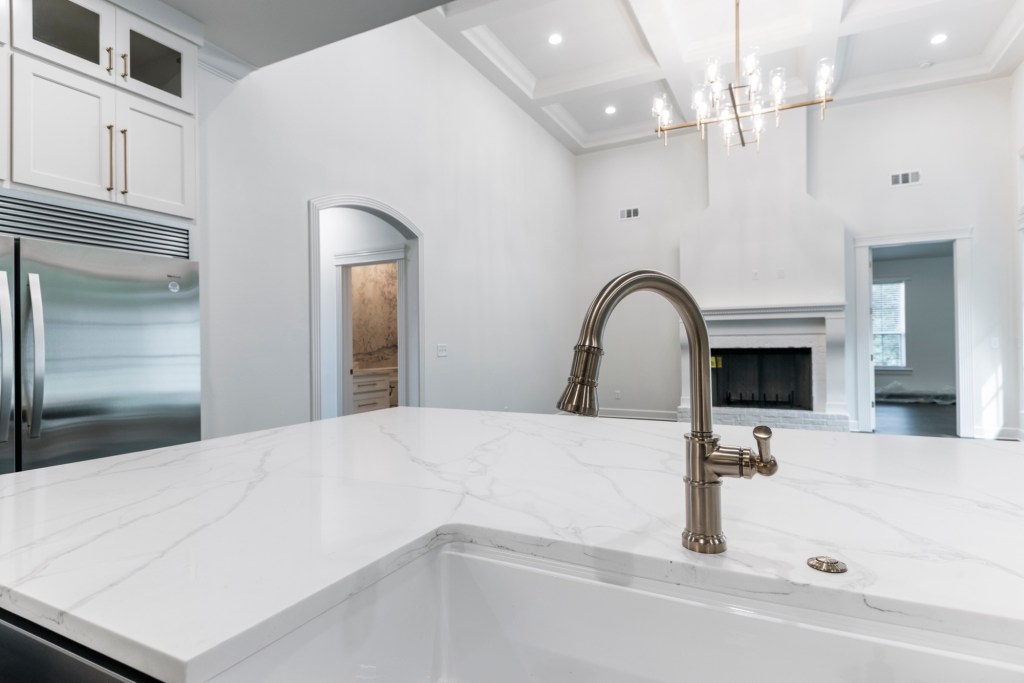
We moved the refrigerator from it’s original space to create a more fluid work triangle. The sink remained under the beautiful double window and we replaced the two small islands with one beast of an island with cabinets on the front and on the back.
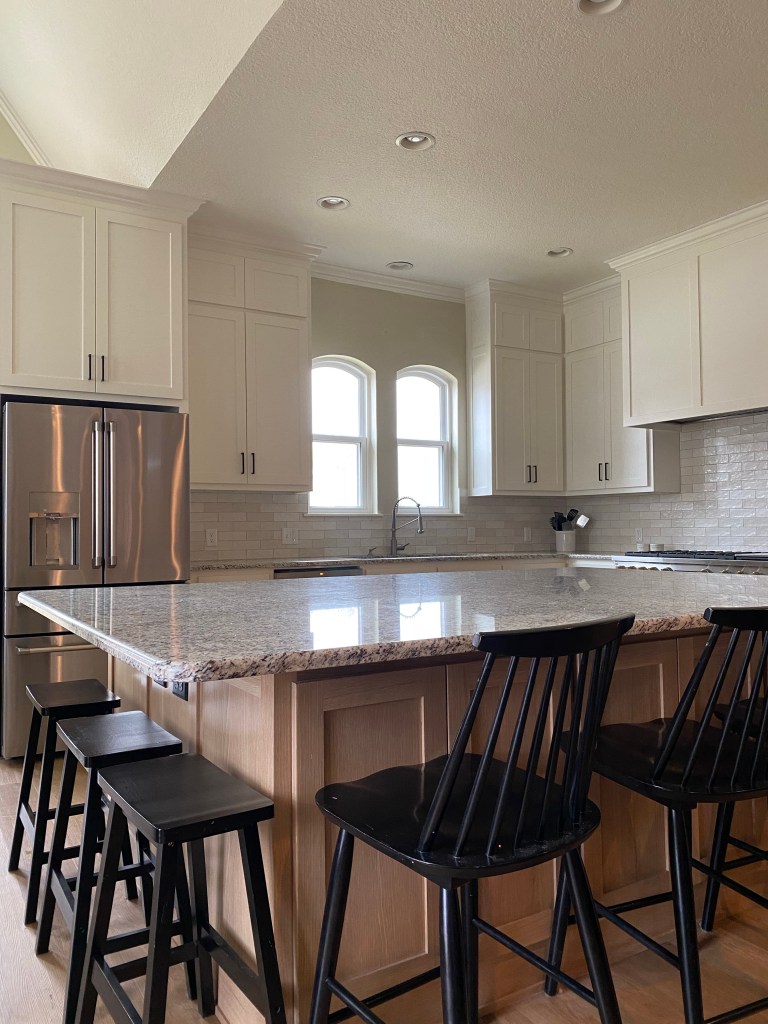
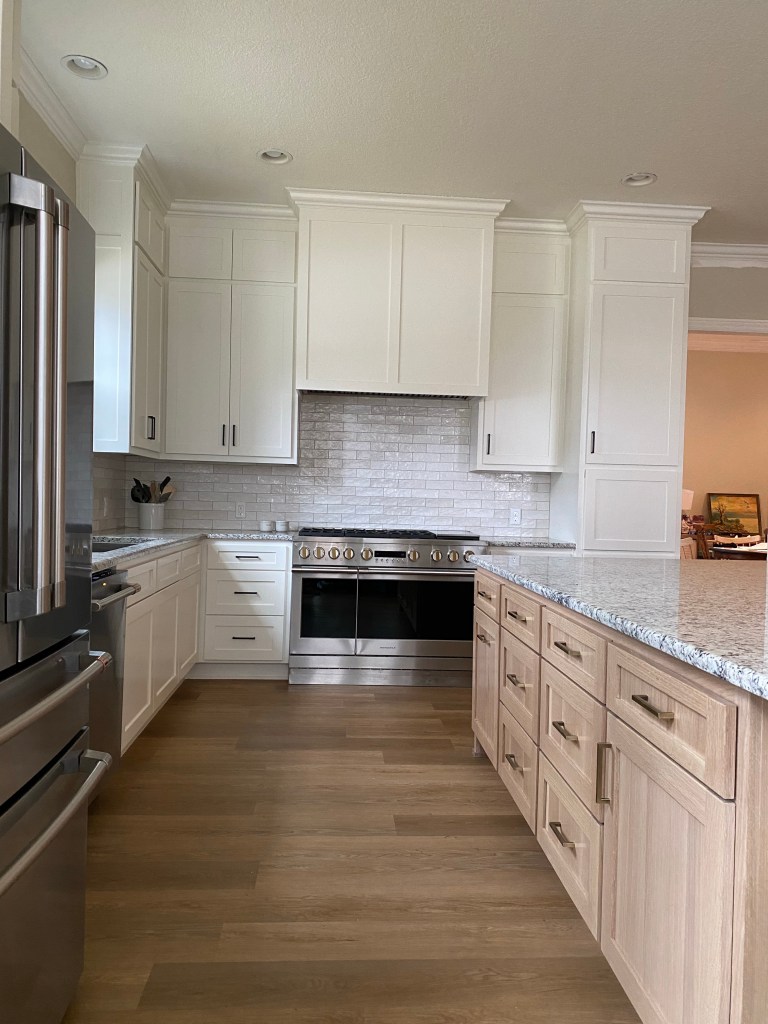
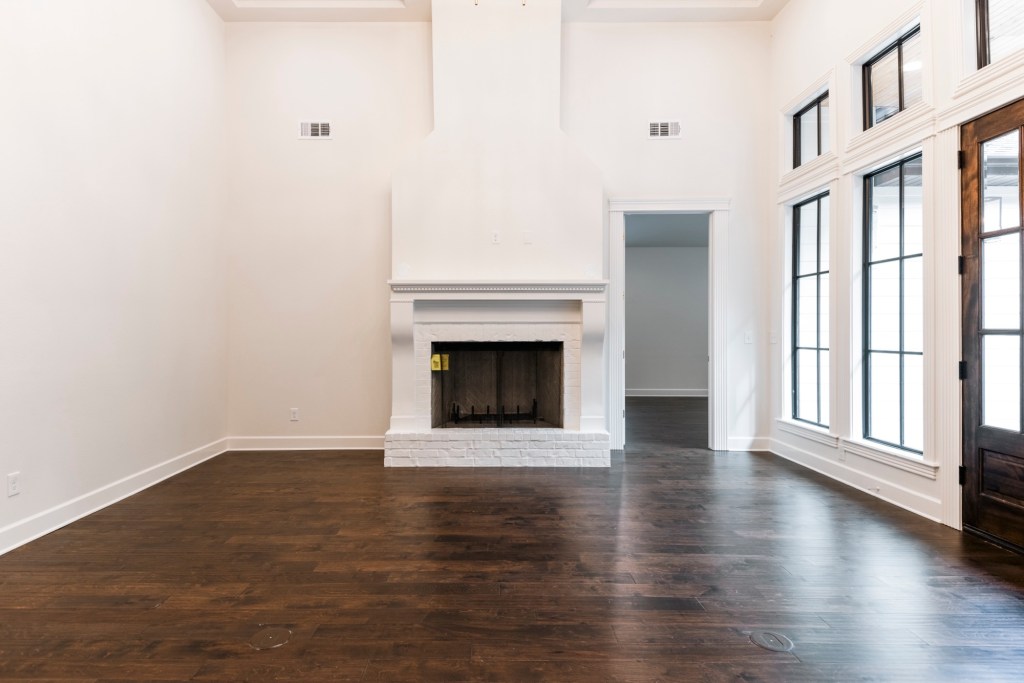
We opted to replace the tile flooring with a high quality luxury vinyl plank because this kitchen and living room area is adjacent to an outdoor pool. The LVP that we selected has a limestone core and is extremely durable in high traffic, and sometimes wet areas. It is the most wood-like LVP that I’ve found and I had lots of help from my friends at ProSource with finding just the right flooring.
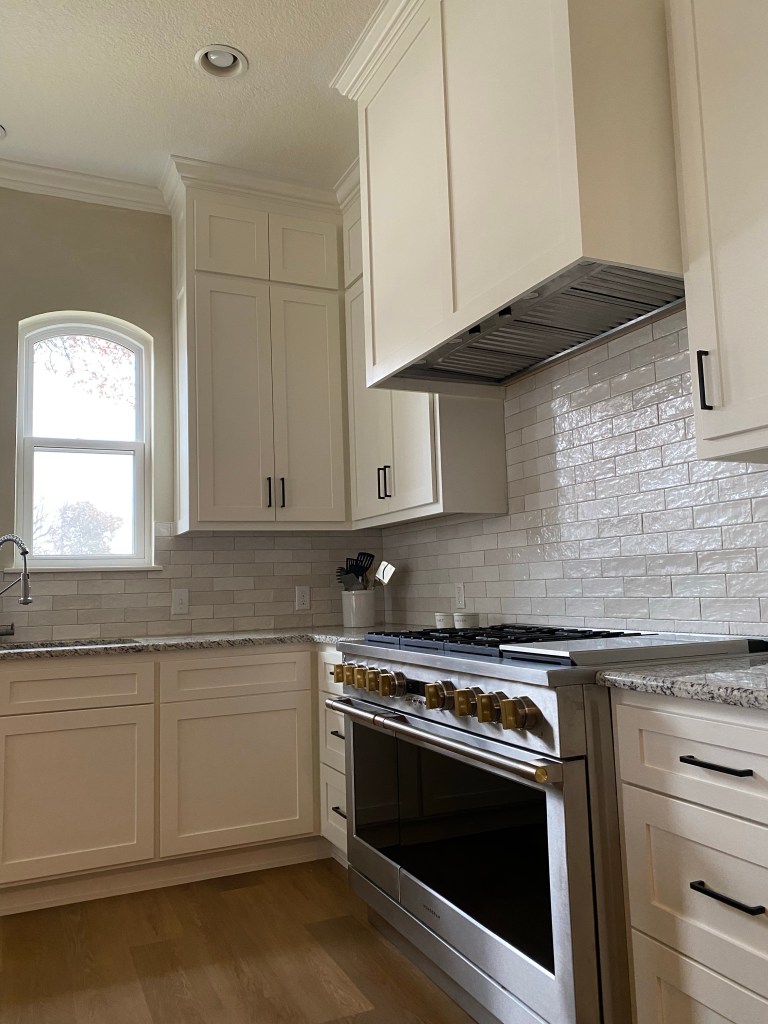
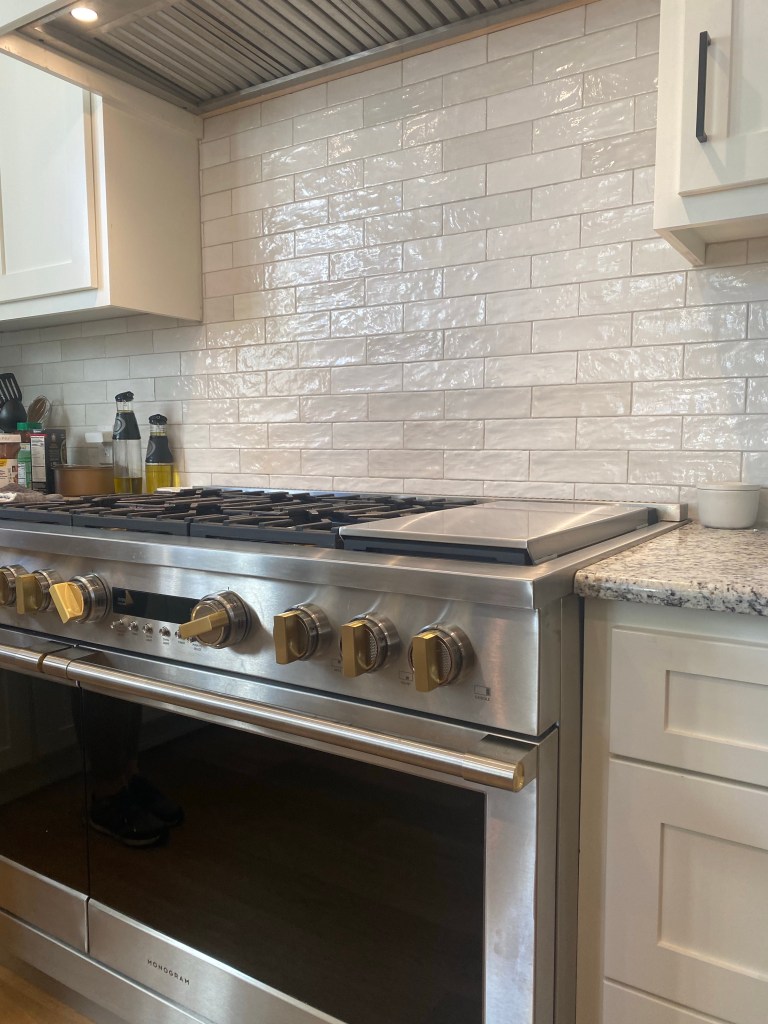
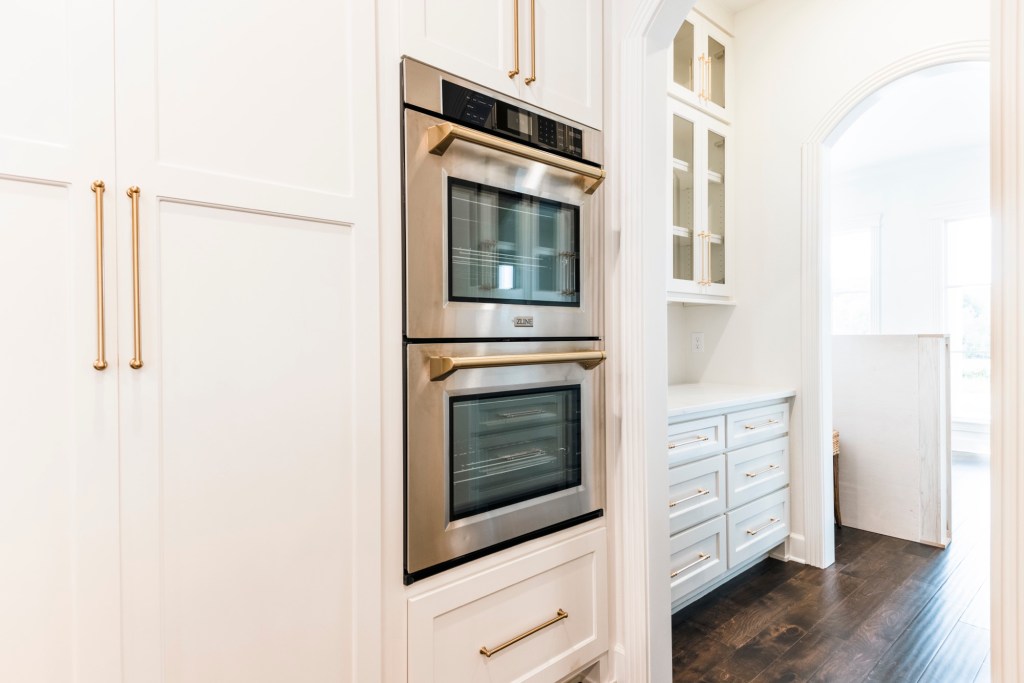
For the cabinets, we chose to paint the surrounding cabinets white and stain the island a natural shade of wood. This combination could not have turned out any better. For the backsplash, we went with an understated, textured subway tile that’s classic and timeless with just a hint of shimmer. My client LOVES her workstation sink, as well as her GE monogram 48” double oven and range.
We used a mixture of hardware, being careful to keep scale and functionality in mind. For the countertops, we went with a neutral builders’ grade granite. Granite is really an unsung hero in the kitchen world. It can handle heat, water, oil and a whole bunch of abuse. Plus, the builders’ grade price is a serious value.
My clients also opted to add a few special features to the cabinetry, as shown in the videos below.
This remodel, from start to finish, took several months and lots and lots of phone calls, meetings and texts with my clients. It was absolutely worth it in every way. I enjoyed being around my clients and their sweet family. Seeing them enjoying their newly designed kitchen is just icing on the cake!
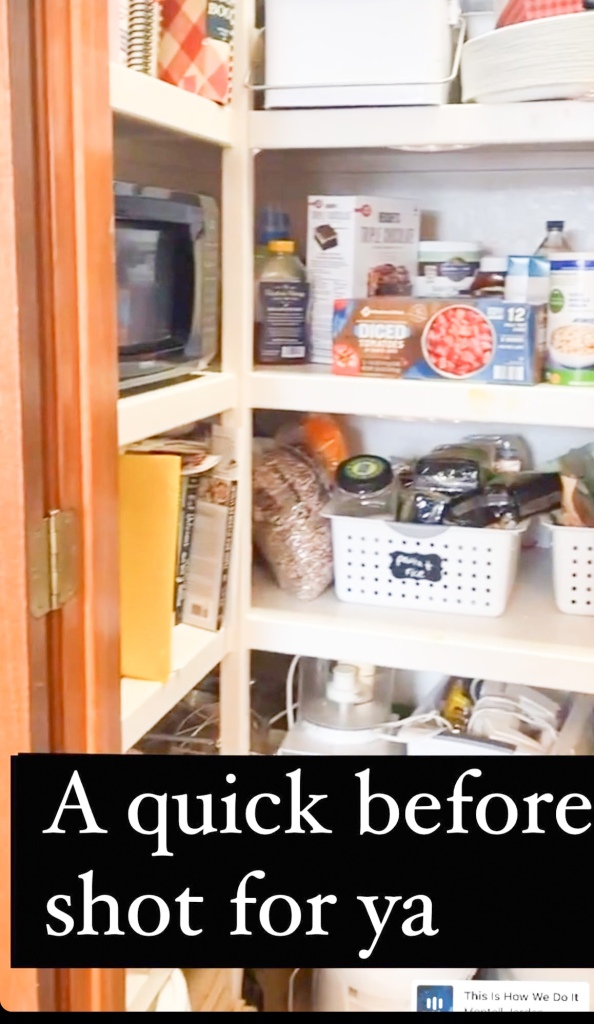
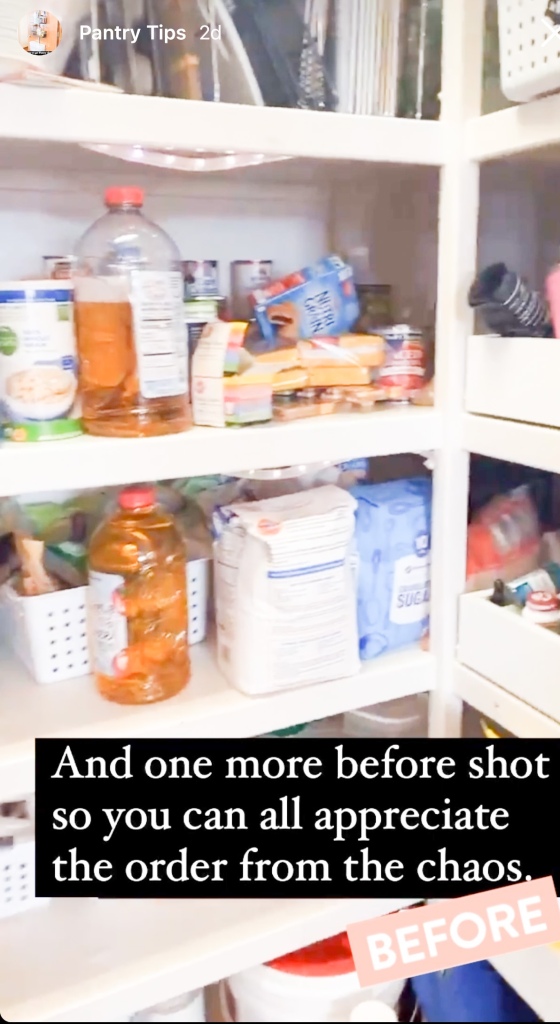
My hubby and I spent some time decluttering and reorganizing our pantry over the weekend. I love a good before and after, so here are a couple of very rough before photos taken straight from my Instagram stories.
Step 1: We unloaded each shelf, one or two shelves at a time. I didn’t empty the entire contents of the pantry all in one fell swoop. The goal of this project was to create more peace and organization. I knew that if I unloaded the entire pantry and covered every single space of my kitchen and dining room with the items from the pantry, I’d get overwhelmed. First, I took out all the cookbooks and went through them. I wiped down the cookbook shelves and put the cookbooks back. Next, I took all our paper plates, plastic cups, and basically any disposable product out of the pantry and organized them. I wiped down the shelves where they had been stored and put them back.
Step 2: We went through each group of items that we’d removed from the pantry. We dedicated one area of our kitchen as a space to put things that will be donated and placed unused items there. As we worked, Justin would bag things up from this area and take the bags to the garage to eventually donate. We were snowed in during this project. We would typically put the bags of items to donate directly in the back of my van so that I could donate them as soon as possible. That little trick actually helps me a ton. I really don’t like having random bags in the back of my van, which motivates me to take care of donations quickly.
Step 3: We wiped down the shelves and bins that were holding the items we’d gone through. I honestly didn’t think I’d do this at first. I like to think I’m a fairly clean person and felt that I was maybe a bit above needing to wipe out the shelves of my pantry. Pride comes before a fall…the shelves and bins needed to be cleaned out in a bad way!
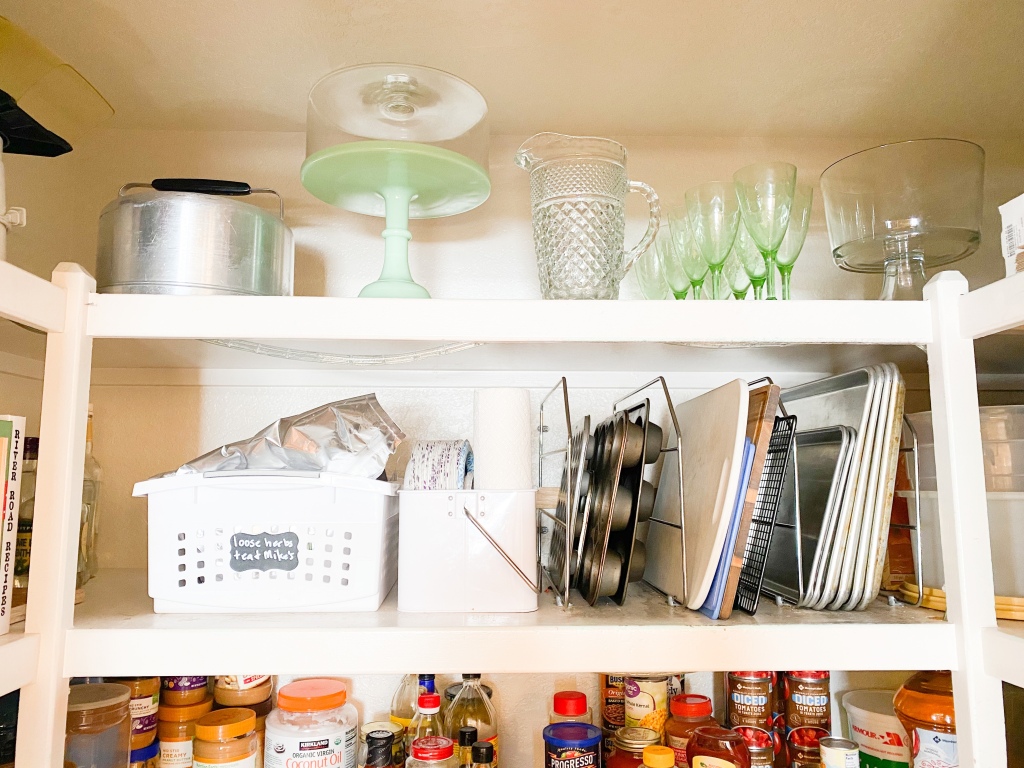
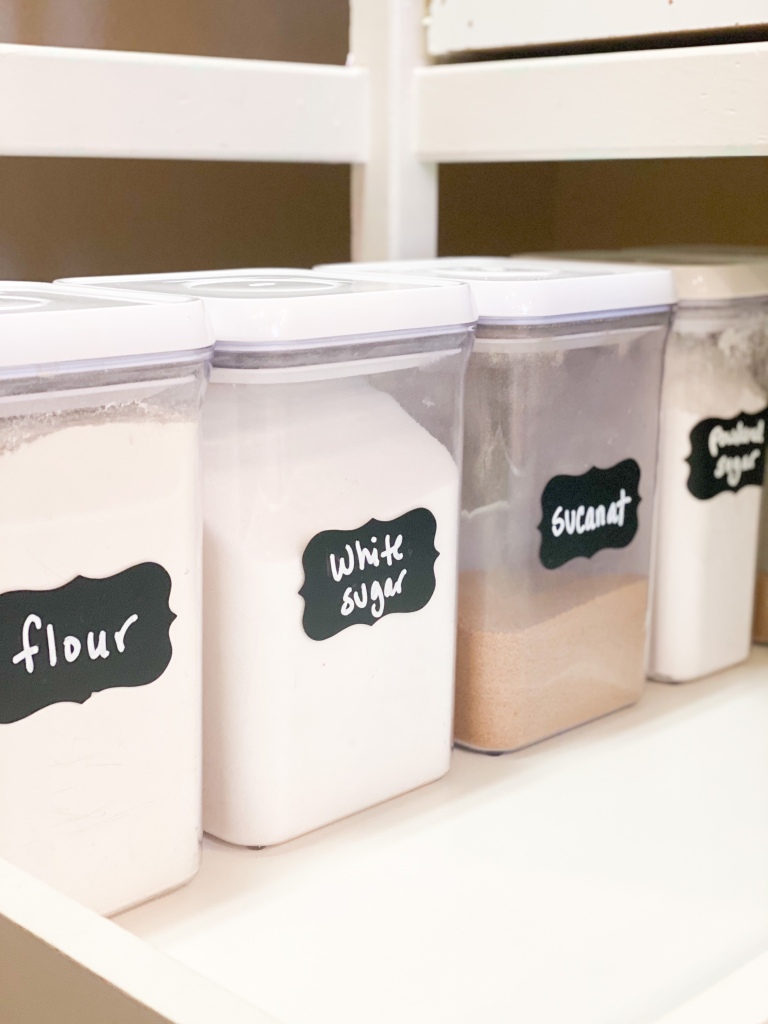
Step 4: We put everything back in a way that functions well and looks good. This final step is key! To help your storage space make sense, it’s good to group similar items together. I try to keep canned goods, glass bottles and condiments all on one shelf, but in separate groupings. Storing all of my baking supplies in one space brings great efficiency to my pantry. I love these Sterlite bins for open storage, these Oxo containers for baking supplies and this set of chalk markers and labels to keep it all labeled. If you have some serving pieces that you’d like to see, put them on shelves that you can see when you open the door. I stored my cake plate, a vintage cake carrier, some family heirloom wine glasses and a glass trifle dish on my top shelf so that I can see them whenever the pantry door is open. What I don’t see every time I open the door, are two shelves stacked with not-so-pretty large storage containers that I use often. I like that they’re easily accessible, but they’re not in my direct line of sight. We also keep our microwave on one of the side shelves of our pantry. This is purely a personal preference, but it’s a big priority for me and I’ve had my microwave in the pantry of all our homes. I like being able to use it fairly easily, but I don’t want to lose counter space, or over the oven space to a microwave.
Finally, there are a few things that my husband and I do to help us stay on the path to productivity when taking on a big project like this. First, we really try to start early in the day so that we can finish the project by dinnertime, or even bedtime that night. I don’t know about you, but a cleaning project that takes multiple days is not my cup of tea. Secondly, we each take breaks as we go. Our kiddos were in the kitchen just a chitty-chatting with us during this entire process. We both needed to step away from time to time so that we could have patience with the kids and get back to work with renewed energy.
Another thing that really helps me to stay sane and productive when doing projects at home is to not compare my home to others. My home doesn’t need to look like the cover of a magazine. I do love the look of a perfectly appointed pantry, with every single thing decanted and in matching bougie bottles, but that’s just not my reality. I have four kids who are all learning to cook right now. I often cook three homemade, from scratch meals on the daily. I don’t have the time or energy to stop them and say, “oh honey, please empty that dried pasta into the breakable container that’s labeled in Italian, okay?” Maybe that will be my reality someday. When I’m an empty-nester, you can all come and look at my pantry and ask me how I made it so perfect. I’ll tell you that it’s because the kids moved out and quit needing all our money and emotional energy. And one final tip on how to get a big ole project like this done is to try to laugh and have a good time. I know that sounds so cheesy, but it’s true! There are plenty of stressful moments, just ask our kids, but we’ve found that if we can laugh at and with each other, we have more fun and are more productive. Here’s the final after shot of our pantry clean out. Drop me a comment below and share any tips that help you conquer the big projects in your home!
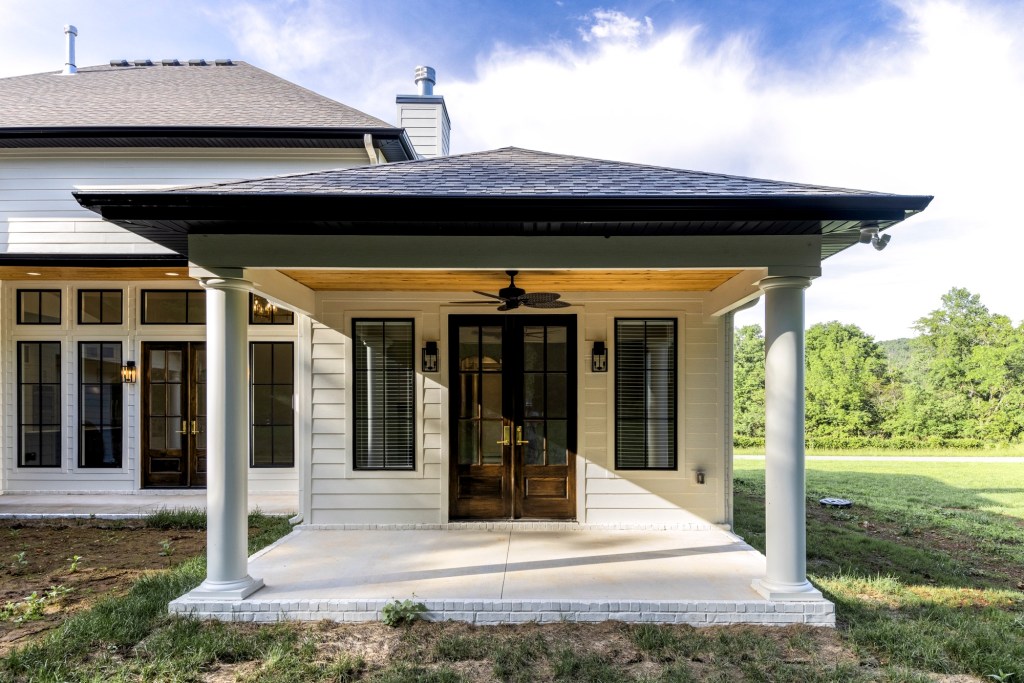
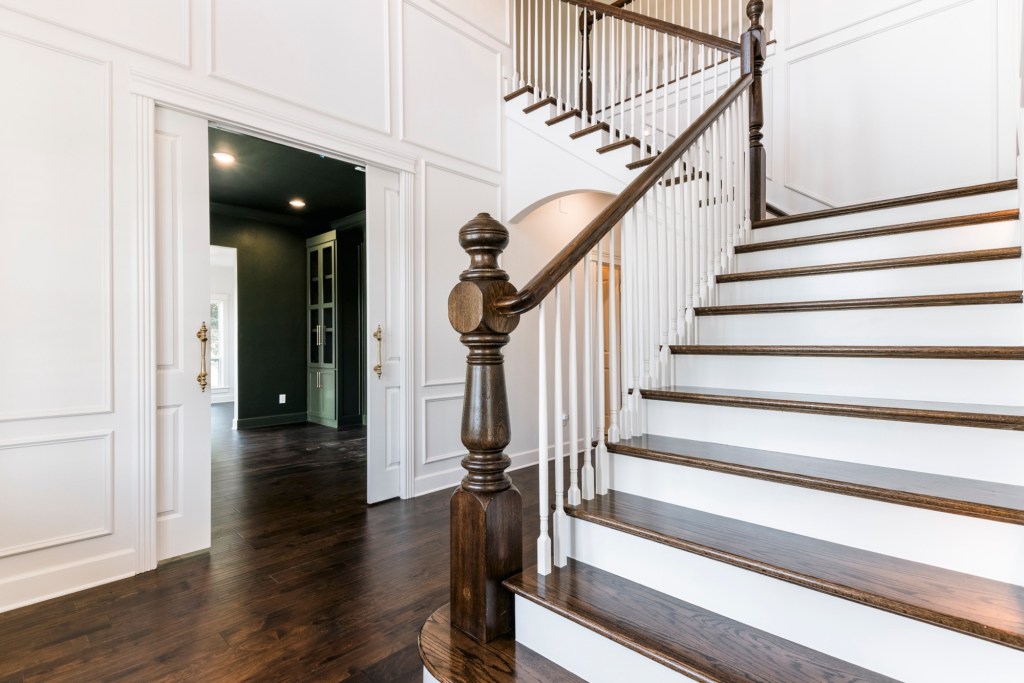
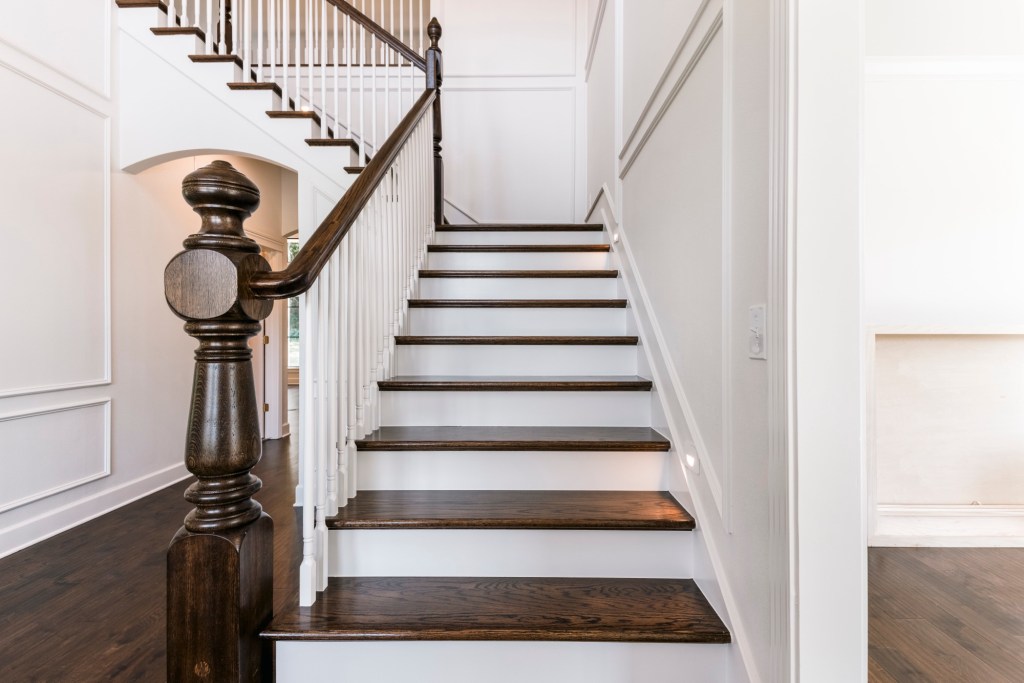
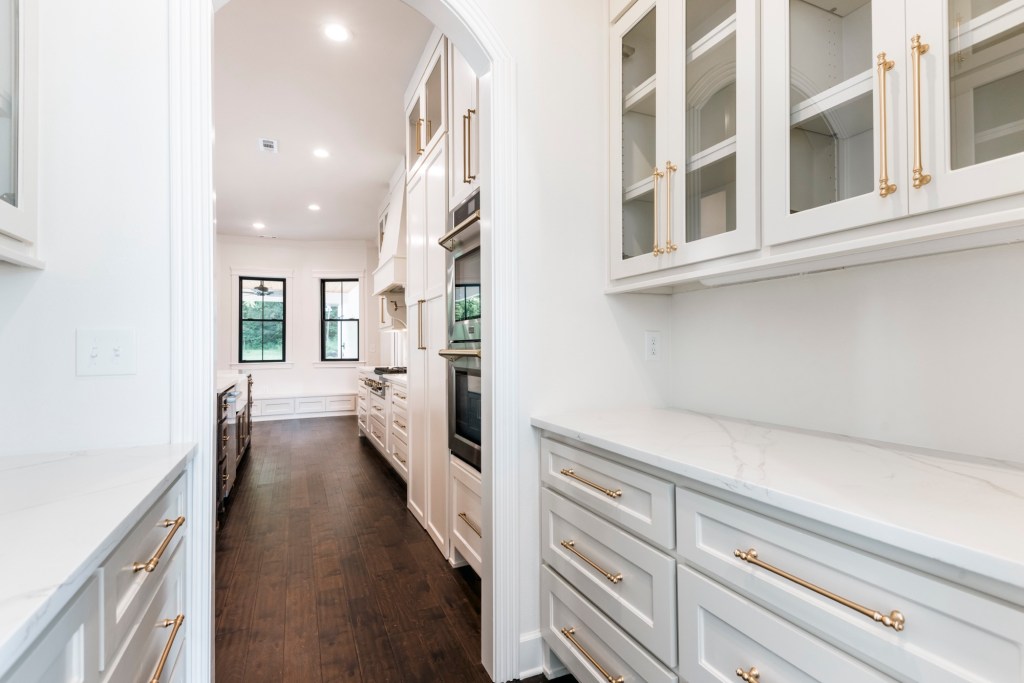
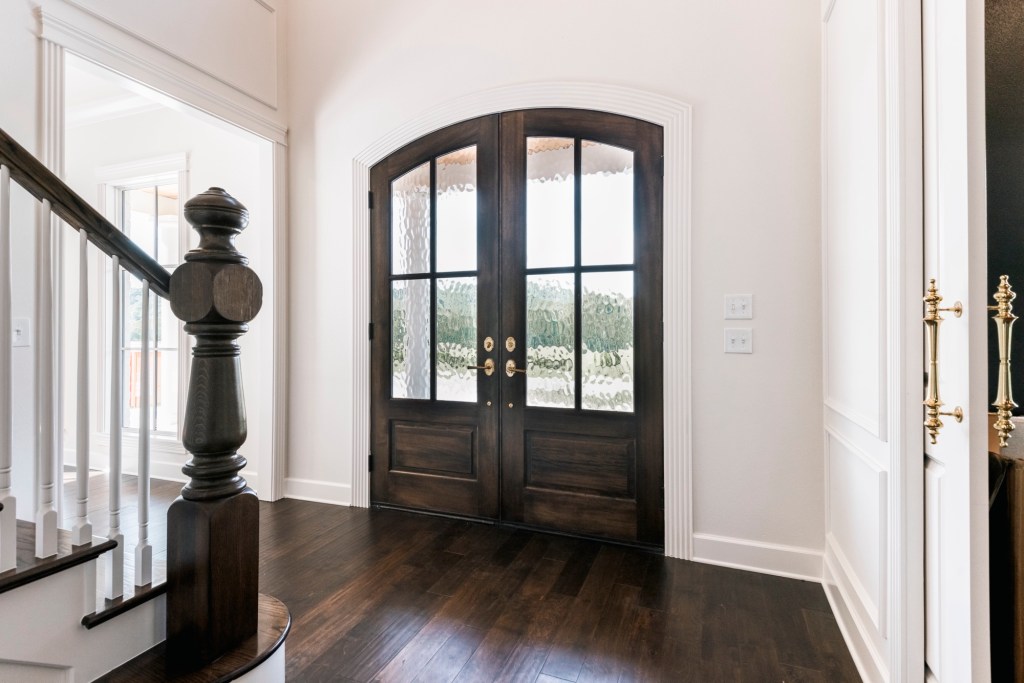
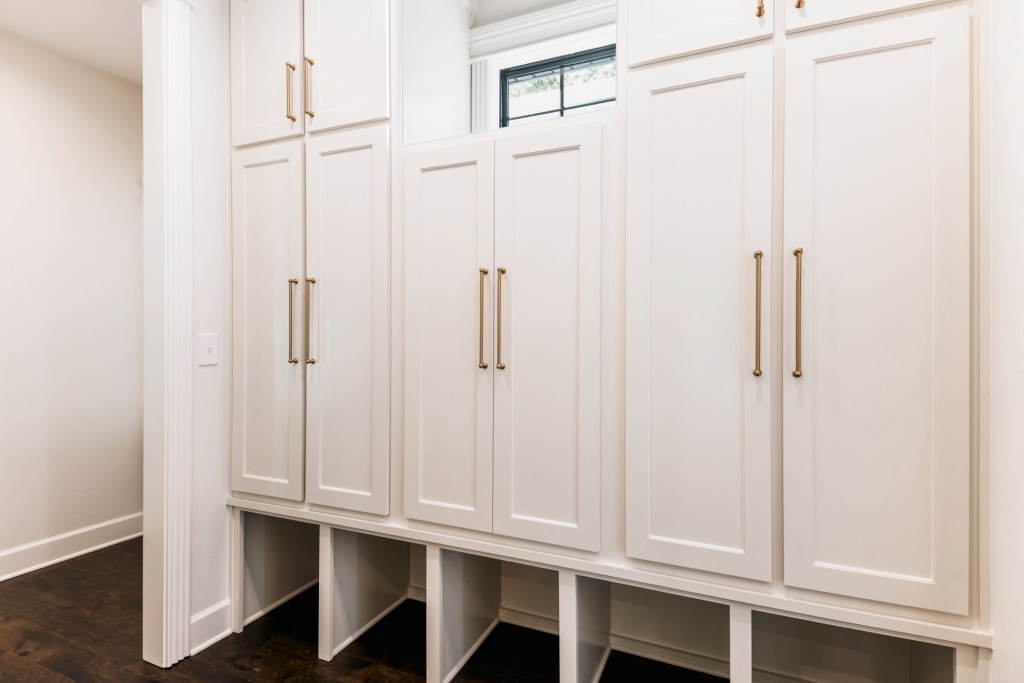
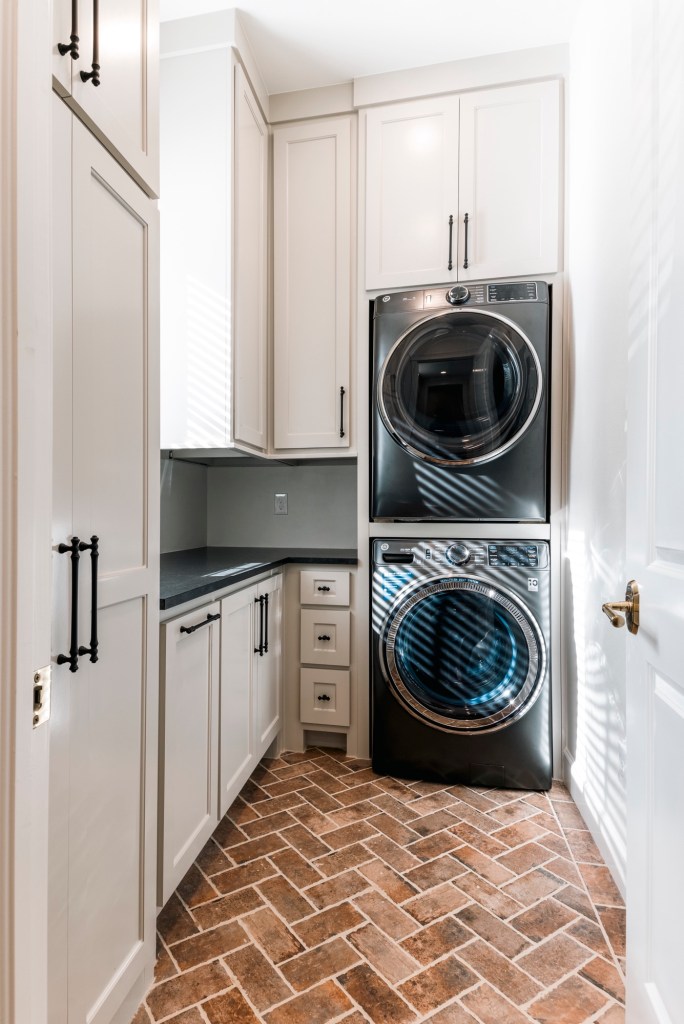
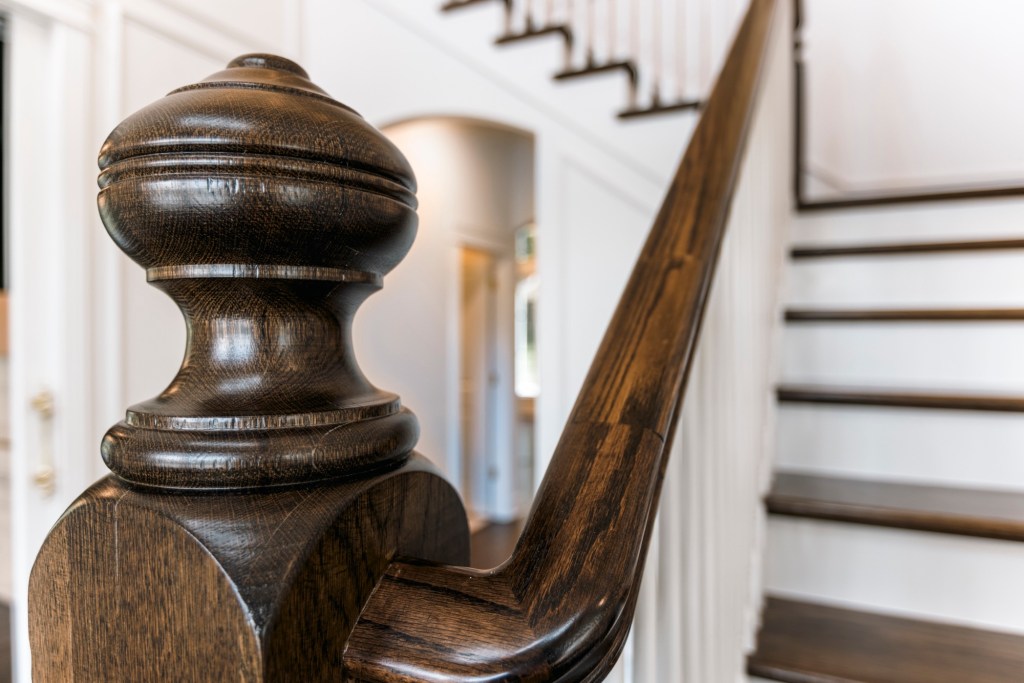
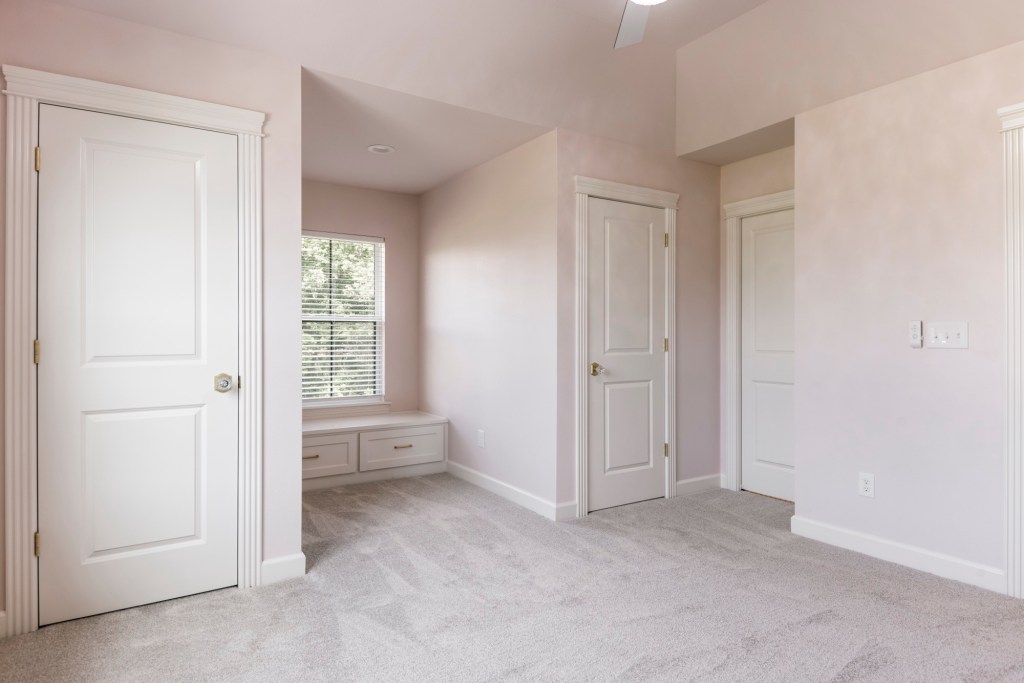
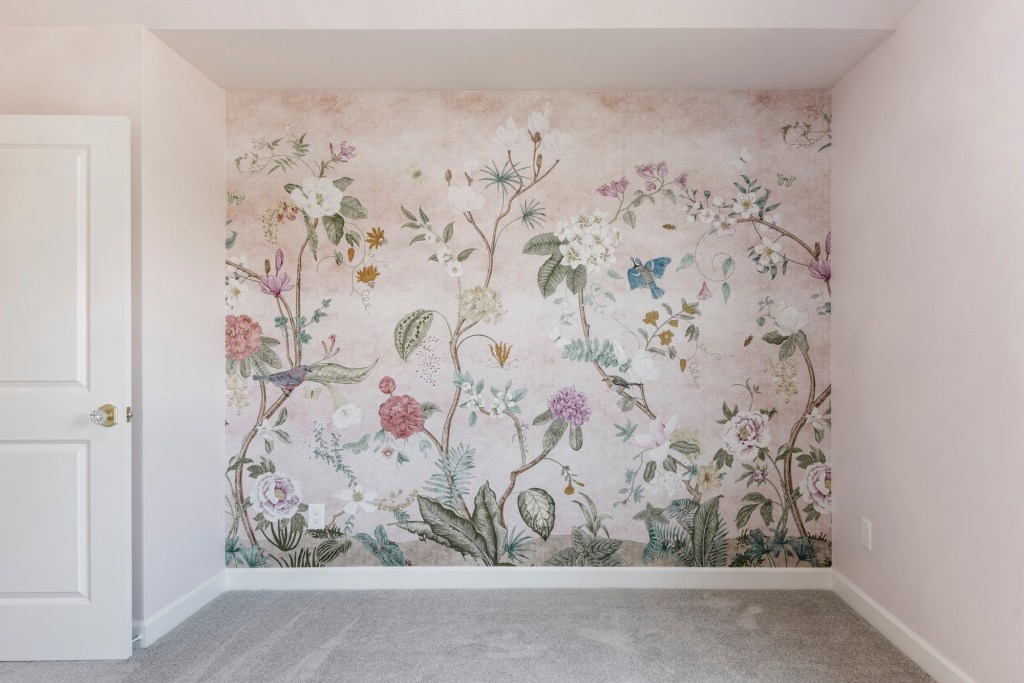
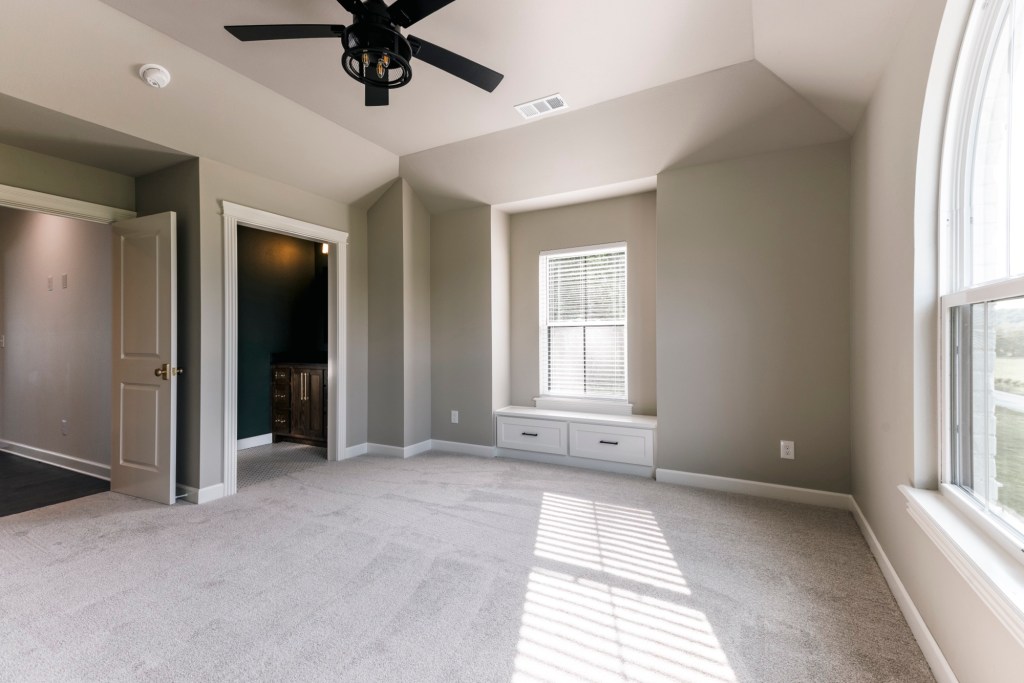
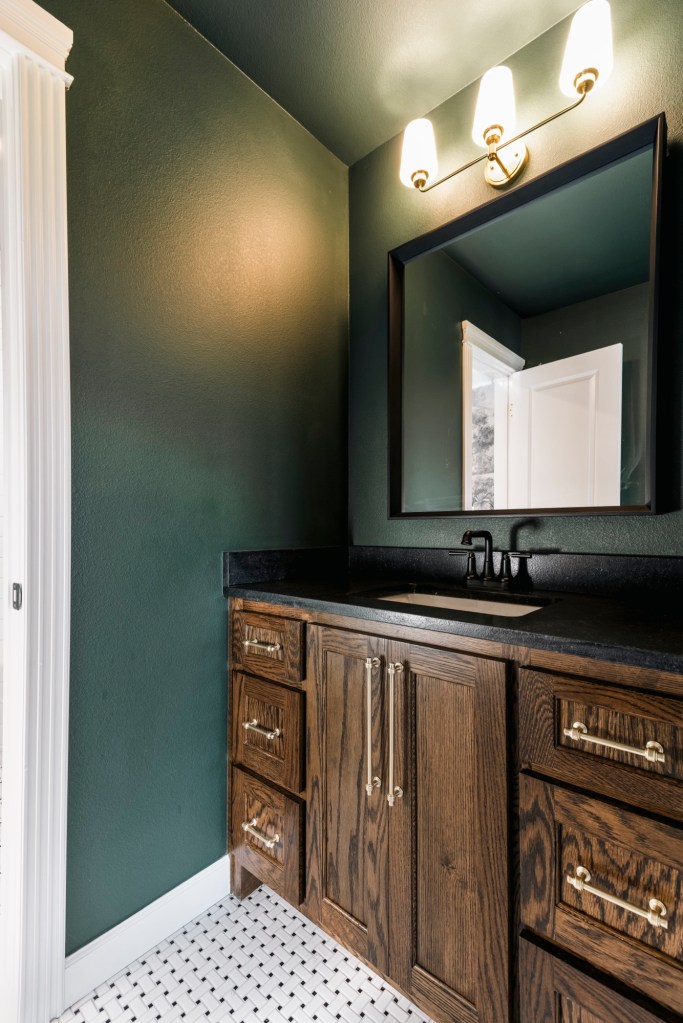
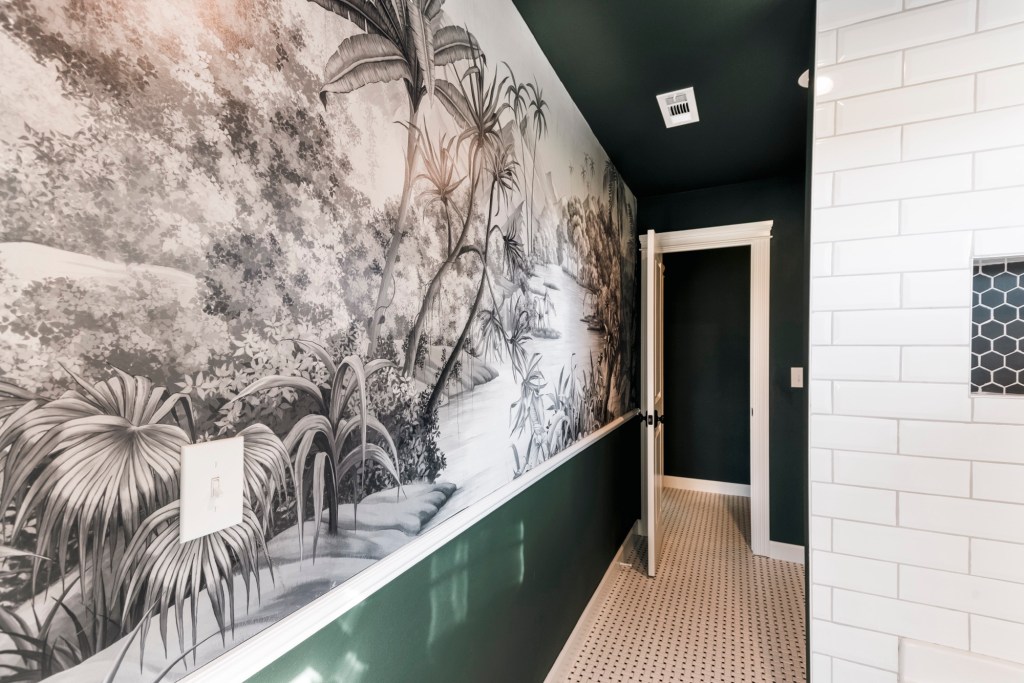
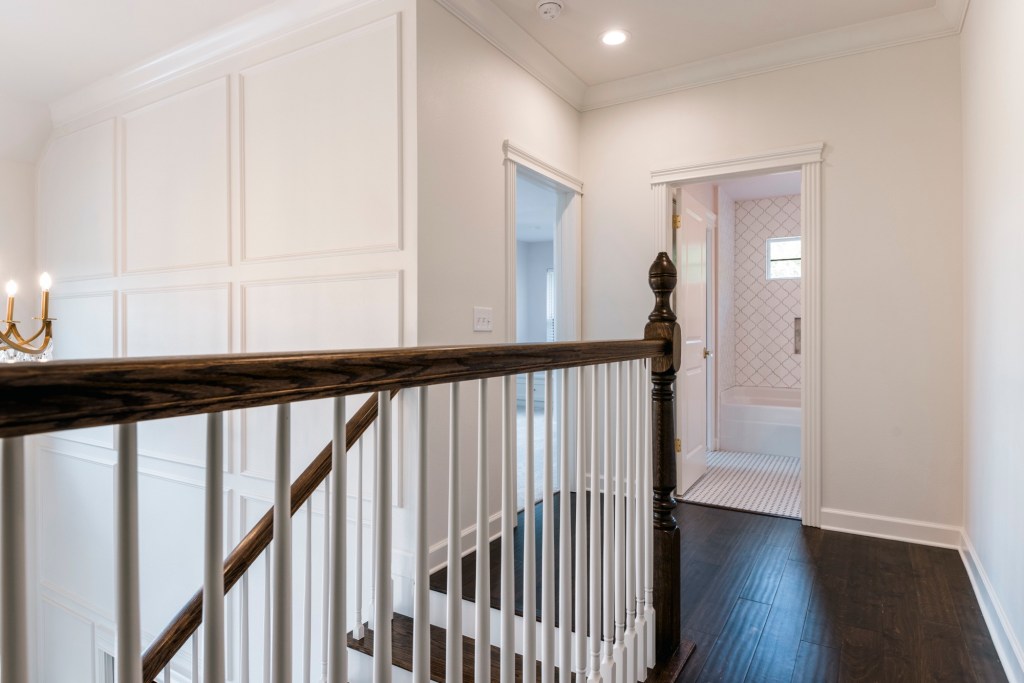
When my dear friend approached me about working with her on the design of her new home, I didn’t hesitate a moment before replying with a resounding, “yes!” We spent months together honing in on my client’s style and talking over details upon details…the newel post on the stairs, just the right engineered wood flooring for 3 kids and maybe a puppy someday, the cream color for the kitchen cabinets, just the right exterior color, and the wallpapers we used. Overall, it was a wonderful experience. I’ll write more about each space as we design the interiors, but for now, I’ll leave you all to feast your eyes on these beautiful photos of the finished home.
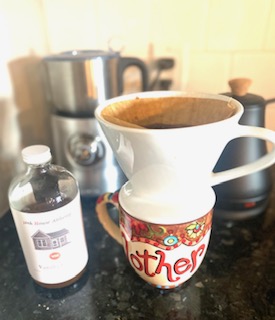
True confession: I only began drinking coffee regularly 18 months ago. I’m honestly not sure how I lived so long without it, but here’s the story. My Grandpa passed away in August of 2022. He was very dear to me and he was a complete and total coffee lover. He had lots of little fainting spells in the year or two before he passed, and whenever a nurse or doctor would talk to him about how he felt after he’d fainted, they’d ask him if he’d had anything to drink that day. He’d say, “I’ve had my coffee.” And every single time, they’d remind him that he needed to drink actual water. Truth be told, I rarely saw the man drink water unless he was outside working in the yard. He drank coffee all day long and could go straight to sleep after a cup of fully caffeinated coffee. He was obviously a legend. After he entered into Glory, there was a wealth of coffee paraphernalia to part with and my Nana was going to put it all in a garage sale. I bought every single bit of it and I have zero regrets. Once I made my way back home with a new coffee pot and my very own coffee grinder, I bought some coffee beans so that I could make my own half-caff blend. I started making coffee here and there and it soon became one of my favorite morning rituals.
I’m an avid coffee drinker and pour over coffee is my favorite way to drink a cup every morning. This is similar to my porcelain pour over. My sister got me a Bodum tea kettle for Christmas and I use it daily. I’d been wanting a milk frother for quite a while and my sweet kiddos got me this one for my birthday. If I’m in a hurry, this handheld frother is so quick and easy. I use this frother daily to combine my collagen and electrolytes. I grind my own beans and I use this grinder that was my Grandpa’s. If I’m making an entire pot of coffee, I LOVE my Bunn, which was my Grandpa’s preferred coffee pot. It uses a method similar to pour over and it’s so delish. Plus, the carafe keeps coffee warm for hours.
For the actual coffee, I have found that the most robust tasting decaf is the Kona Blend from Fresh Market. For the caffeinated coffee, I love any coffee from Heroes, Just Bee Coffee Bar or the French Vanilla from Fresh Market. I LOVE to add a little syrup and my favorite syrups are from Pink House Alchemy. These syrups are heavenly and make each cup feel so special and just a little fancy. For the milk, I really prefer Fairlife whole milk. It froths better than any other milk I’ve tried. My family and I drink raw milk that we purchase locally, but we go through it so quickly that I prefer to buy Fairlife just for my coffee and let my family have the raw milk. As far as the method I use for making the coffee in a pour over, I use the method from this article.
There is something so peaceful and warm about this morning ritual. I usually drink my coffee after I’ve been awake for about an hour and I often sit down to journal while drinking my coffee. When is your favorite time to drink coffee? I would love to how and why you love coffee, too!
Hi friends! I seem to find myself making new things or learning new things. I’m going to share what I’m making or learning here on the blog on Thursdays. Let’s jump in! This week, I’m making sourdough bread, after a long hiatus! I made my own starter during the pandemic, aptly named Pandoughmic, and he died a sad death when a sweet little house guest accidentally left our deep freezer open. A dear friend who makes the best sourdough shared some starter with me and we are rolling! After feeding the new starter for a week or so, I’ll be making my first loaf tonight. I can’t wait! I have this cookbook and I am a huge fan! It really breaks down the process of how to make sourdough in layman’s terms.
If you guys don’t have Joanna Gaines newest cookbook, please treat yourself!!! It’s beautiful, she uses tons of real food ingredients and the recipes are divine. My favorite so far has been the spinach manicotti with this sauce (that will legit change your life) poured over the top.
Earlier this week, I was chatting with my girls about our weekly menu, which includes sloppy joe sandwiches. The girls interrupted me to ask if I was using my recipe, or my friend Amanda’s recipe. Apparently, the recipe Amanda makes is superior. I mentioned this to Amanda and she volunteered to make them for our family! We had them for dinner and they were delicious. I’m just emerging from two weeks of sickness, so this was a welcome blessing.
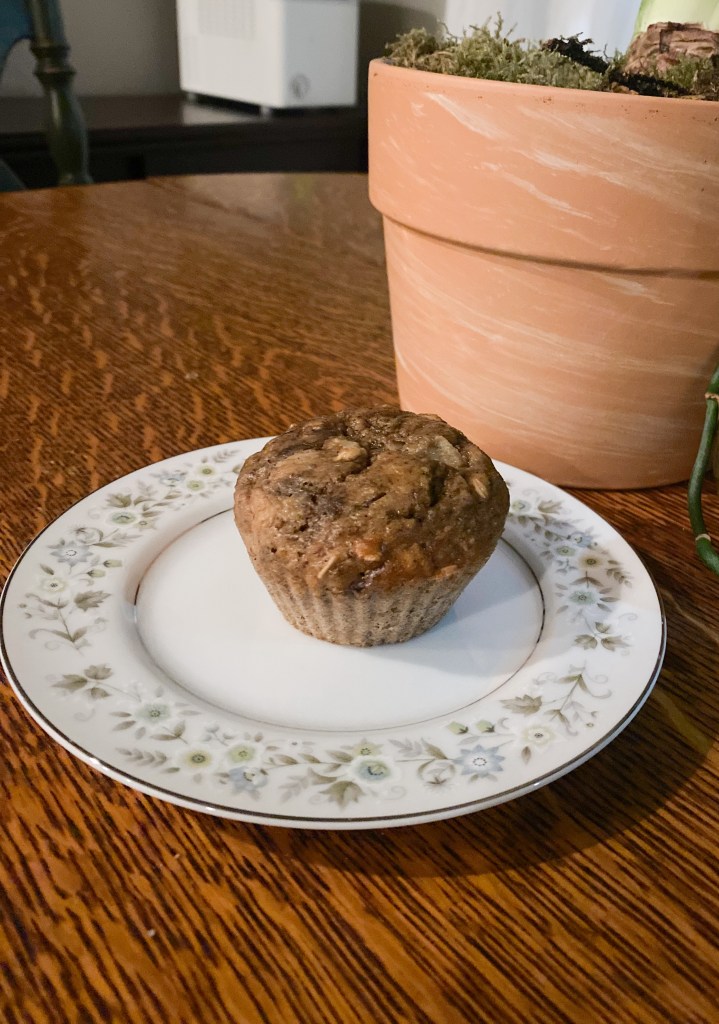
Another thing I’ve made this week are morning glory muffins. If you’ve not made these, it’s time. It’s just time. Plus, these are SO easy to make gluten free if you’ve got a gluten sensitive friend or family member who needs these muffins. I’ll leave you with the recipe. Let me know if any of the above is helpful to you! I find that much of what is helpful to me comes as a result of knowledge my friends have shared with me. 🙂
Morning Glory Muffins
1 cup whole wheat flour
½ cup all purpose flour
1 cup rolled oats
¾ cup brown sugar
3 tablespoons ground flaxseed
2 teaspoons baking soda
¼ teaspoon salt
½ teaspoon cinnamon
¼ teaspoon ginger
1 cup yogurt
1 cup mashed bananas
1 large egg, beaten
1 cup raisins or craisins
½ cup pineapple tidbits
½ cup chopped walnuts
Combine dry ingredients, stir well. Then add bananas, yogurt and egg. Then add nuts and fruit. Bake at 350 for 20 minutes. Makes 18 muffins. Doubles easily, lots of additions work with this!
One of my goals as a Mom has always been to make things magical for my family. I started hanging witch hats and candles from my ceiling during the Fall several years ago and my family loves these whimsical, slightly spooky decorations. You can buy the hats, candles, batteries, hooks for hanging, and clear fishing line I used simply by adding to your cart. Everything I used can be purchased on Amazon, and it all can be hung without damaging your ceilings or walls. One more thing to note is that the candles also come with suctions cups and hooks to adhere them to your windows to use during the Christmas season. Now go make some magic in your home and enjoy!
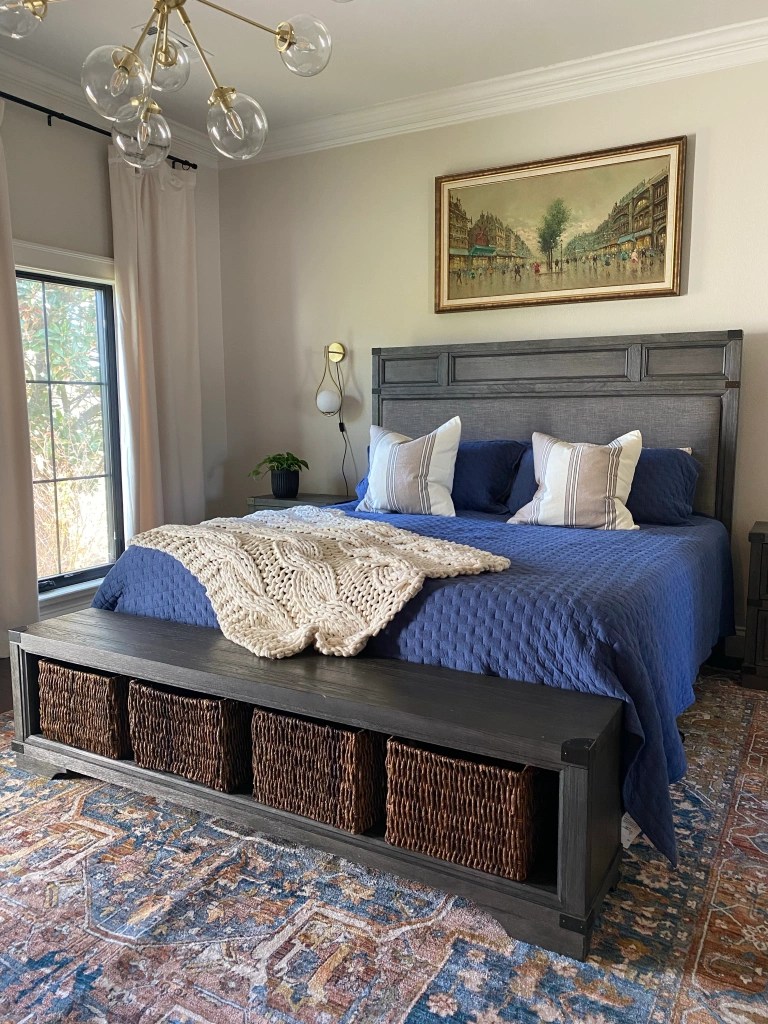
As a small business owner, referral and repeat business are the biggest compliment to me. So, when a friend of my dear client Amy James (see her beautiful kitchen remodel here) reached out to me to help her with her master bedroom, I was honored. We jumped in with both feet and got cracking on this lovely space.
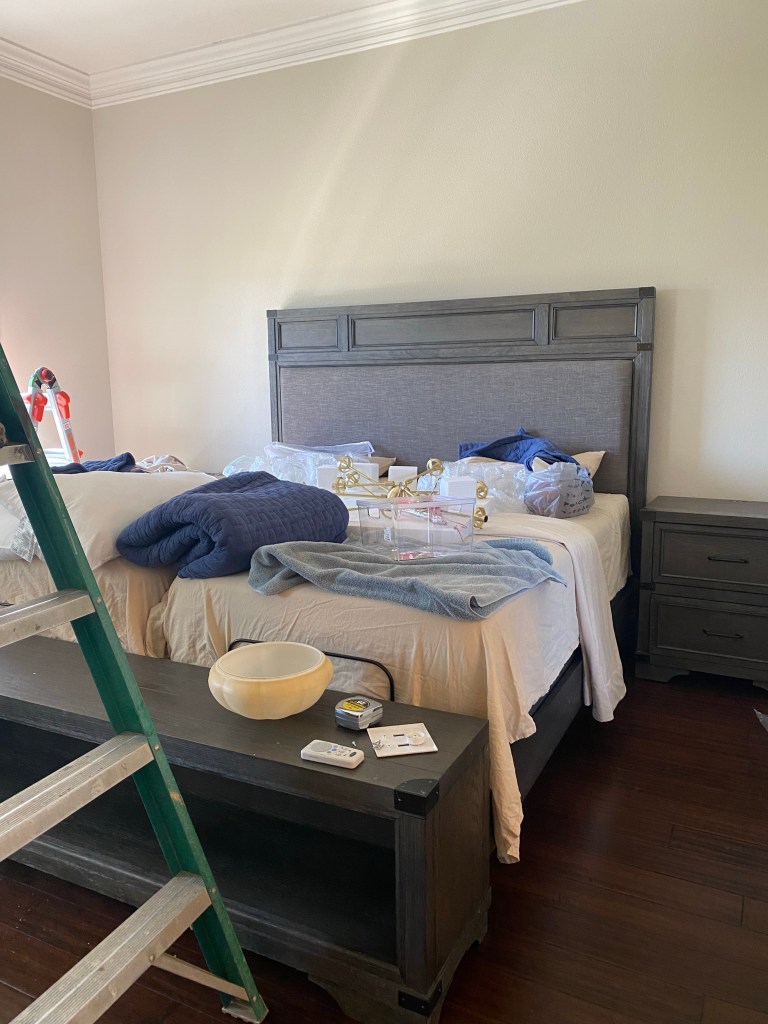
Salinas Primary Bedroom Before
The Salinas fam lives on a mini-farm with their five kiddos and I had a ball getting to know them. In fact, the youngest Salinas child now regularly sends me video chats. Have I said lately that I love my clients? Because I do! Back to the design work needed…Angela and David Salinas have a nice sized primary bedroom with new furniture and dreamy new windows. They just needed my help in discovering their own personal style for this room. I met with Angela and David and asked them questions about the function of this space, their daily lives within their home and what design styles they prefer. I ended up designing 4 different vision boards and we moved forward with the design.
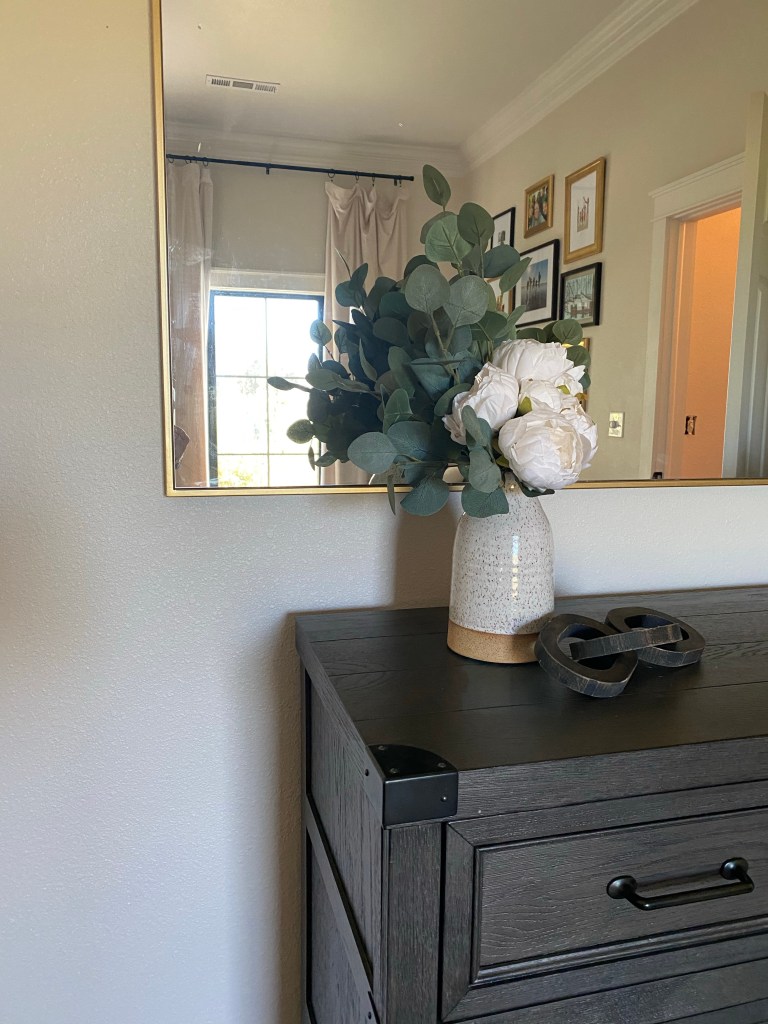
Angela and I collaborated on this project as we gathered each element of the design. Angela is a talented photographer. She combed through years worth of photographs to find her favorites for the wall arrangement that we hung in the room.
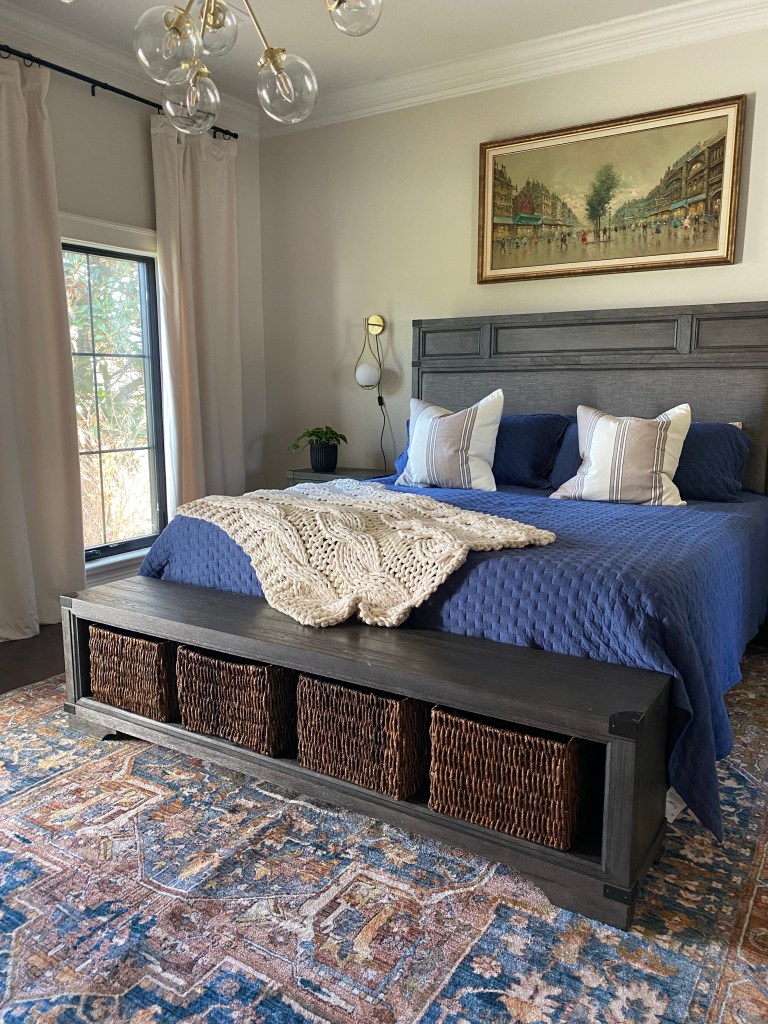
Angela and David also really enjoy original, unique art. The painting above the bed is an original piece that Angela found on Facebook marketplace. We carefully transported it to Hobby Lobby and had it framed. This painting is one of my favorite elements of the entire space.
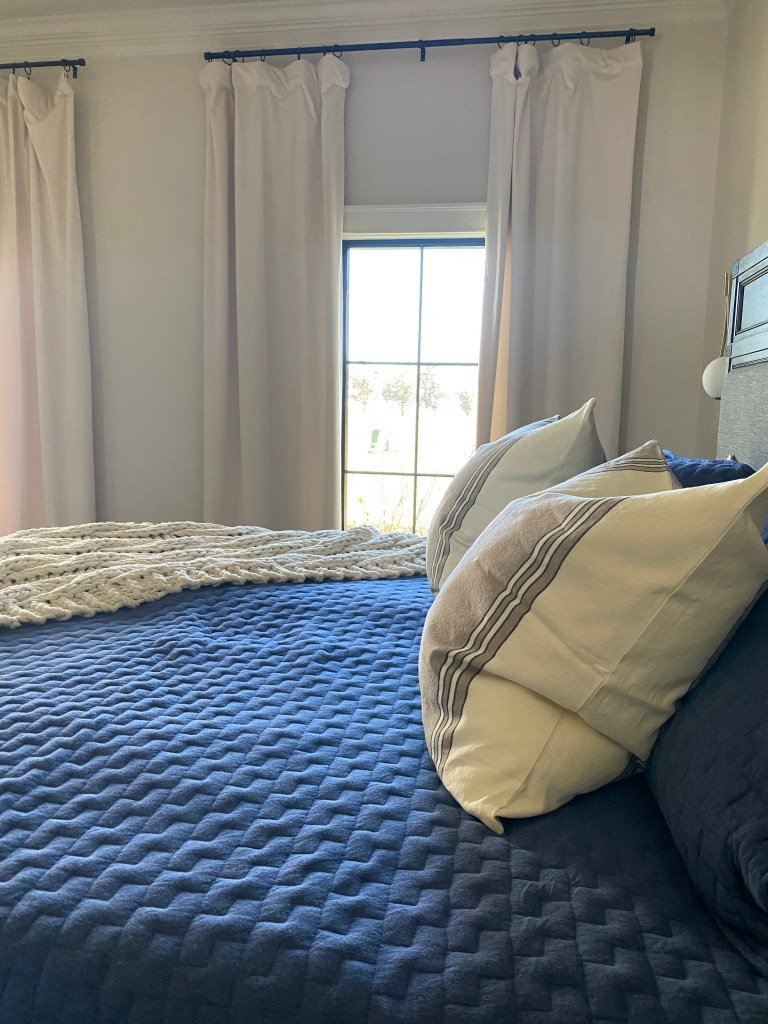
The sources for this room are varied between Wayfair for the couch, Amazon home for the rug and drapes, Company Store for some of the bedding, Pottery Barn for most of the pillows and other things were gathered along the way as she and I both shopped for this space. We both pored over color choices for the room, and Angela ended up selecting the primary paint color and it is one of my favorites. One of my goals as a designer is to help each client define there own personal style, and I feel like Angela and I really honed in on what she wanted for this space.
I had a ball installing this master bedroom with the help of my precious installer and an amazing electrician. Angela and David were a lot of fun to work with and I truly love how well this space came together.