When we bought this house, I knew the bonus room would be the perfect multi-purpose space. There is a bathroom off the bonus room, as well as beautiful windows, plenty of space to lounge around and a door for privacy. With four kids at home and my hubby working from home, I knew that having a designated guest room probably wasn’t an option. This space really lacks nothing and I can’t wait to show it to you!
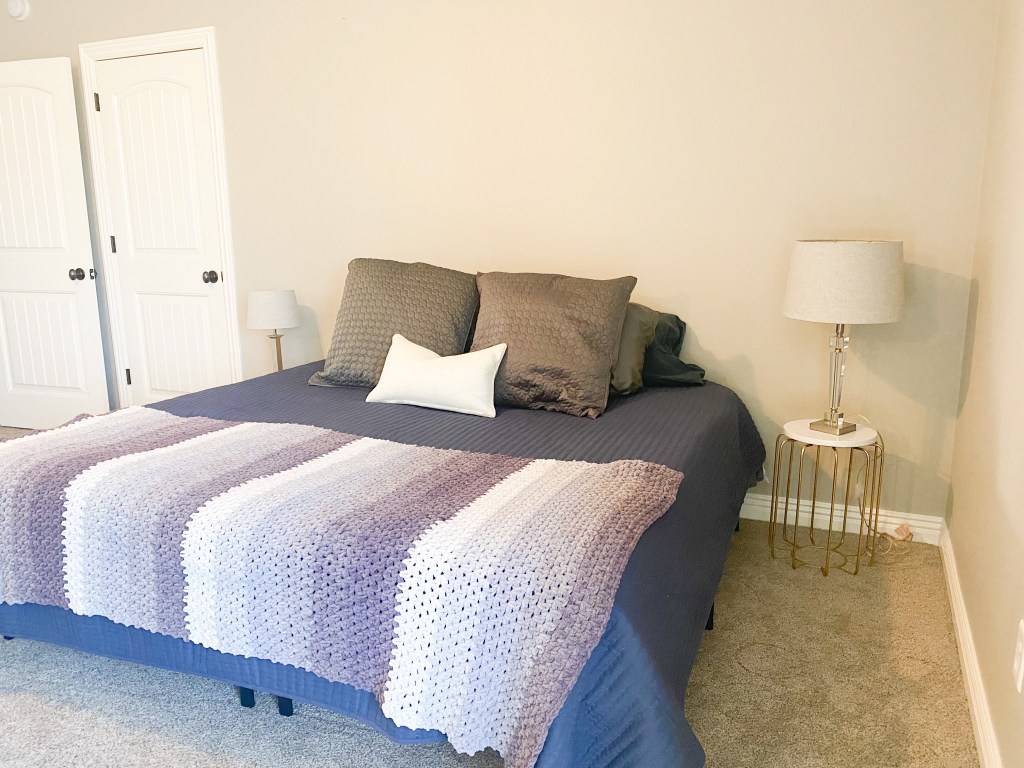
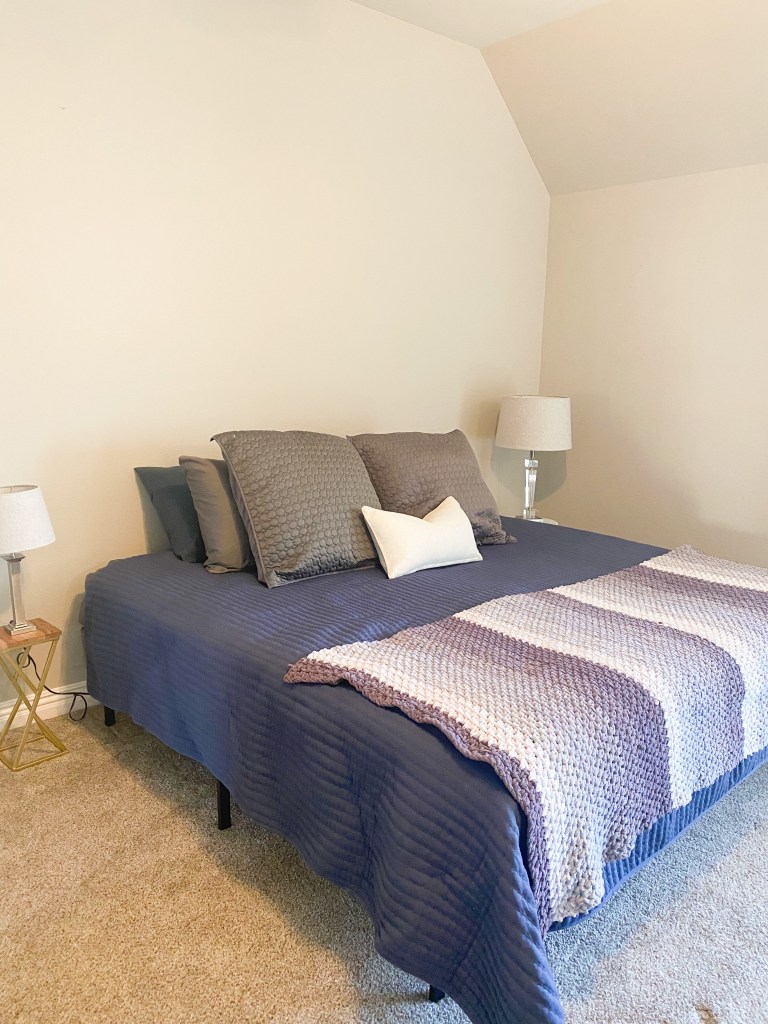
We have company coming in from out of town this weekend to help me with some organizational projects post move. Ironically, the room needing the most help is the bonus room which doubles as our guest space. I put all the random lamps and pictures to the side and made up the guest bed. I wanted a guest bed that felt sturdy and like a real bed, but had the convenience of an air mattress as far as storage goes.
Enter, my space saving solution! I bought two of these bed frames. They collapse and open as easily as a card table, and they’re very solid! We have two extra twin mattresses that we use on the bed. One of these is stored in the attic (located just off the guest room) and my husband uses the other in his office. The bedframe in his office is an antique and requires a box spring and a regular mattress. We got rid of the box spring years ago, so we use several slats and two regular mattresses and it works great!
I bought this thick, gel foam mattress topper and this mattress pad to add cushion and to unite the two mattresses. I read reviews and found these sheets on Amazon and they are very soft! I also bought two feather pillows and two regular pillows. The comforter was a TJ Maxx find, but this blanket is very similar. The euro-shams are a very old Bed Bath and Beyond find and the blanket at the foot of the bed was crocheted by my sister. The smallest side table is from TJ Maxx and the larger is from Lighting Emporium. Both lamps are old Target finds.
A few must haves for me in a guest room are plenty of pillows, a couple comfortable blankets, soft sheets, and a nightstand with a lamp. I’m excited to provide this cozy space for our guests! If you’re curious about what the rest of this room looks like, here ya go. I told you it needed work!
Big news, y’all! We bought a house! Before I dive into the details of how we managed to find a house during a nationwide house shortage, here’s a brief overview:
A friend of ours mentioned to us that a mutual friend was planning to build a house and sell his current house, which happens to be in one of our fave neighborhoods. We saw the house, made an offer, and closed on it today. The sellers will rent the house from us till late November, which is the projected completion date for their new home. Didja catch all that?
Here’s how it went down, for those of you, like me, who love the details and a good story. We moved to northwest Arkansas about five years ago. When we moved here, our kids were pretty young and we’d been homeschooling them for several years. We transitioned to a university model school once we moved here, which meant that our kids would be in school two to three days a week and homeschooled the remaining days. Our house is twenty-ish minutes from our school, which I didn’t think would be a big deal to me. I was used to homeschooling full time and spending the majority of my days at home. But, the drive ended up being a really, really big deal to me. Within a year of making this drive several times a week, and often three to five times a day, I knew that we needed to move closer to school. When we bought our current house, we’d planned on renovating it to make the floorplan to work better for our family. Justin and I eventually decided to only modify the kitchen, since we knew our days in this house were numbered. After months of praying and talking and trying to make this house and location work, my husband and I decided that we would list our house and start actively looking for a house in Spring of 2020. Right about the time we were ready to get the ball rolling, the lockdowns began. We weren’t comfortable making plans to buy and sell a home during such an uncertain time, so we put our plans on hold indefinitely.
While we were waiting, I was looking at homes on zillow like an obsessed house stalker. I drove through neighborhoods and approached the owners of homes I liked and gave them my contact information. I prayer-walked circles around our current house asking for God’s direction and provision. I made a list of what we wanted in our next home and prayed through it often. I even had a couple dear friends praying specifically through the same list. We thought we’d found a lot to build on, but the increasing building prices put a halt to that in a hurry. We thought we’d found a house that would work, and we even made an offer on it, but it fell through during negotiations. It seemed like we were in a holding pattern for months and months. I would see a house I loved and it would immediately go off the market. I even joked with our realtor that I was a magnet for unavailable houses. I waffled between resting in God’s timing and provision and, in my lowest (and most dramatic) moments, feeling like He’d forgotten about us.
This past April, we were sharing our discouragement about the house situation with our community group when one of our friends mentioned that a mutual friend would eventually have a house to sell. As soon as we got home from community group, I asked Justin to reach out to our mutual friend and ask him about his house. He immediately responded and even sent us a floorplan from when the house was originally built. Once I saw the floorplan, I knew this house was a good option for us. We looked up an old zillow listing and could see from the old pictures that the house had all the spaces we wanted and a really good layout. I was already very familiar with this neighborhood because it’s located close to school and church and it has so many things I was looking for in a neighborhood…a pool, park, walking trails, and close access to the Razorback greenway, just to name a few. Justin and I had a few days to think about the house before we went to see it. Justin came up with the idea of proposing to the sellers that we would buy the house from them now and they could rent it back from us while their new house was being built. We talked this over with our realtor and she agreed that it was a great idea due to the current low interest rates and the fact that our offer would likely be appealing to the sellers. We set up a time to see the house and we loved it. After walking through the house, we sat on the back porch with the owners (the sweetest people ever, btw) and chatted for about an hour. We pitched our idea to them and made a verbal offer. I was a nervous wreck as I was the one doing most of the talking, and Justin and I hadn’t exactly agreed to make an offer that day, which is just a little tiny detail. Oops? I felt like the time was right, so I went for it! Later on that day, Justin and I talked and he assured me that I was not in trouble for making an offer. I was relieved! I’m still laughing over this. After a few negotiations with the sellers, we set a closing date and the rest is history.
Our current plan is to list our house later this Summer or early Fall and move into our new house by the end of November. If you know someone who is wanting to move to northwest Arkansas, send them my way and I’ll connect them with our realtor. In the meantime, we’ll spend the summer swimming at our neighborhood pool in our new ‘hood and making design boards for our new space like the true house stalker that I am. I can’t wait to share our new place with all of you once we move in. Out of respect for the sellers, who have been the kindest, most accommodating people, we won’t be showing any interior pictures for now.
If you’re looking for a house in this crazy market and feeling discouraged, I hope our story gives you a glimmer of hope. We prayed and prayed and prayed for this house over the course of about 3 years. If you’re praying for a house too, reach out to me and I’ll be happy to pray for you, too. God worked out every single detail of this process and we are deeply grateful for His provision and timing.
We finished our kitchen renovation a few weeks ago and I’m finally ready to share an update and pictures. If you’d like to see the process, here’s a link to part one of our kitchen renovation and part two of our kitchen renovation. To finish up this stage of our renovation, we needed to:
Build and install open shelves to replace the bank of upper cabinets that were removed
Build and install shelves to replace an unused desk area directly behind the sink
Paint the ceiling…this little job was made necessary by an overzealous bottle of kombucha that exploded all over my kitchen.
Paint the wall behind the open shelves
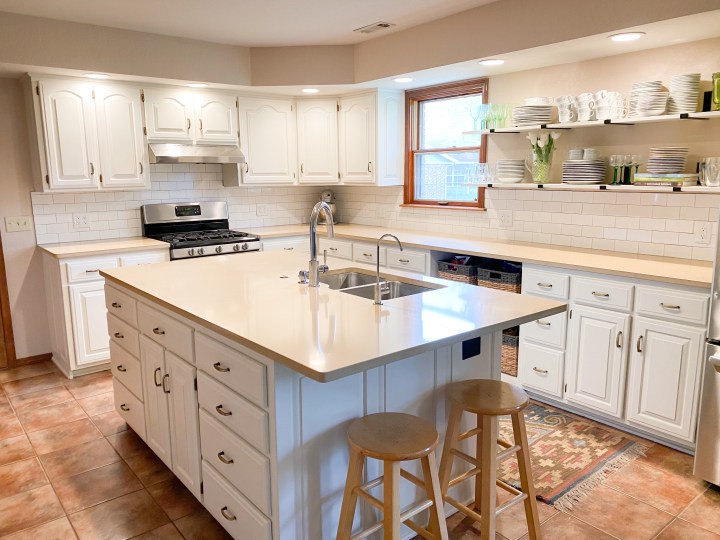
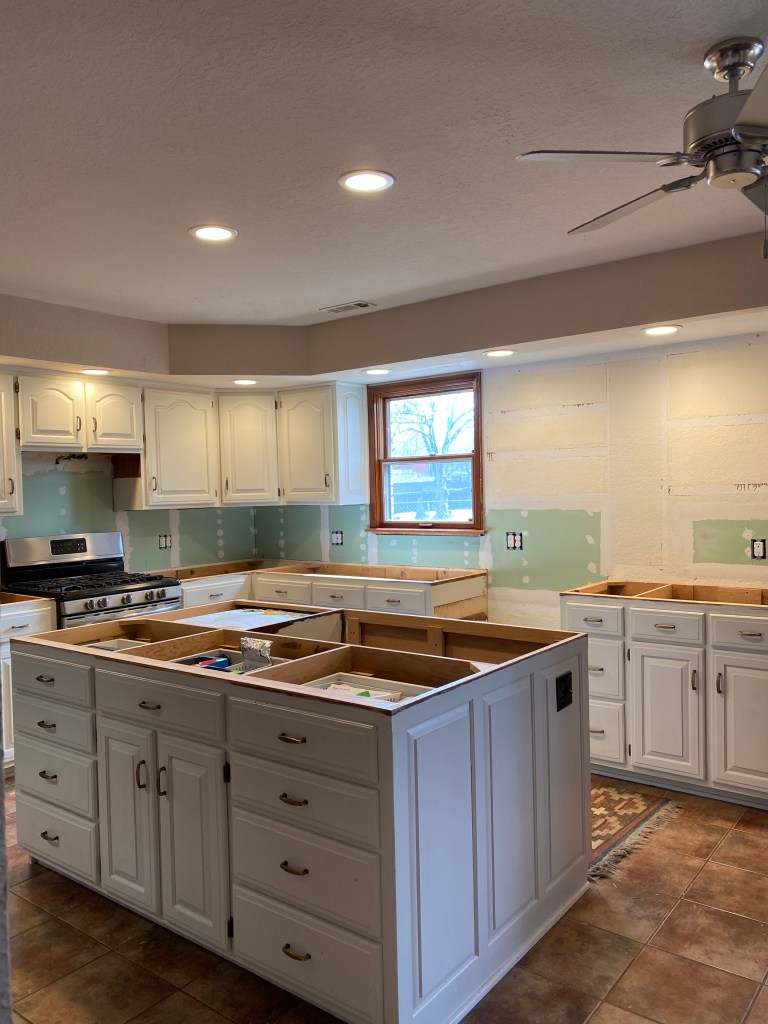
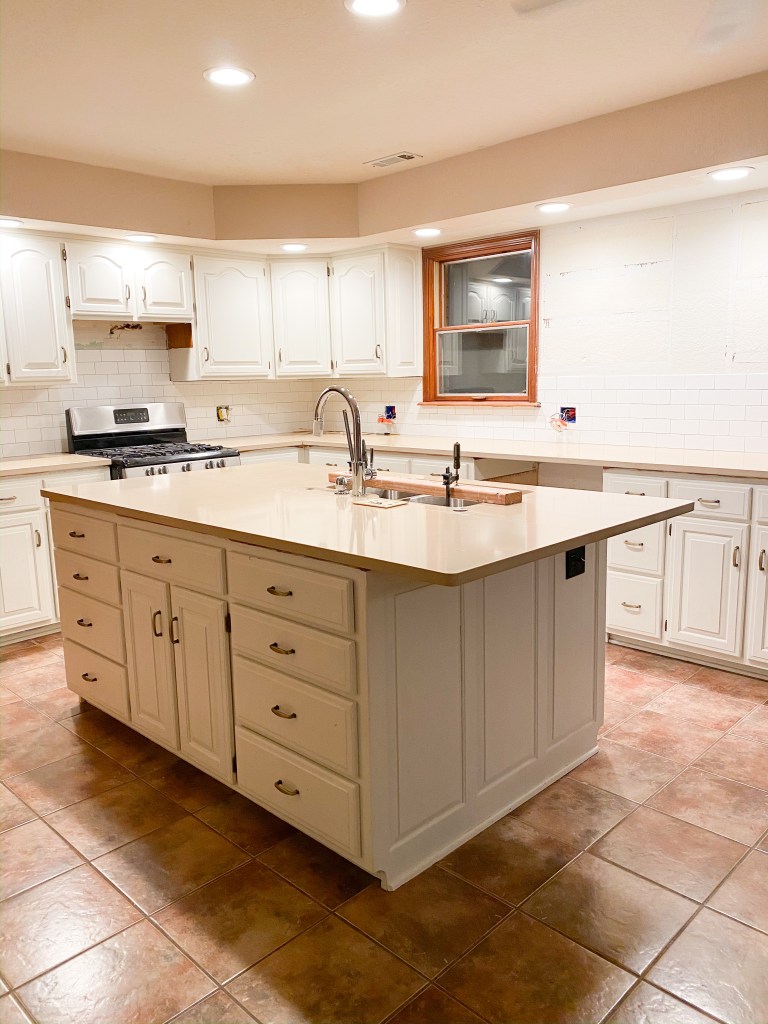
I’m happy to report that we got every bit of this done and we are loving the result! Here’s the before:
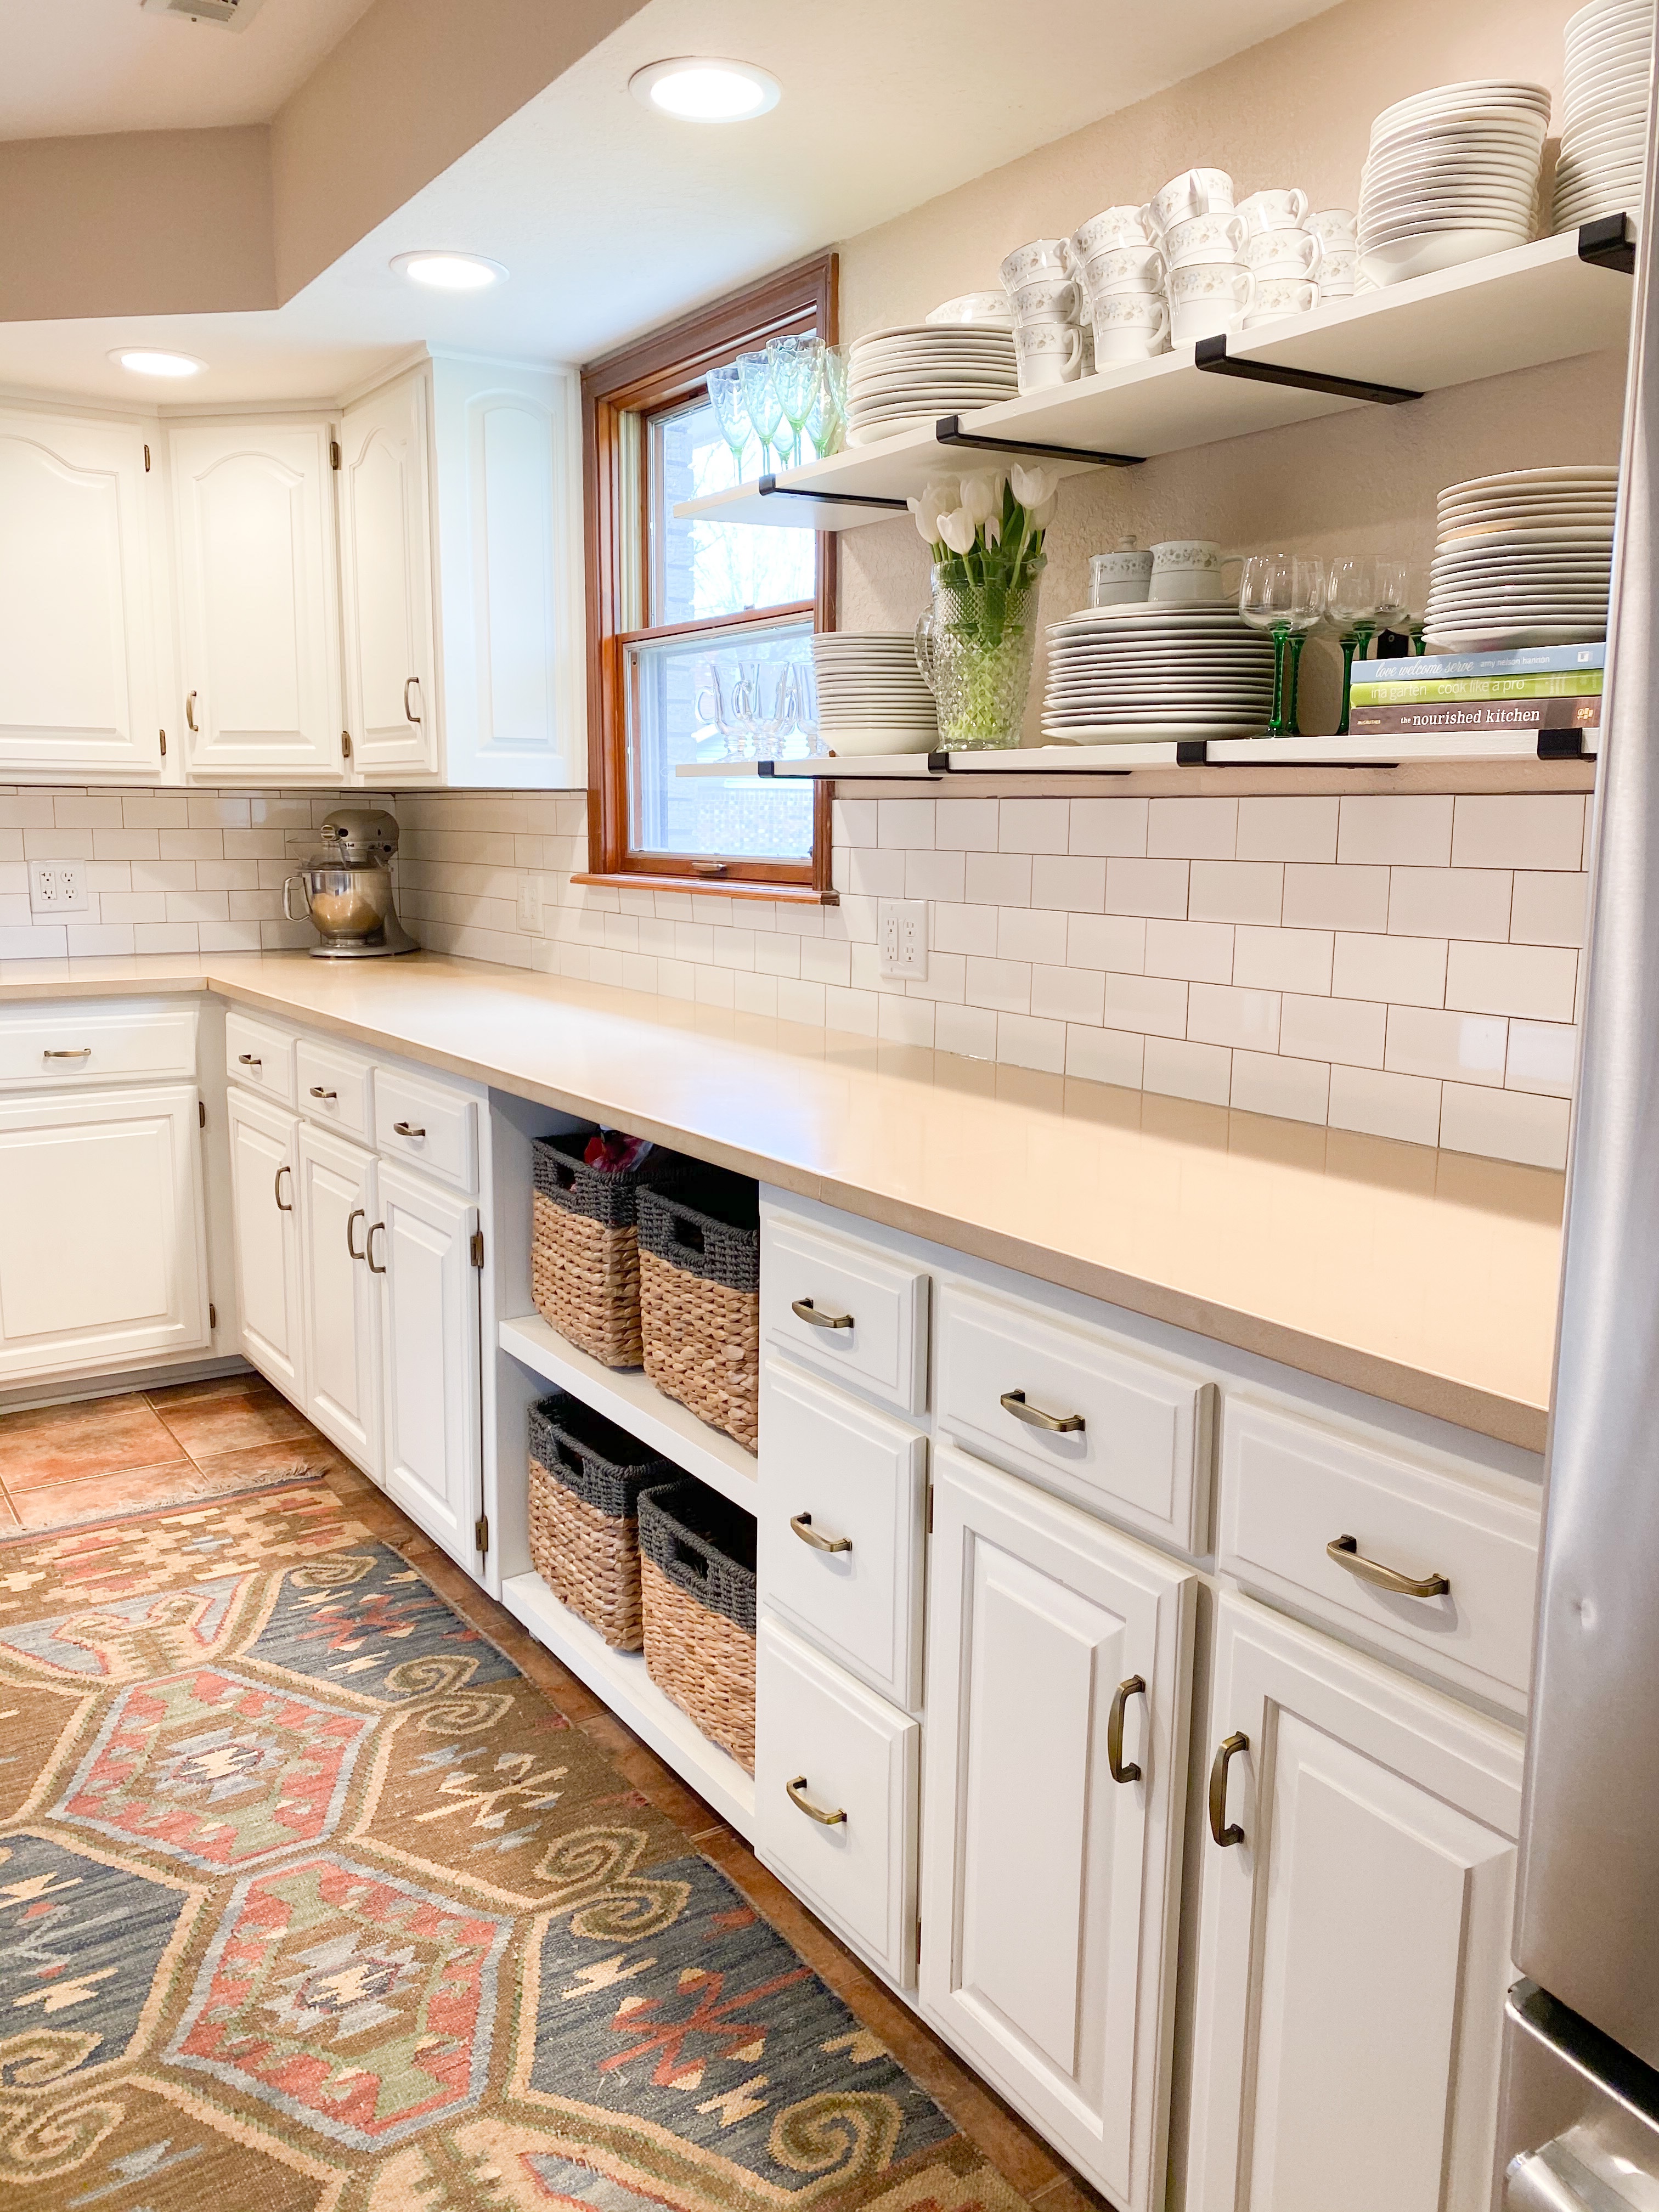
And some after shots:
Overall, we’ve been so pleased with how our renovation turned out. I’m enjoying our quartz counters from Traders Market. They were very reasonably priced and are holding up well. The open shelves make me smile on the daily because I love seeing all my china on display. I also love the lower open shelving. That little space is a power house of storage. One basket holds bread, one basket holds crackers and chips, one basket holds onions and potatoes and one basket holds lunch box snacks. I love the convenience of having each one of those things close by when I’m cooking.
It’s worth noting that my man is a beast who gets it done. He spent hours upon hours working in the kitchen to make my plans come to fruition and I’m so thankful. He even wore a mask before the coronavirus hit! Isn’t he the trend-setter??? It’s been so nice to hear feedback from you all about our kitchen renovation. I can’t thank you enough for following along on our journey.
My husband and I recently set aside a day to give our girls’ room a makeover. Our twins have shared a room their whole lives and I’ve learned a lot over the years about how to keep their room organized. Before I jump into how I spruced up their room, I’ll share a few tips on how to tackle your kid’s room.
First things first: toy cycling….if I want my girls’ room to stay neat, I can’t let them keep all their toys out all the time. What this means for our girls is that they have a few big bins of toys that take turns being stored in the top of their closet, or some lesser used toys are stored in the garage or attic. Each bin holds a different category of toys. For example, they have a bin full of dolls and doll accessories, another bin for stuffed animals and another bin for crafts. At some point, the girls will ask to switch out their toys or I’ll notice that they’ve not played with the toys that are in their room. We’ll get the bins down and swap out their toys. This has saved me so much time over the years and it definitely helps my girls keep their room neater.
Another way I’ve kept their room from getting overwhelming is by periodically going through their rooms and getting rid of things that they aren’t using. Sometimes I involve them in this process, and sometimes I don’t. Of course, I don’t get rid of anything that is particularly special to them if I can help it. If you are familiar with the Marie Kondo method, this is what I used when we organized the girls room recently. We brought everything in their room other than clothing and furniture and organized it in our dining room (see below). This process took hours and I really felt like I deserved some type of medal by the time it was done. My hubs and I started out with the girls helping us, but we eventually sent them to go play in another room so that we could really organize all this random stuff.
The girls also have a shelves in their closet where the bulk of their toys are stored. These bins came from Target over 10 years ago and, while they’ve seen better days, they’re still going strong. Quick tip on how I keep my sanity where a kid’s room is concerned: I don’t spend a ton of money on my kid’s rooms. If I want to really invest in a space in my home, it’s usually a main living area or the master bedroom. My kids play in their rooms a lot, so I find it’s best to keep the spaces fairly utilitarian. In the bins below my girls have stored makeup, crafts, hair bows, shopkins and who even knows what else? Note the bookshelf in the right of this picture. I intentionally left a good part of the shelf empty. I know this space will eventually be filled with something, be it library books or art projects. Keeping space open in our kiddo’s rooms gives them space to breathe and gives us the freedom to not feel like the room is packed to the gills.
Lastly, I highly recommend being very choosy about kid’s clothes. A child’s room can be overrun by clothes in a hurry. My kiddos each have a smallish chest of drawers and I try to keep their clothing limited to what will fit in their chests and what will hang loosely in their closets.
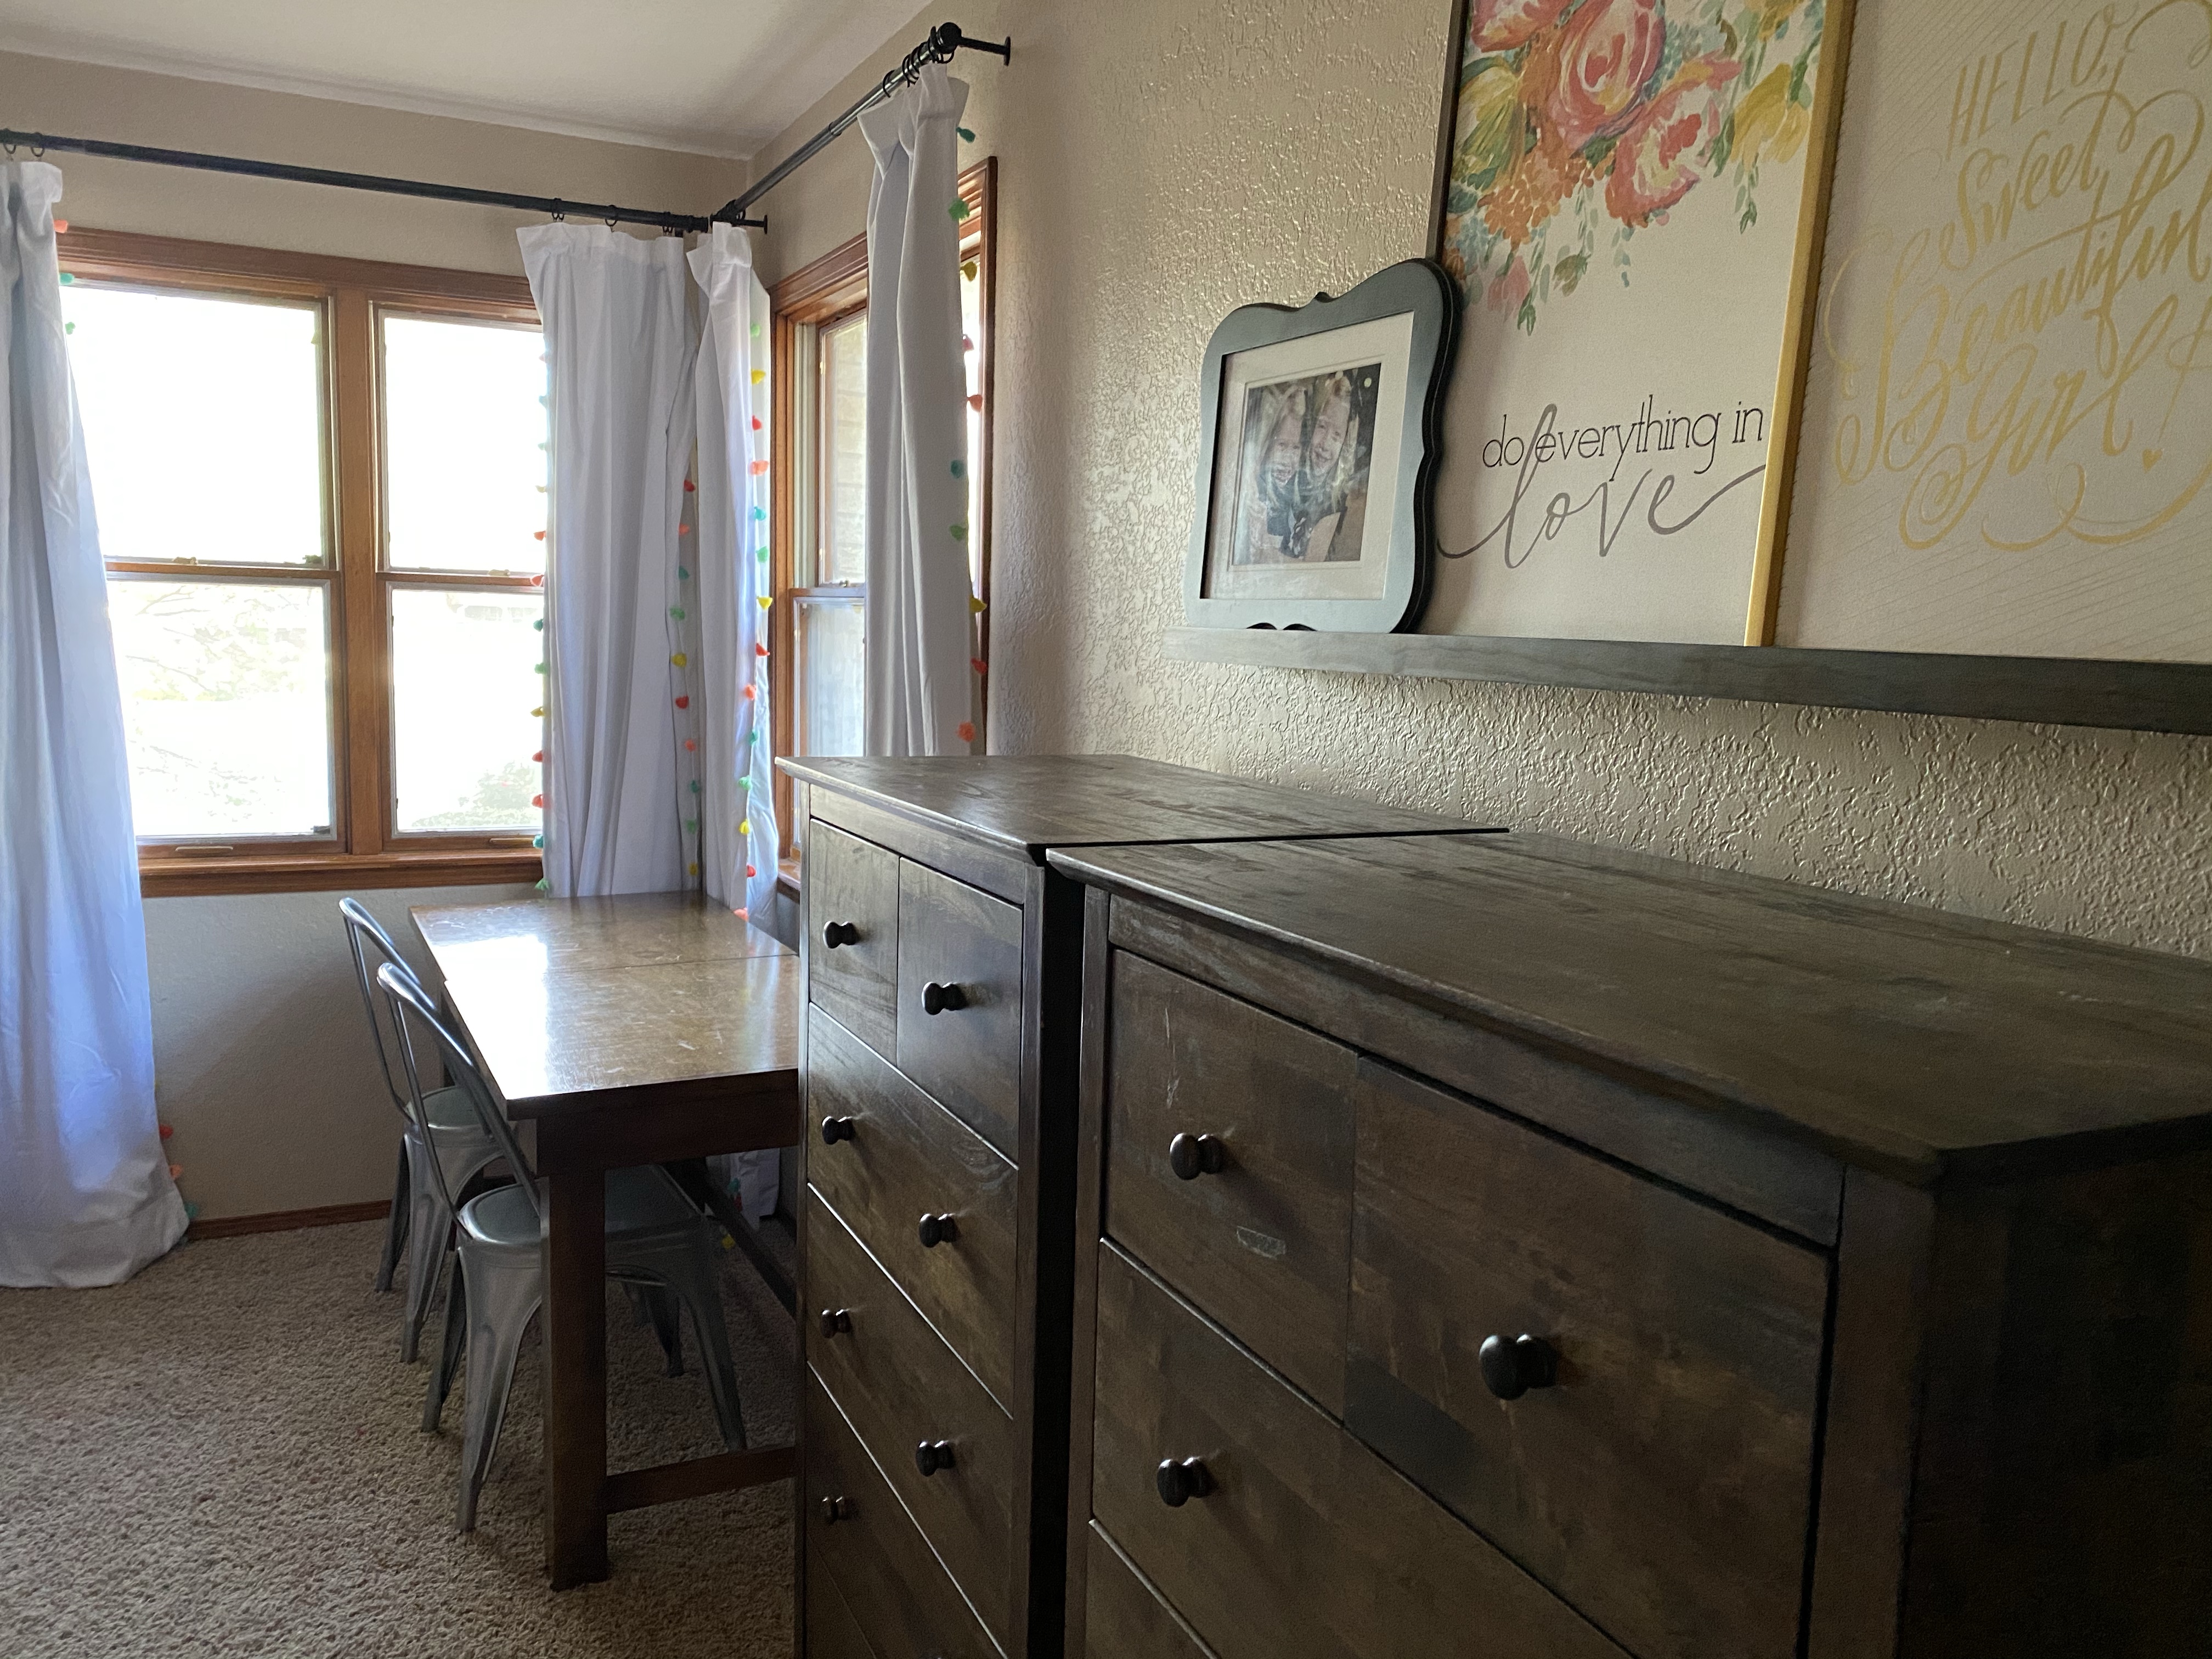
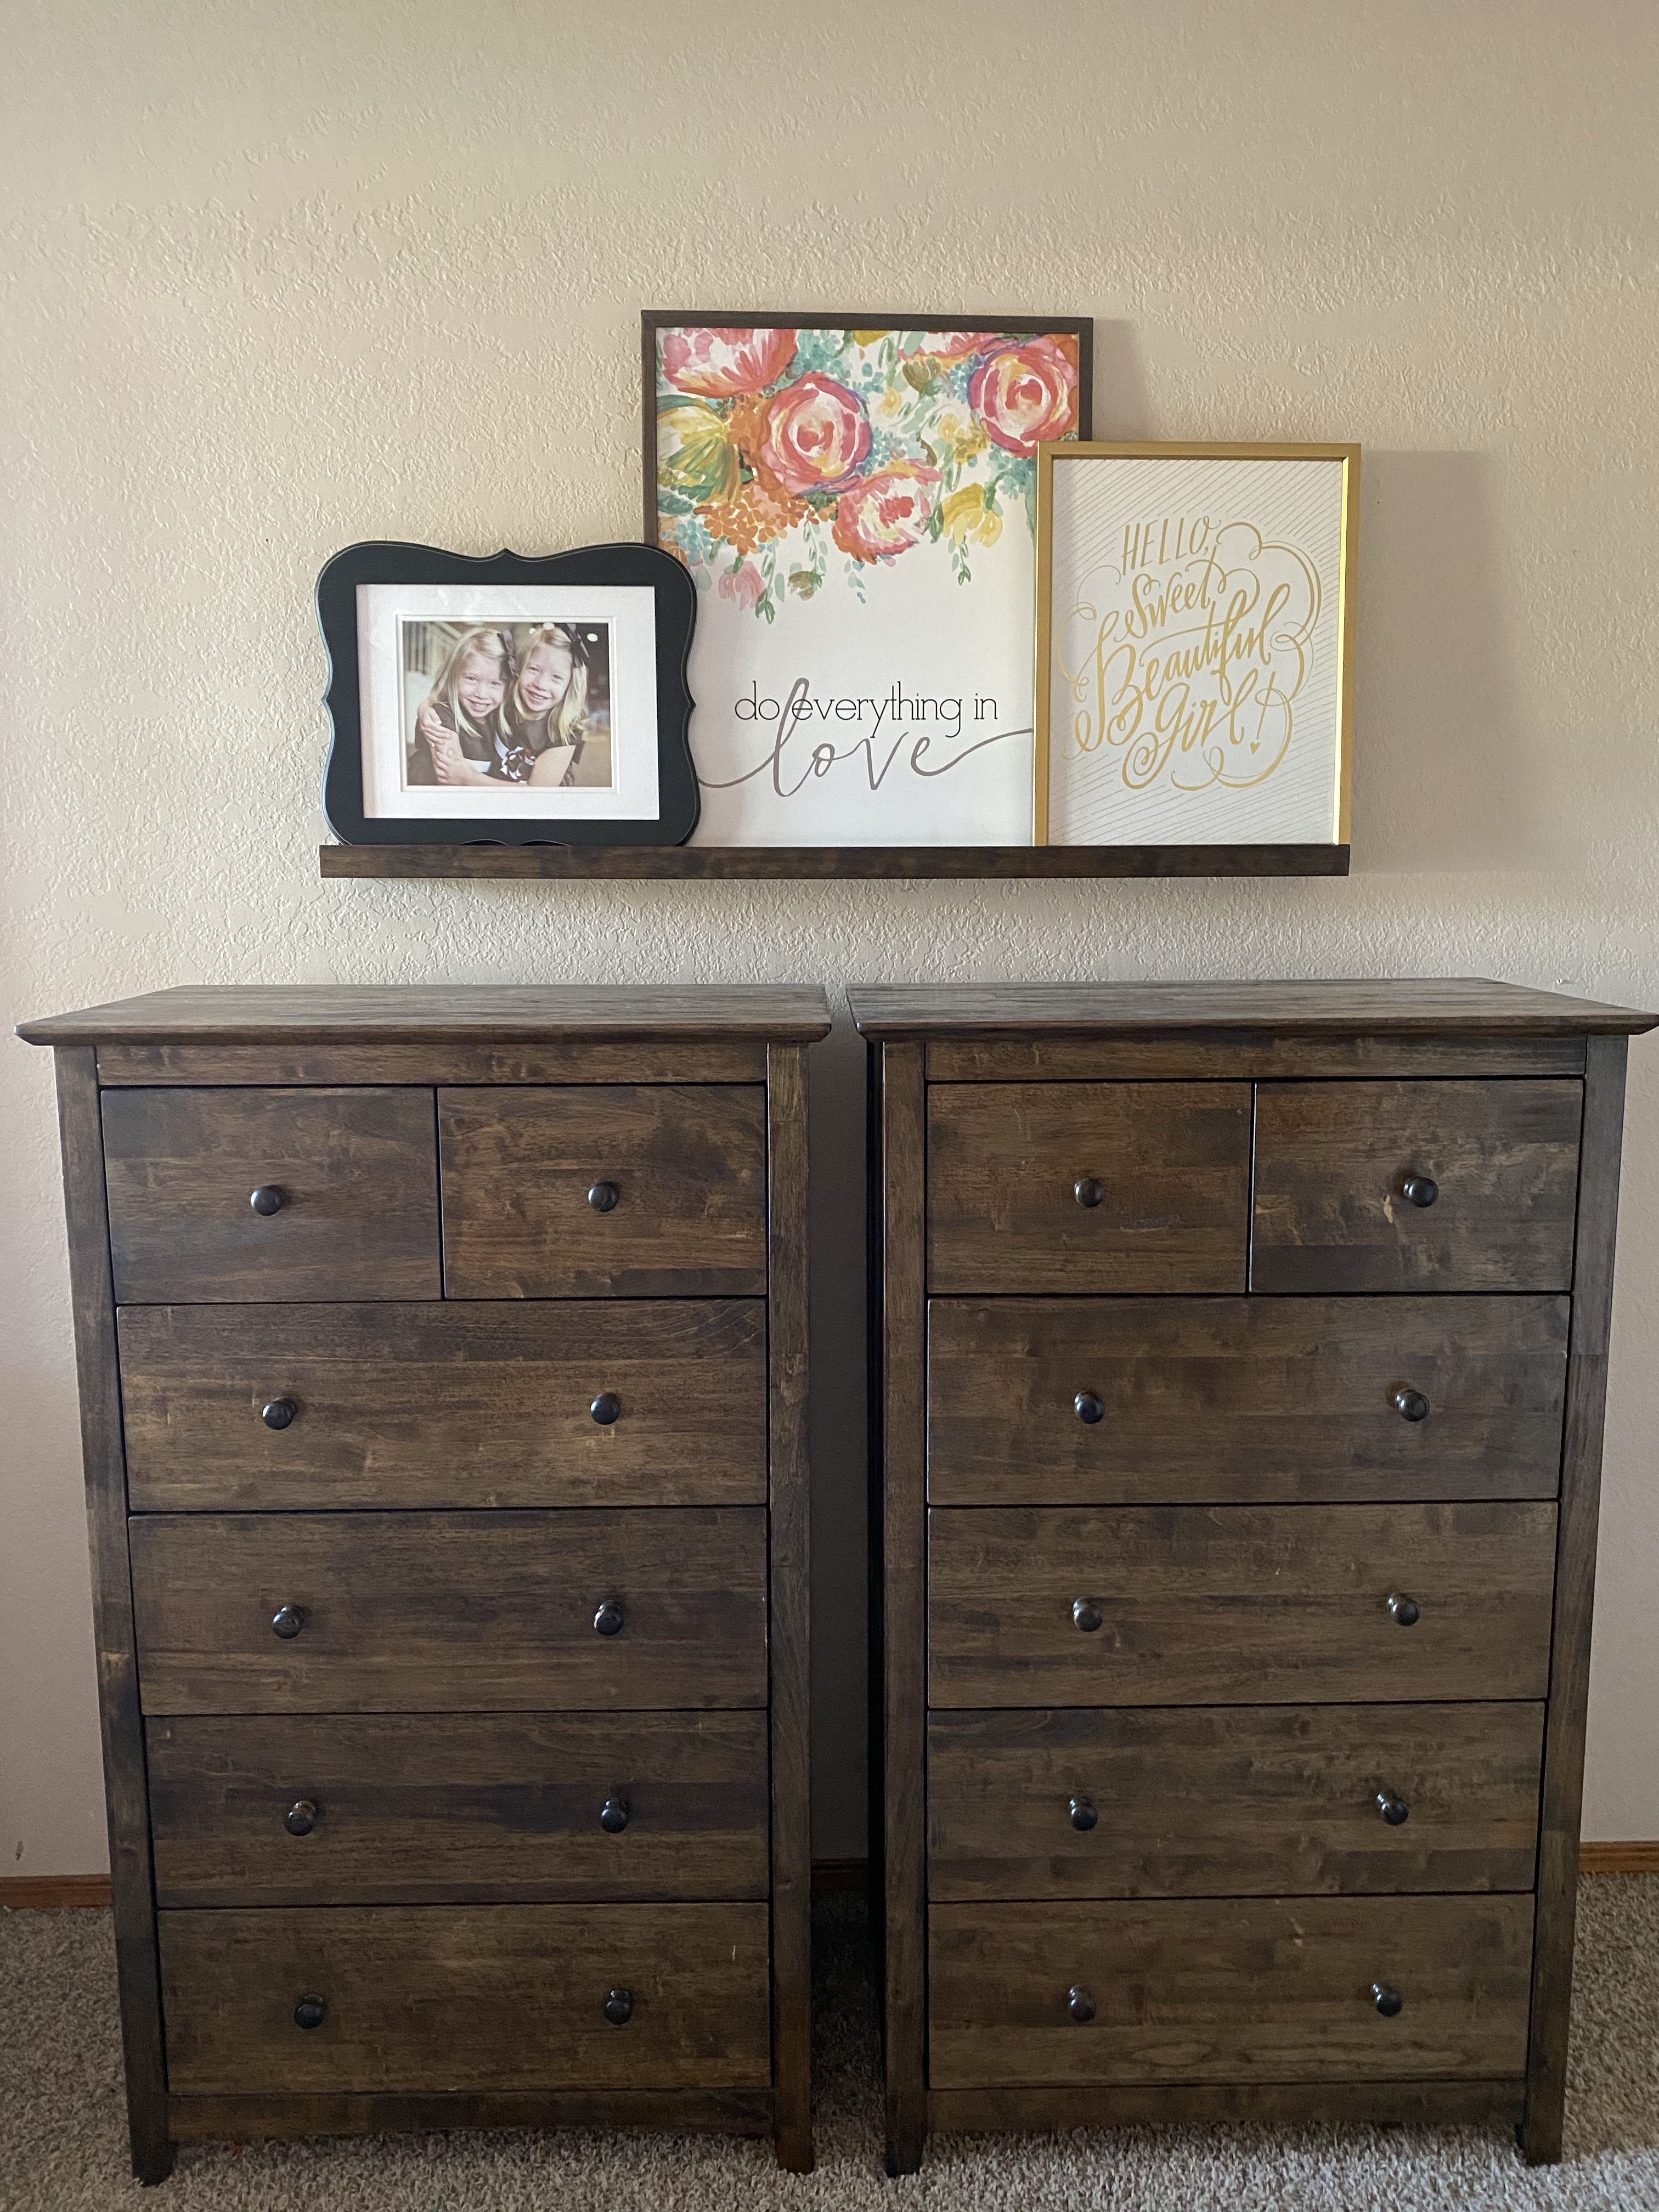
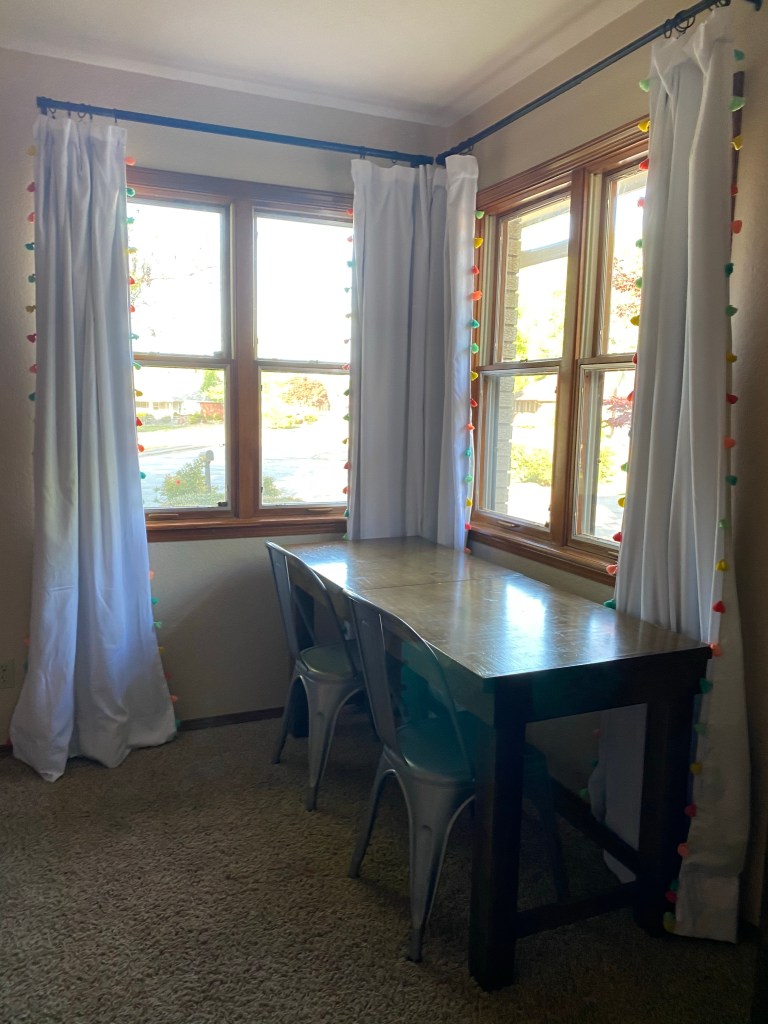
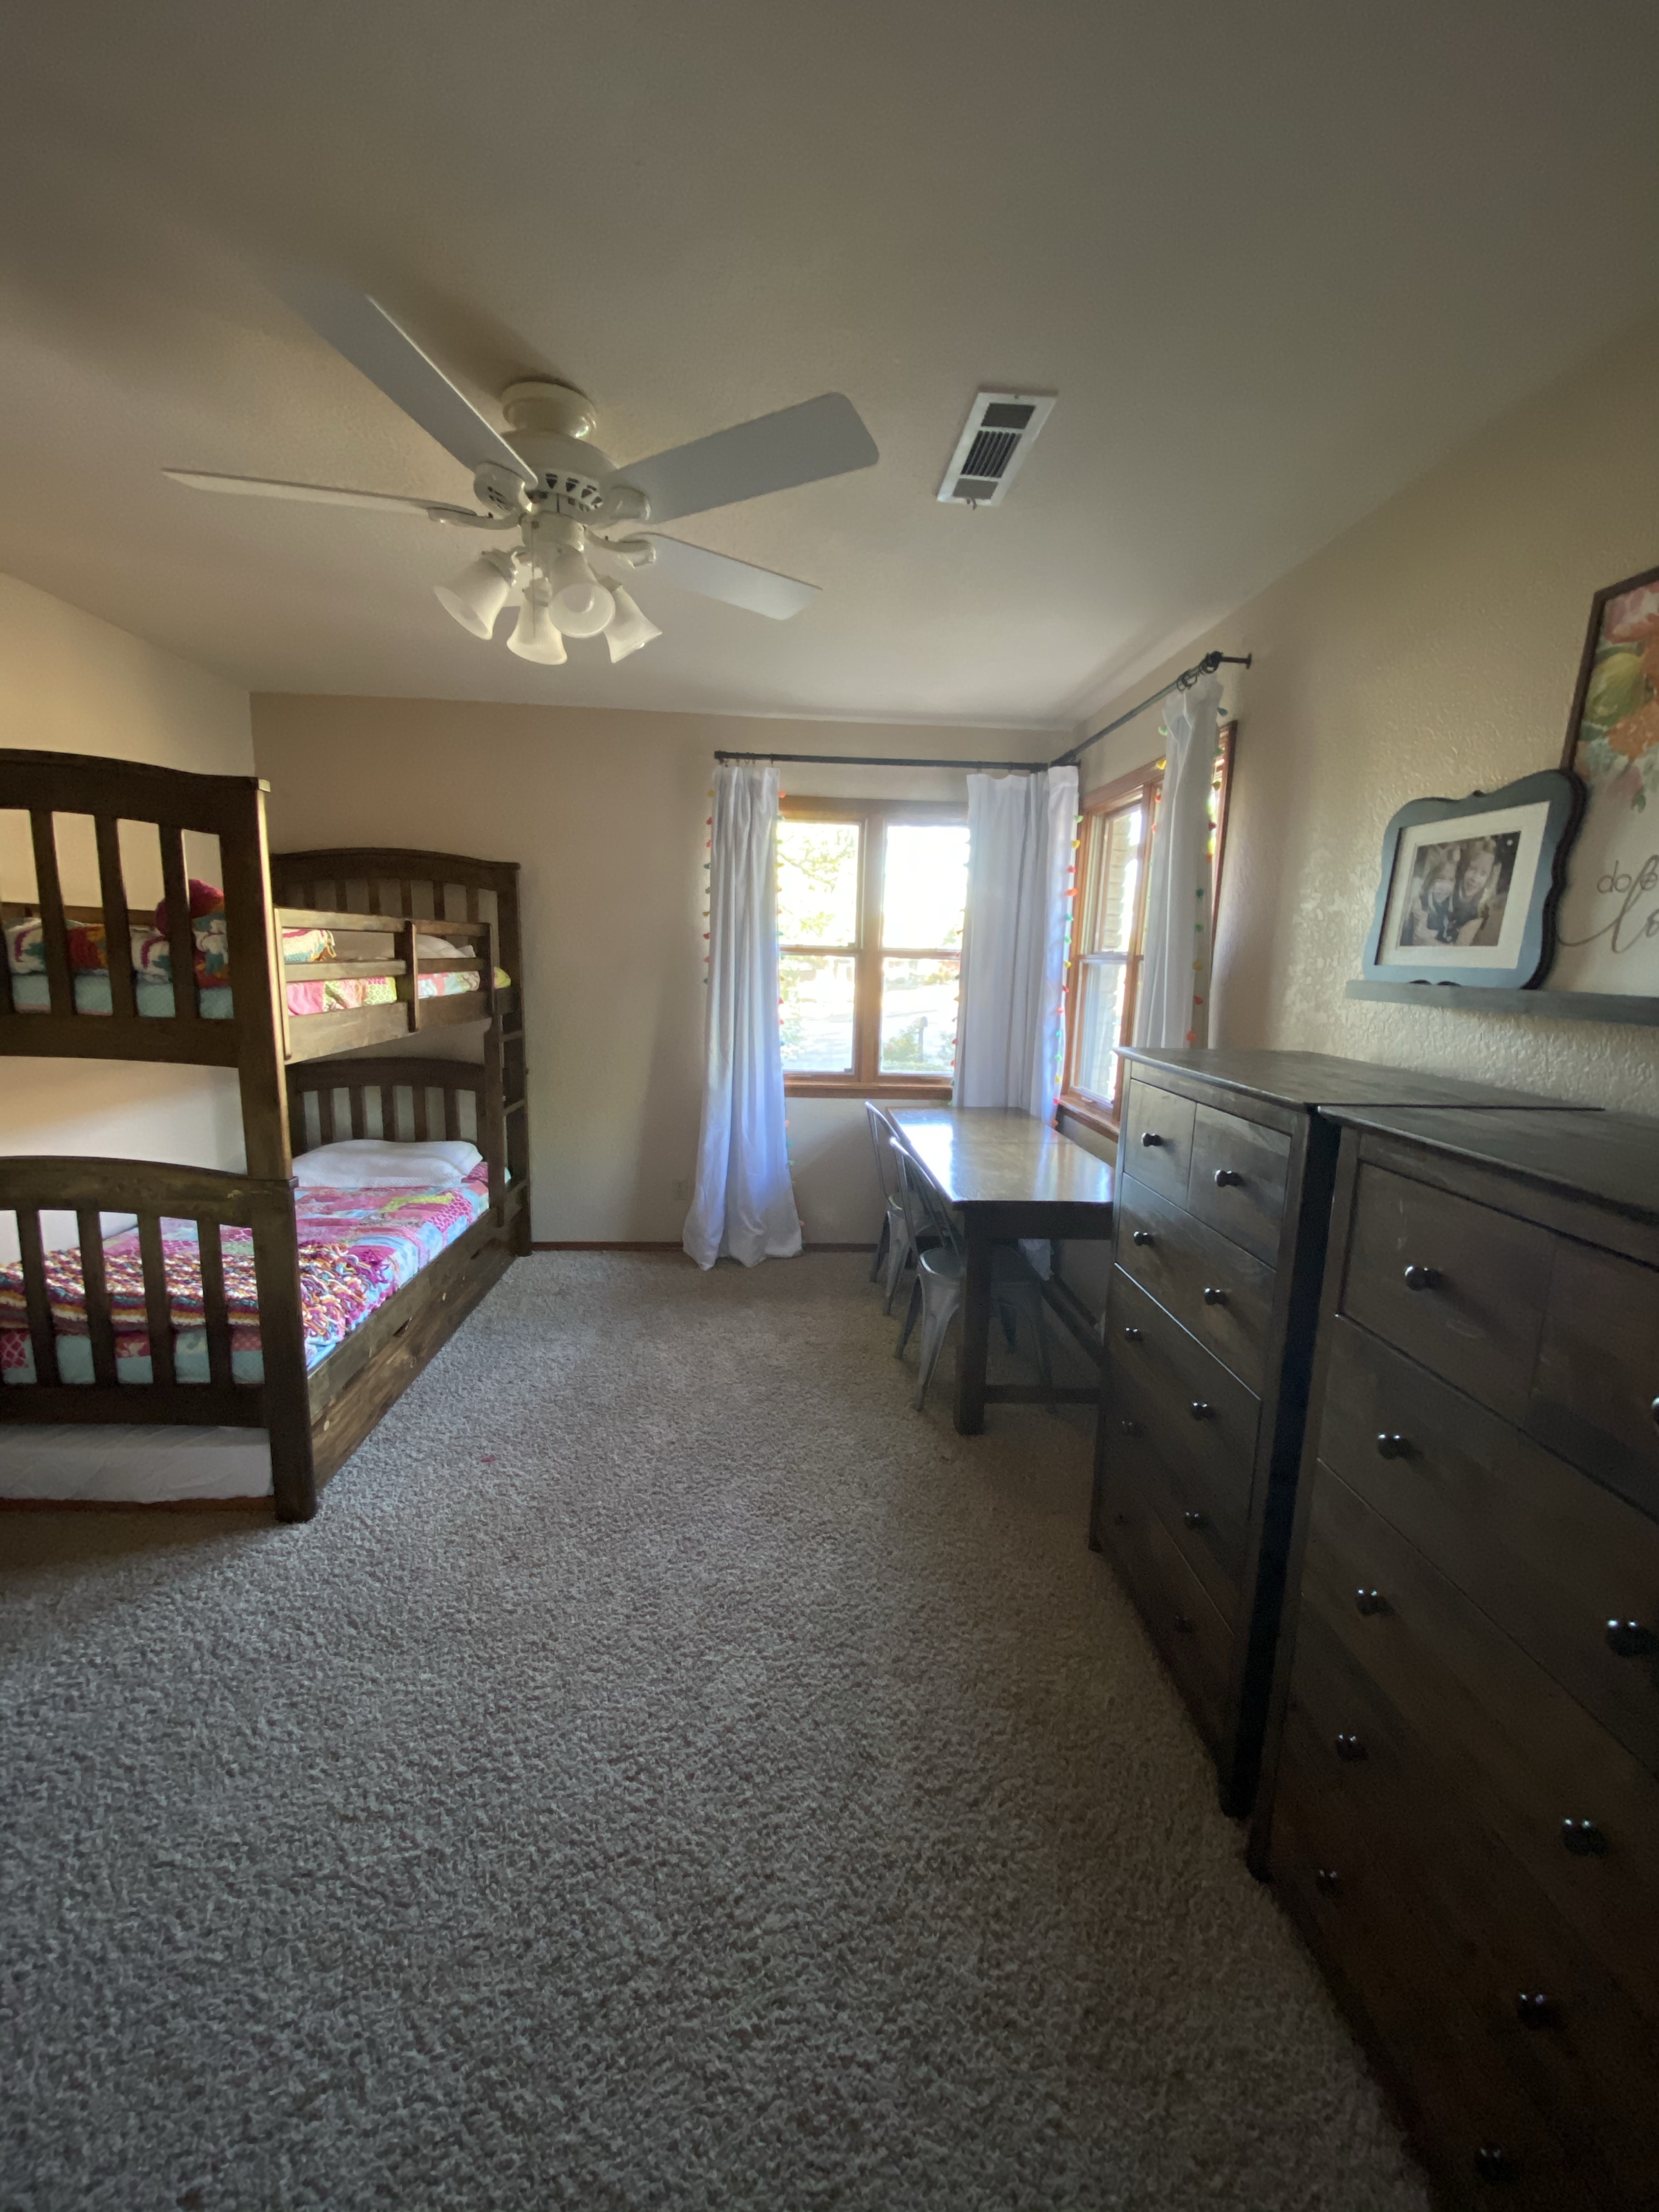
As for decorating their room, I bought them new curtains and rearranged their furniture just a bit. Before we spruced up their room, I had a chest of drawers on each side of the room, but their long, narrow room felt crowded. I moved the two chests together and hung a photo ledge that my husband made years ago above the chests. I styled the ledge with artwork that was already in their room. Hanging the ledge above the chests unifies the two pieces to make them look like one unit. This also helps the room to feel more open and airy.
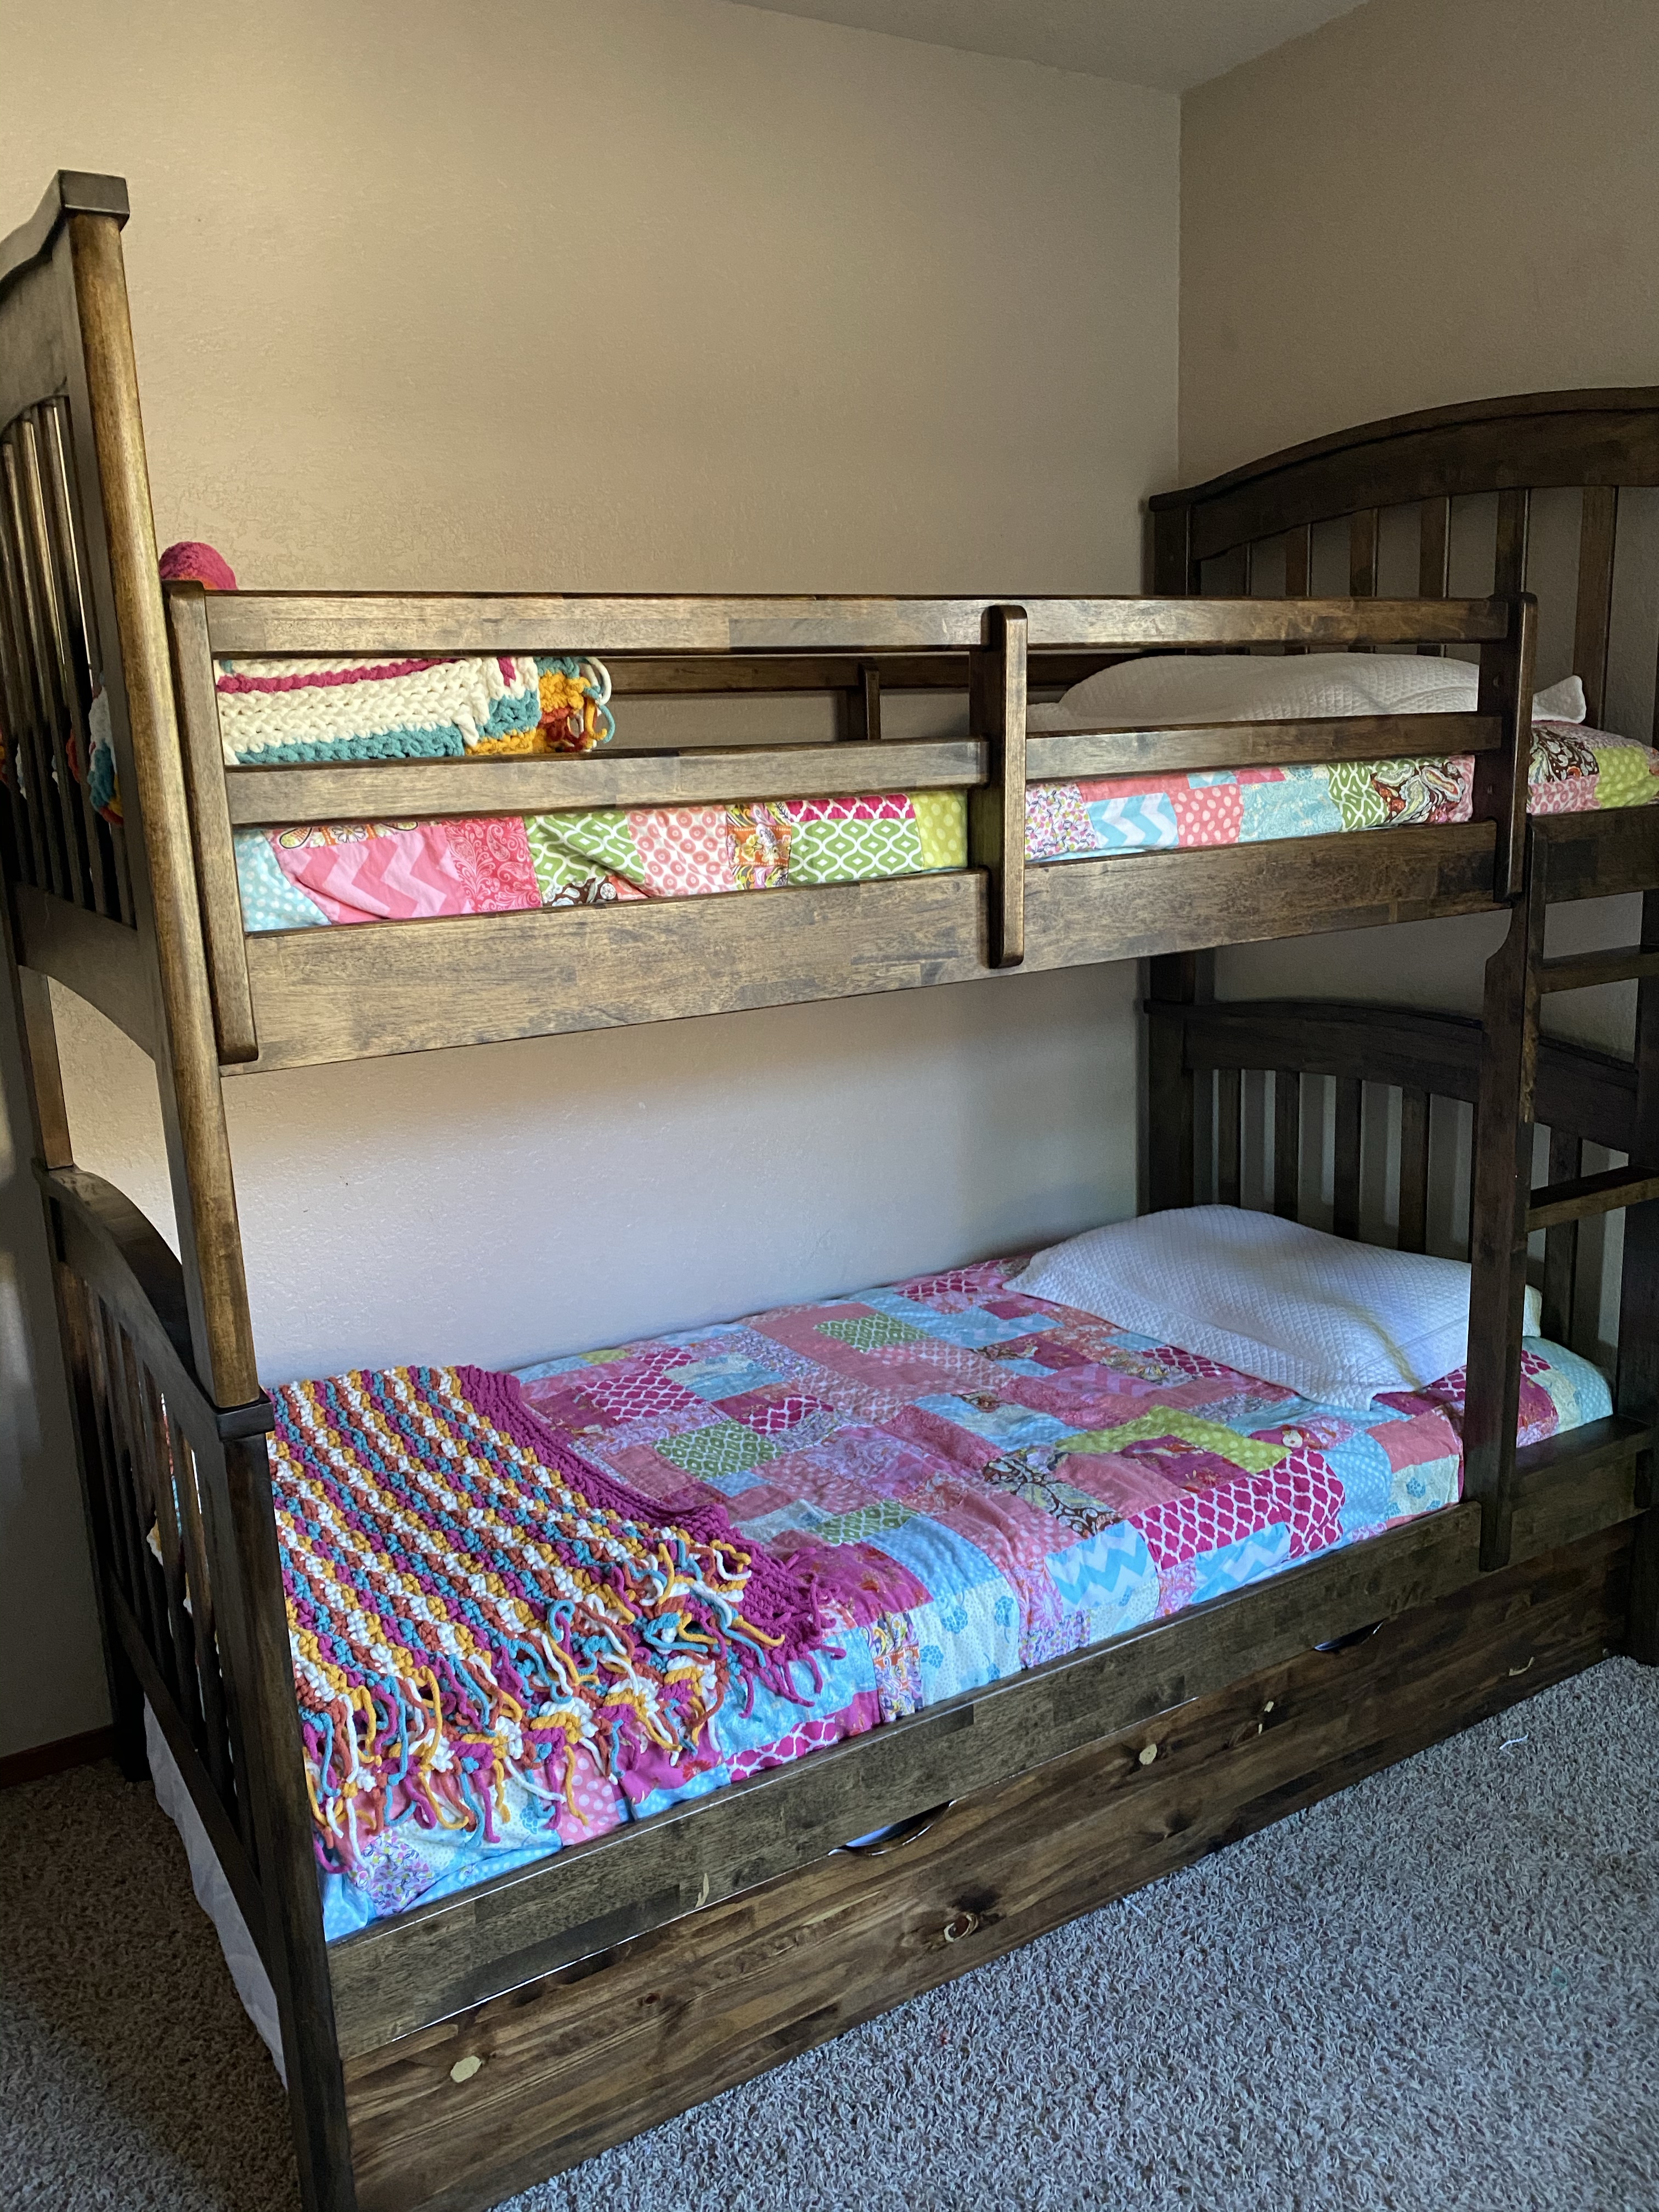
For their bedding, we’ve had good luck with these soft sheets from Amazon. I made their quilts for them a couple years ago and my sister knitted beautiful afghans at the foot of their beds. Again, I keep their bedding very simple. We have duvets and duvet covers that they use in the winter, but for now they are folded and in the closet.
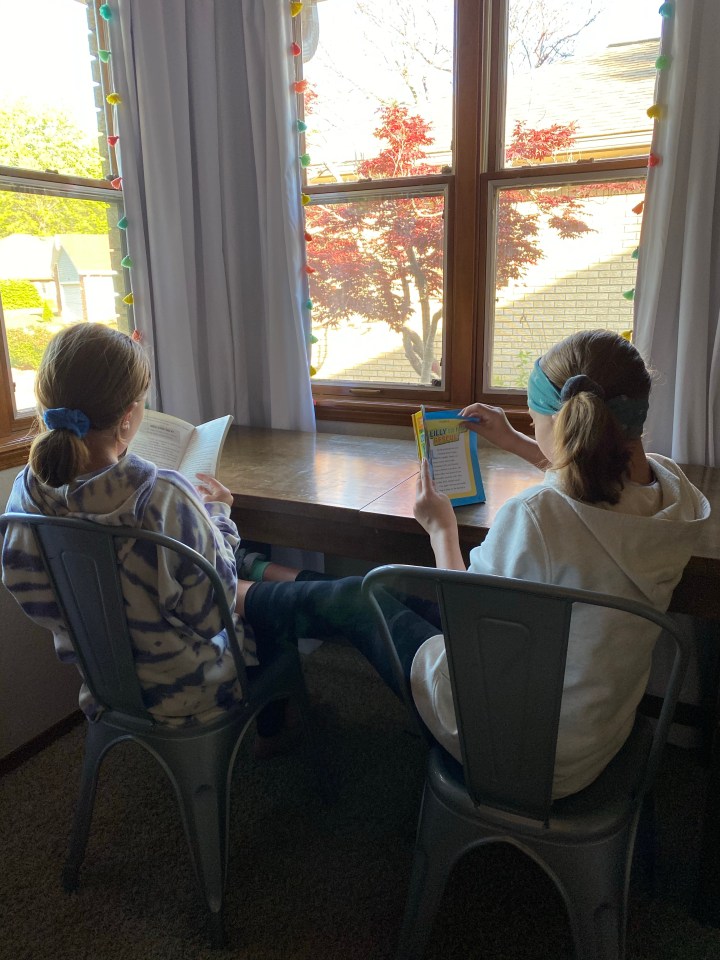
We bought the majority of their bedroom furniture at a local furniture store that is now out of business. The girls’ desk was made by a cabinet-maker several years ago and we got their desk chairs at TJ Maxx.
Revamping my girls’ room has been such a fun process. I mostly used what I already had on hand, with the exception of buying new curtains. They are enjoying having a freshened-up space and they’ve each thanked my husband and I multiple times for helping them get better organized.
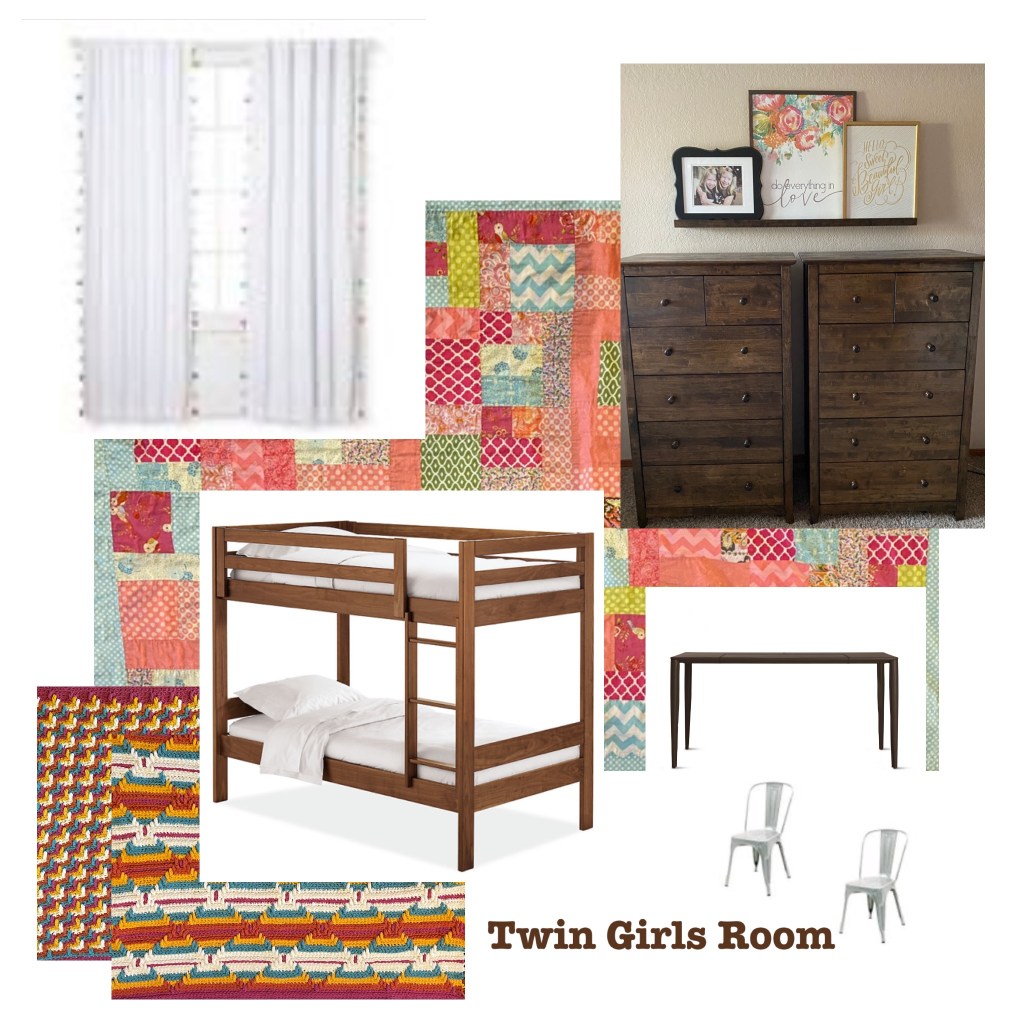
Below is the design board that I created for this space. I had such a good time pulling all of these elements together in a simple, kid-friendly, inexpensive way. If you need me to help design your kiddo’s room, shoot me a message and we’ll work together to create a space that you and your kiddo will love.
Hey y’all! We’re trucking along on our kitchen reno. You can read about part one of our renovation here. By way of review, this is what we’ve done so far:
Removed the backsplash (and the sheetrock that it was adhered to!)
Removed a large bank of cabinets that was sitting on the counter and using up too much of my counter space
Hired an electrician to replace all the plugs and bring them up to code
Hired an electrician to update all the can lights and add one new one
My hubs taking down cabinets that we plan to replace with open shelving.
I’m so happy to say that we can check several of the above things off our list! Over the last few weeks we’ve:
re-installed the sheetrock in order to replace the backsplash
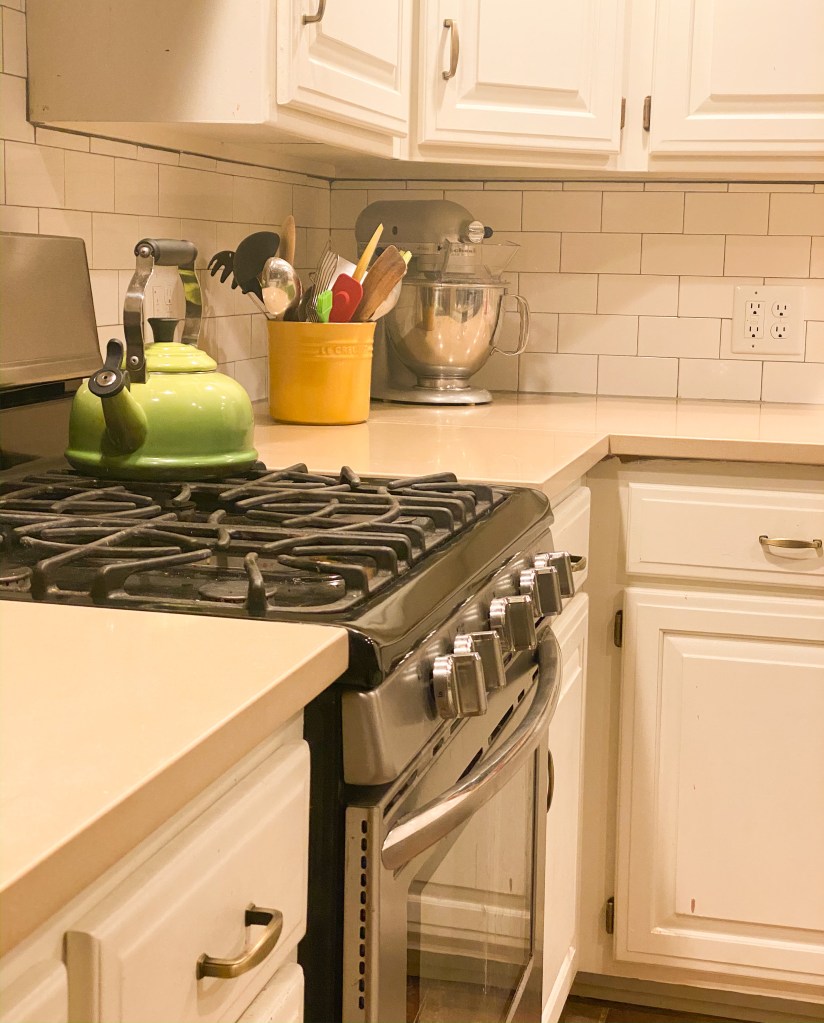
ordered new quartz countertops and subway tile backsplash
ordered new sink and faucet
scheduled and oversaw installation of countertops, backsplash and sink
Buh-bye formica countertops!
Our countertop installers were scheduled to arrive around 8:30 the morning of the install. We woke up early and made sure that the kids had all eaten and gotten out of the kitchen in order to give the installers plenty of time to work. Five hours later, our install crew arrived. Help me, Rhonda. During that time, Justin removed all the countertops himself, which saved us a little money. This is not our first renovation, so we’re familiar with having to wait on installers and etc. Buuuuuut, I have to say, we’d both forgotten how stressful it is when someone is that late. To complicate things further, the install was scheduled for the same day as our oldest son’s very first homecoming dance. Not only were we trying to get him ready, we’d also invited some of his buddies over after the dance to hang at our house. We would not normally plan to host a group of teenagers on the same day as our countertop install, but that’s the way it worked out this time around and we all learned from it.
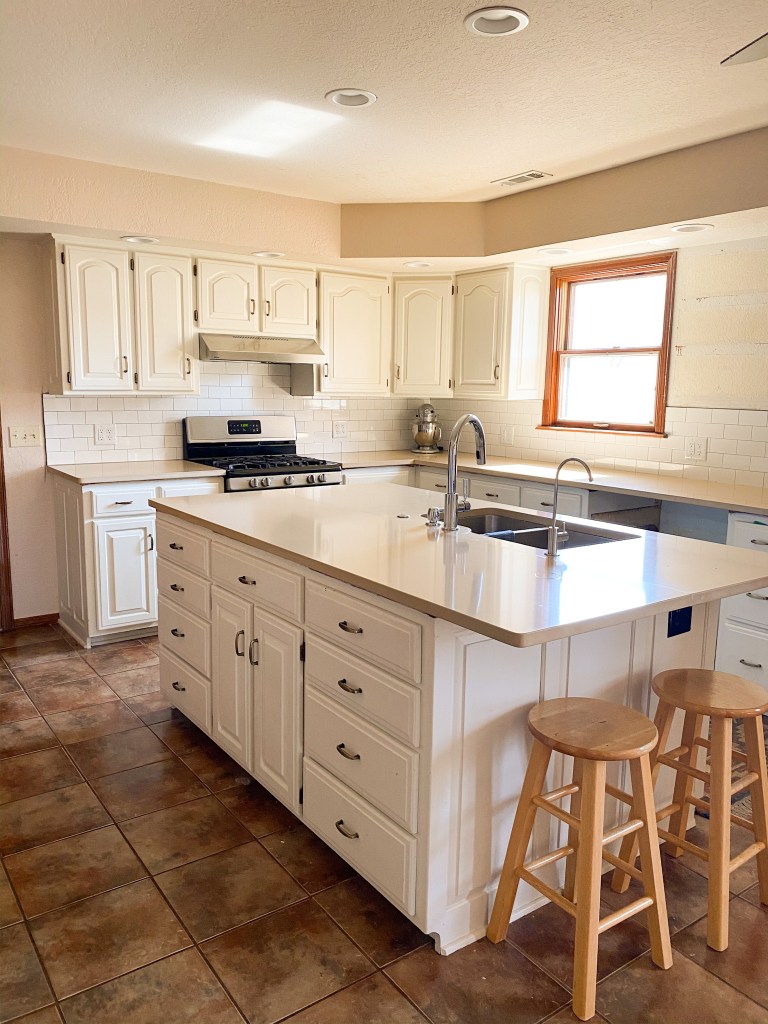
New countertops and backsplash make a HUGE difference!
The installers came back the next morning and finished up and we were so happy with the result. Since then, Justin has put the face-plates back on the outlets and re-installed the vent-hood over the stove.
You see those two little stools? My sister got us four of those as a wedding gift sixteen years ago and they’ve been in every place we’ve lived. Our kitchen did not have a bar previously, so we added a twelve inch overhang when we had the counters cut. This is our third house, and we had a bar in each of the kitchens in our previous two houses. It has been so lovely to have bar space again! The twins have pretty much taken over those two stools and sit there and chat with me as I wash dishes and prepare meals. I love having my kiddos close by when I’m cooking, but I don’t always love having them underfoot, so the bar provides the perfect compromise.
We’re planning to finish up our little renovation of the next week or two. We have just a few things left to do:
Build and install open shelves to replace the bank of upper cabinets that were removed
Build and install shelves to replace an unused desk area directly behind the sink
Paint the ceiling…this little job was made necessary by an overzealous bottle of kombucha that exploded all over my kitchen.
Paint the wall behind the open shelves.
It’s so fun having you all follow along with us and truly care about our project. I’ll keep you updated as we add the finishing touches to our kitchen!