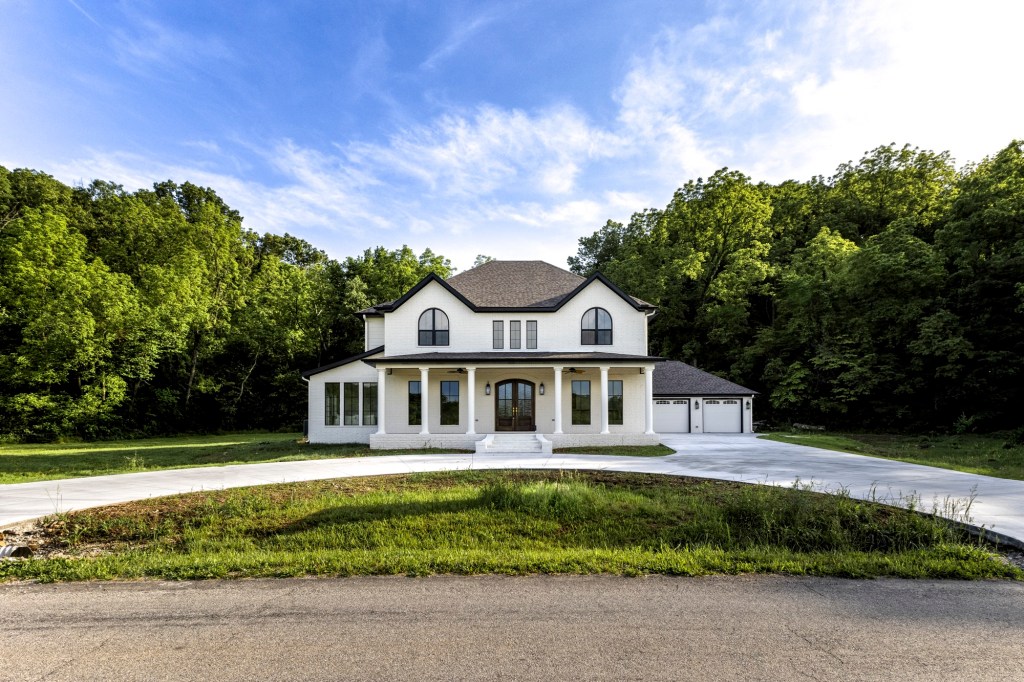
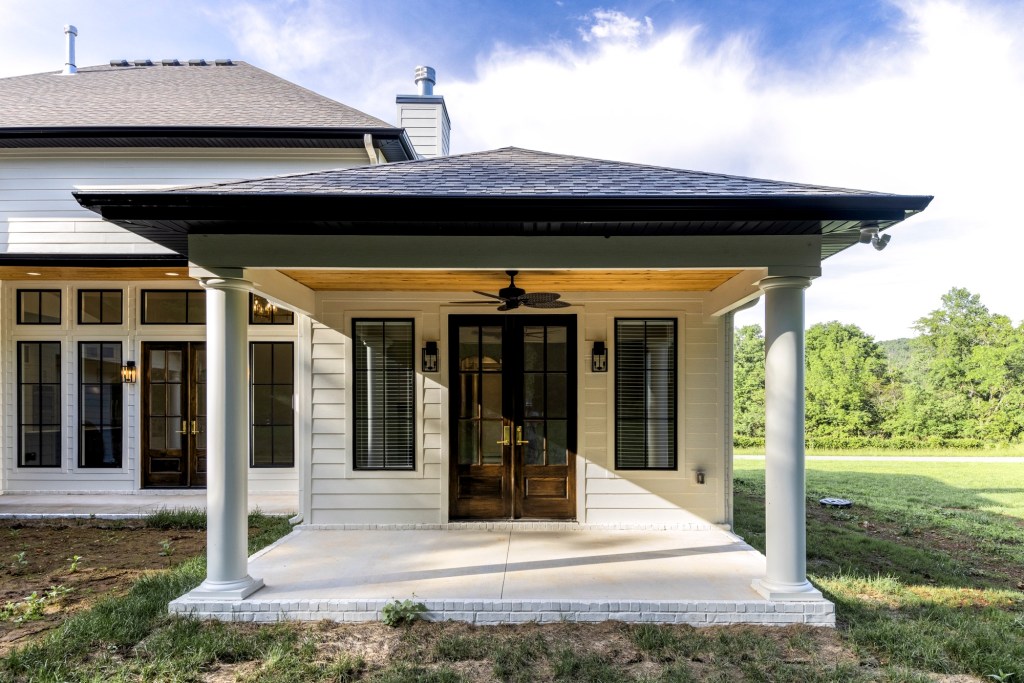
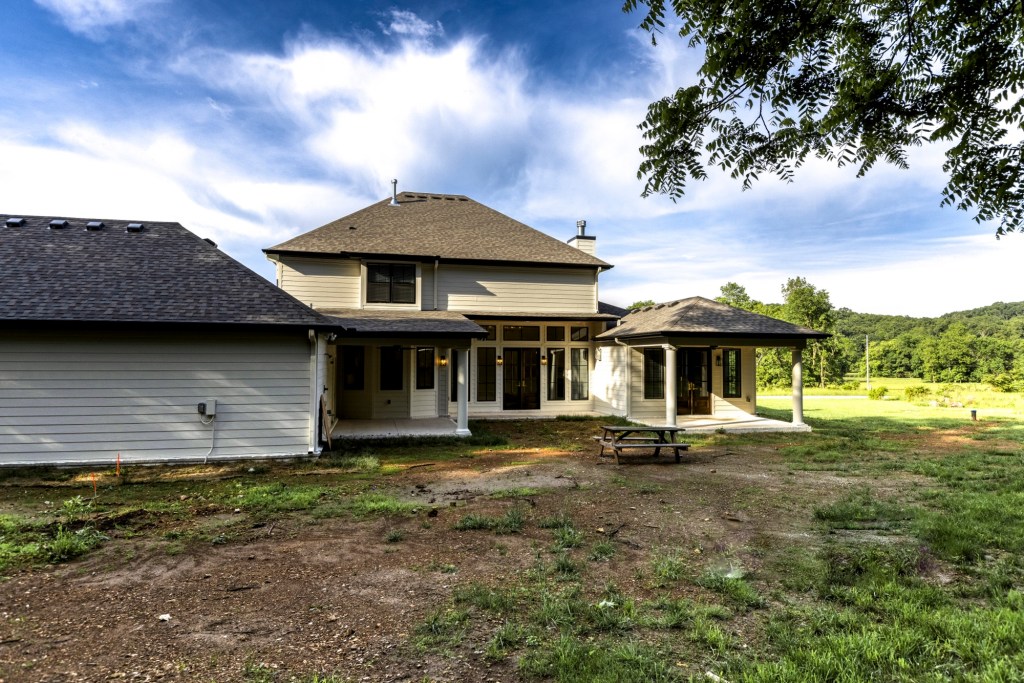
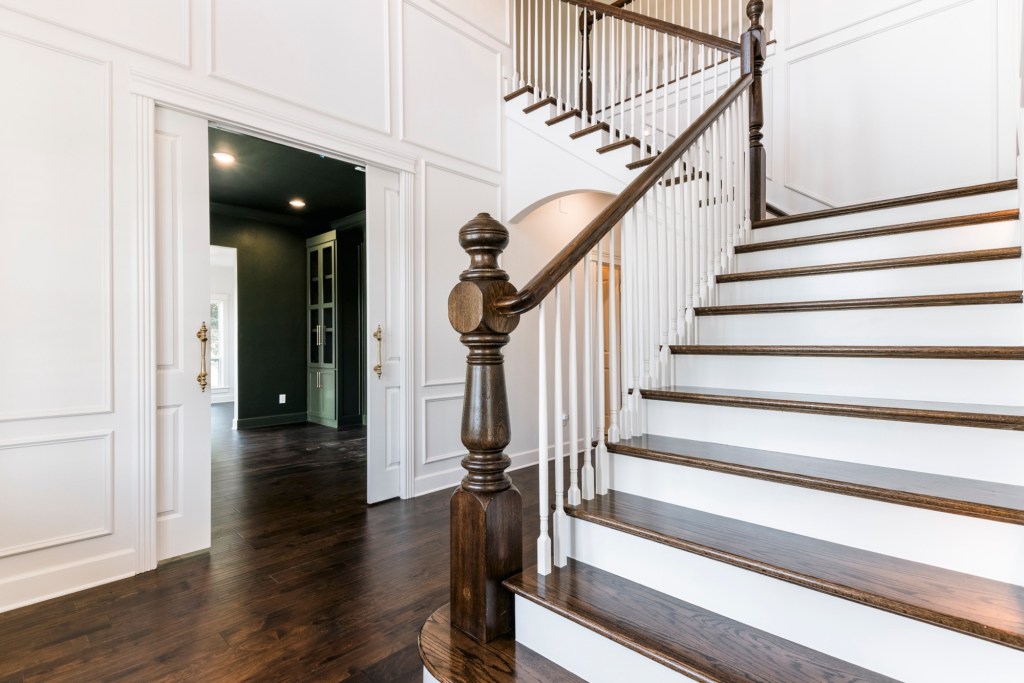
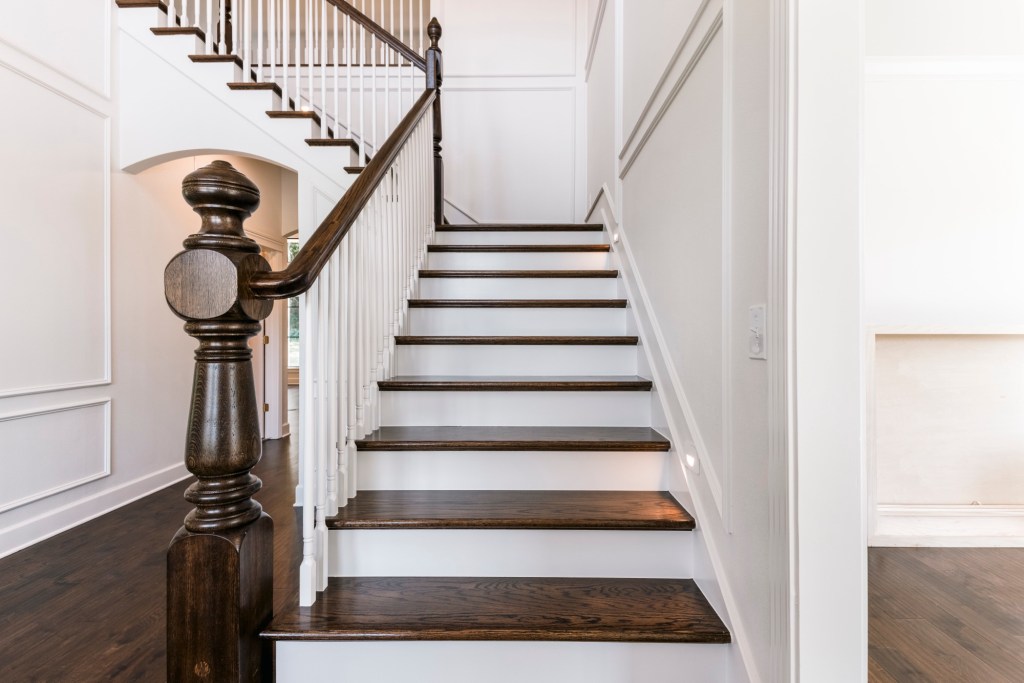
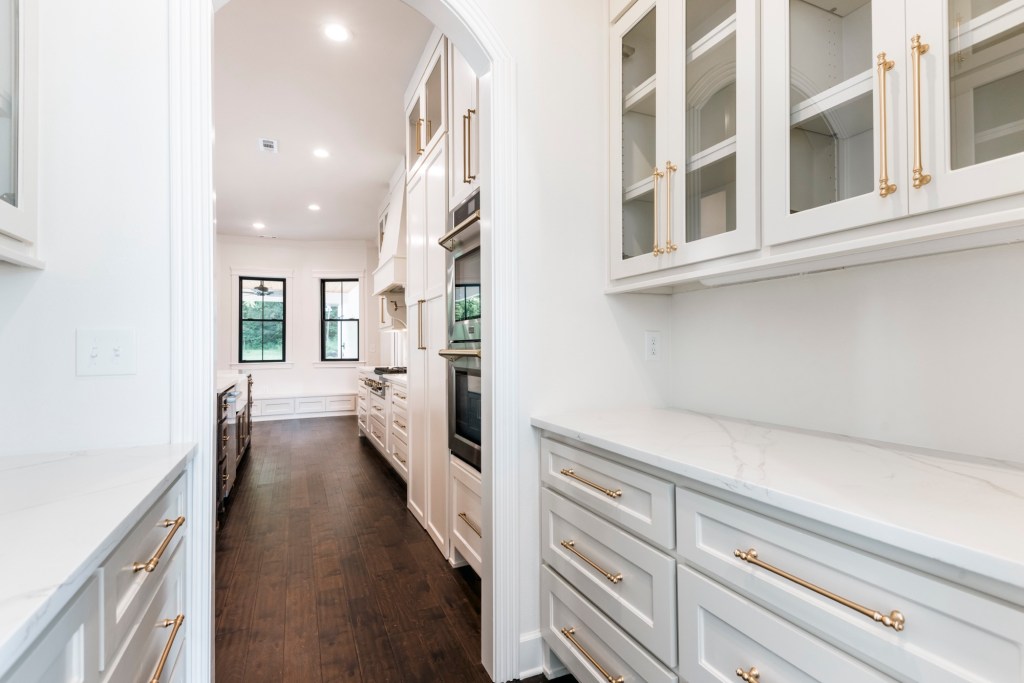
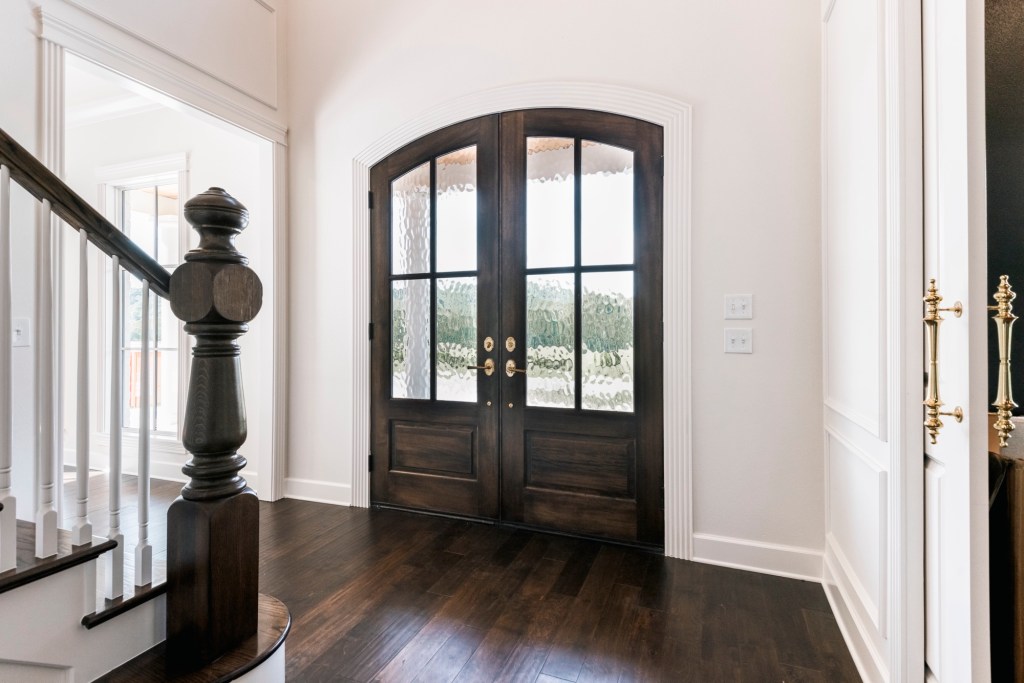
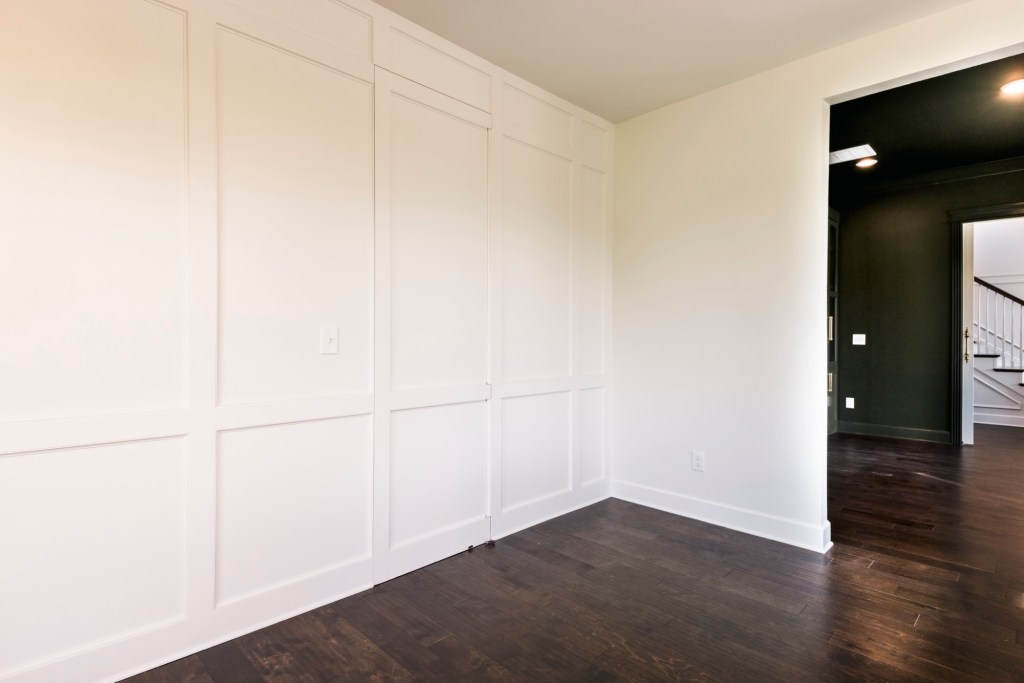
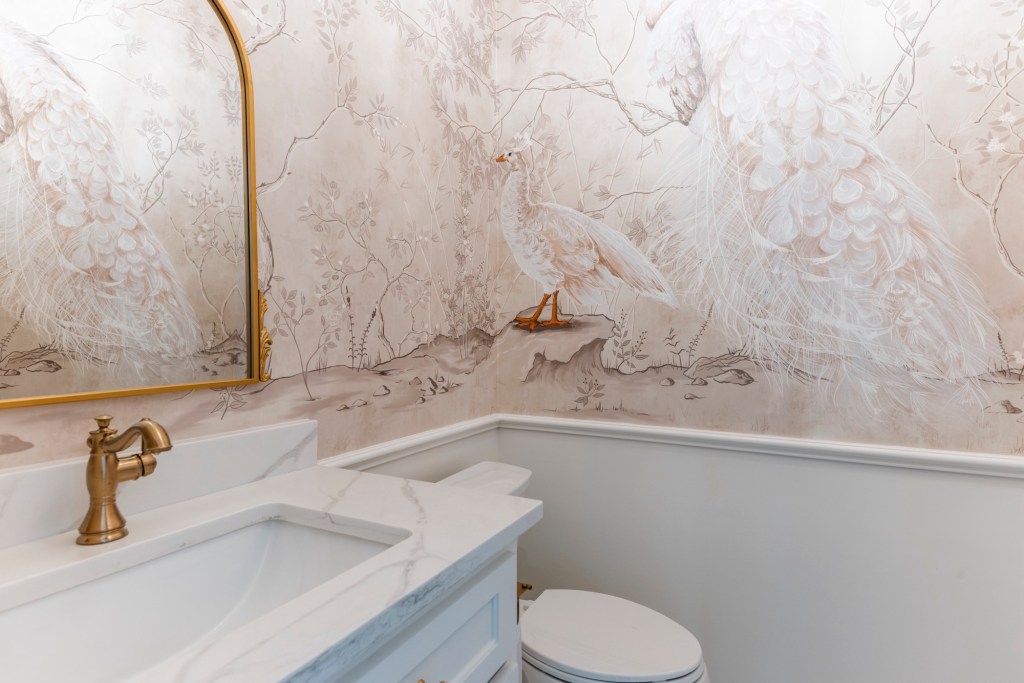
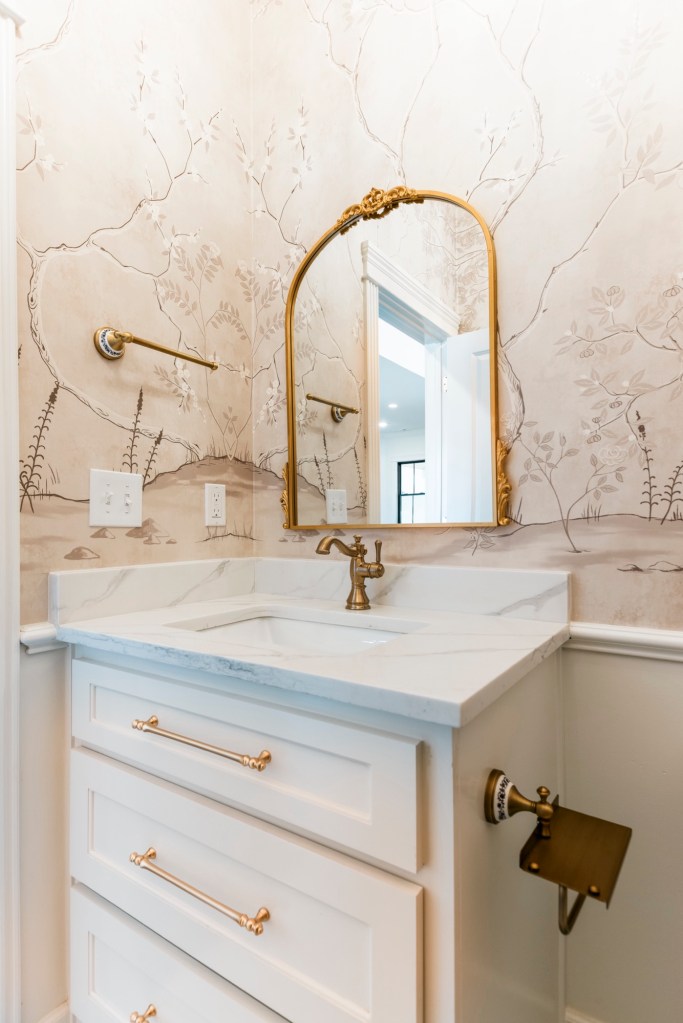
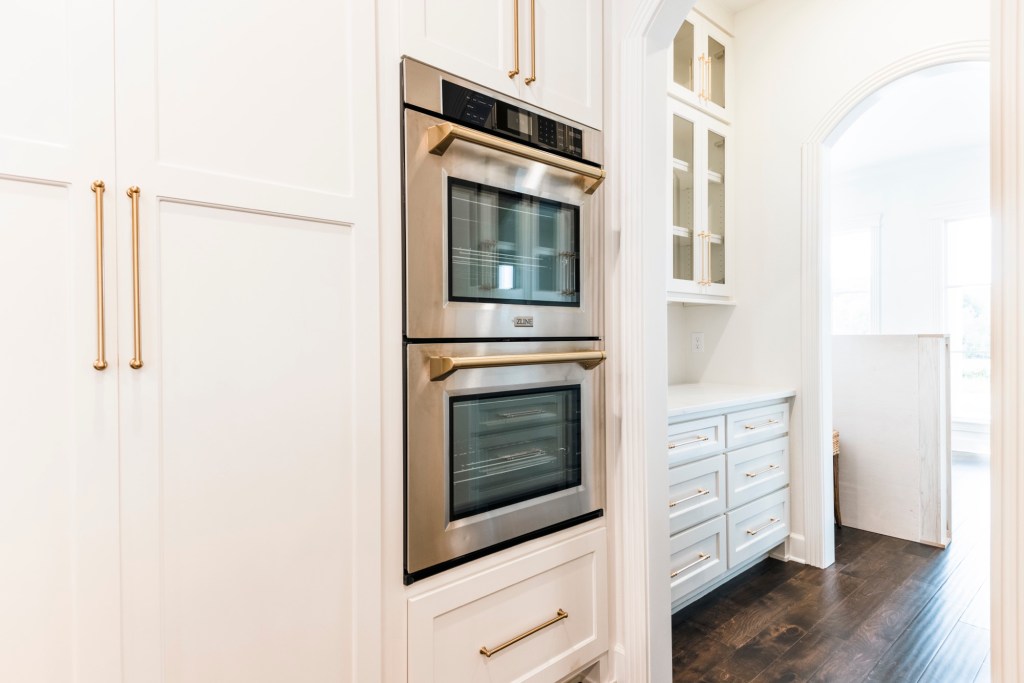
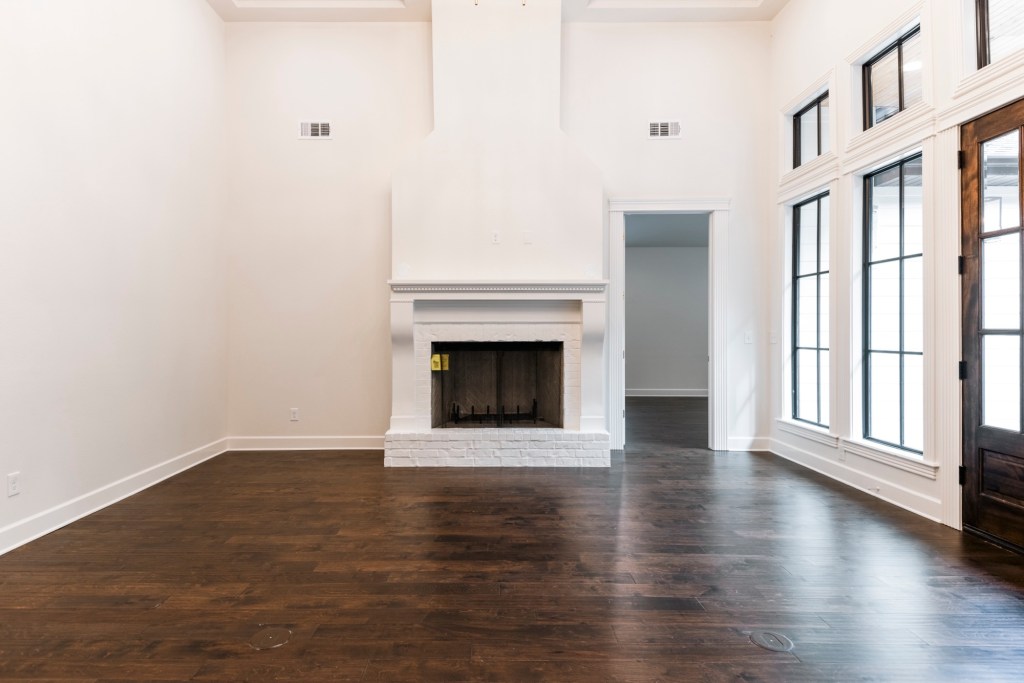
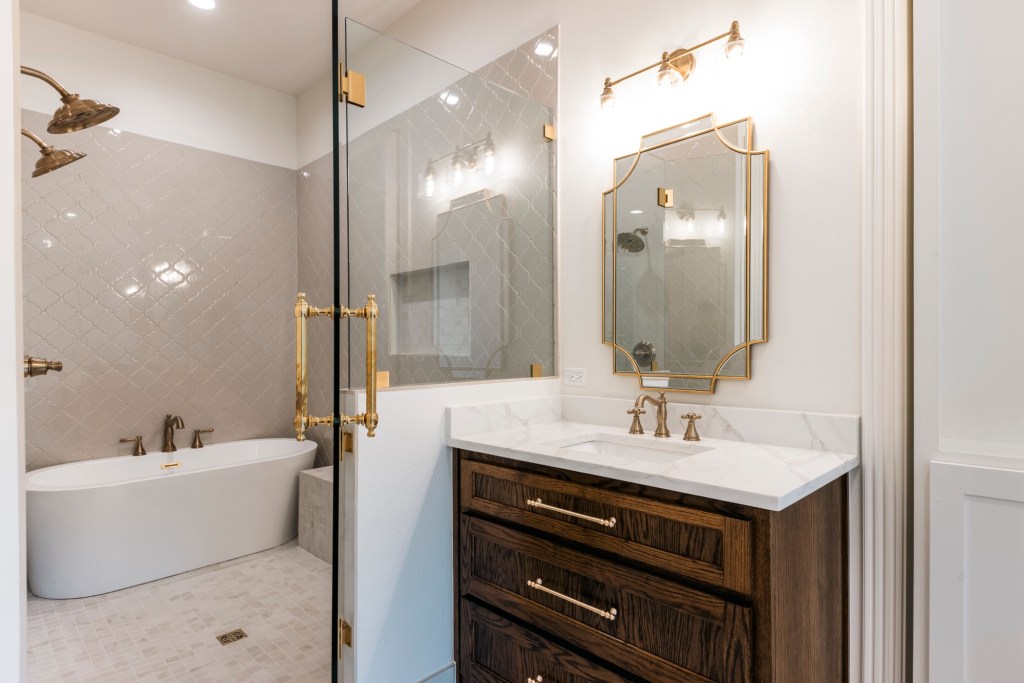
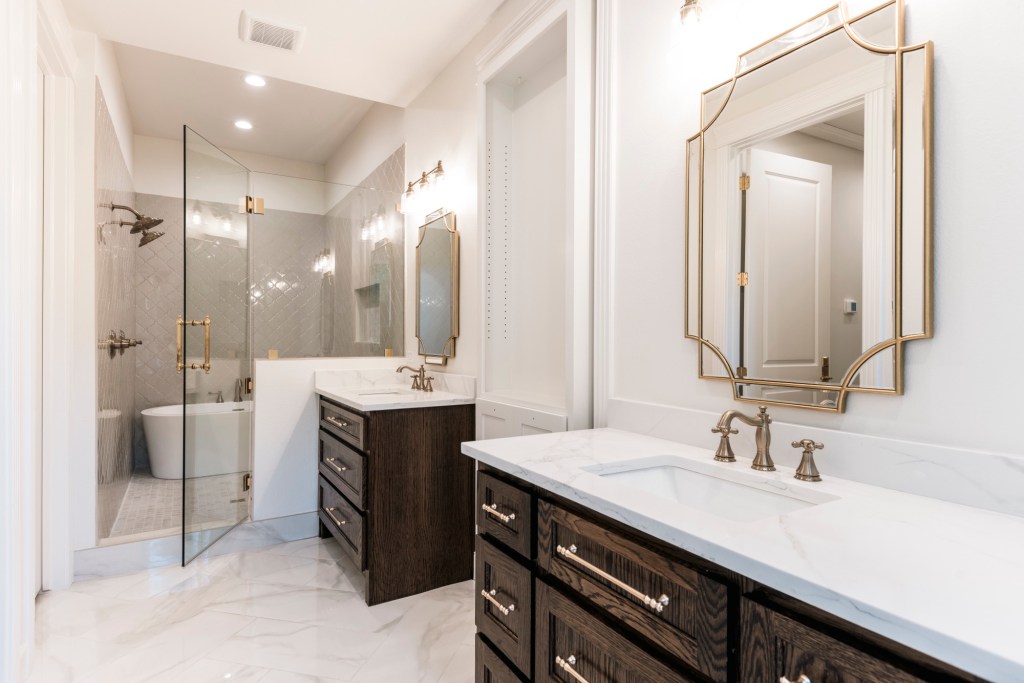
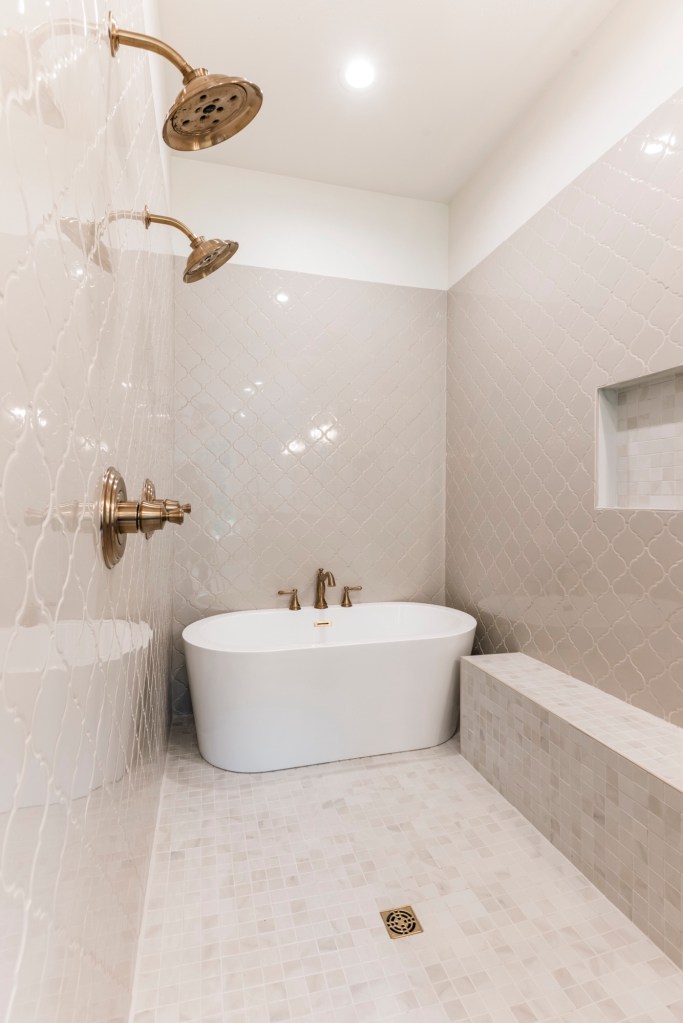
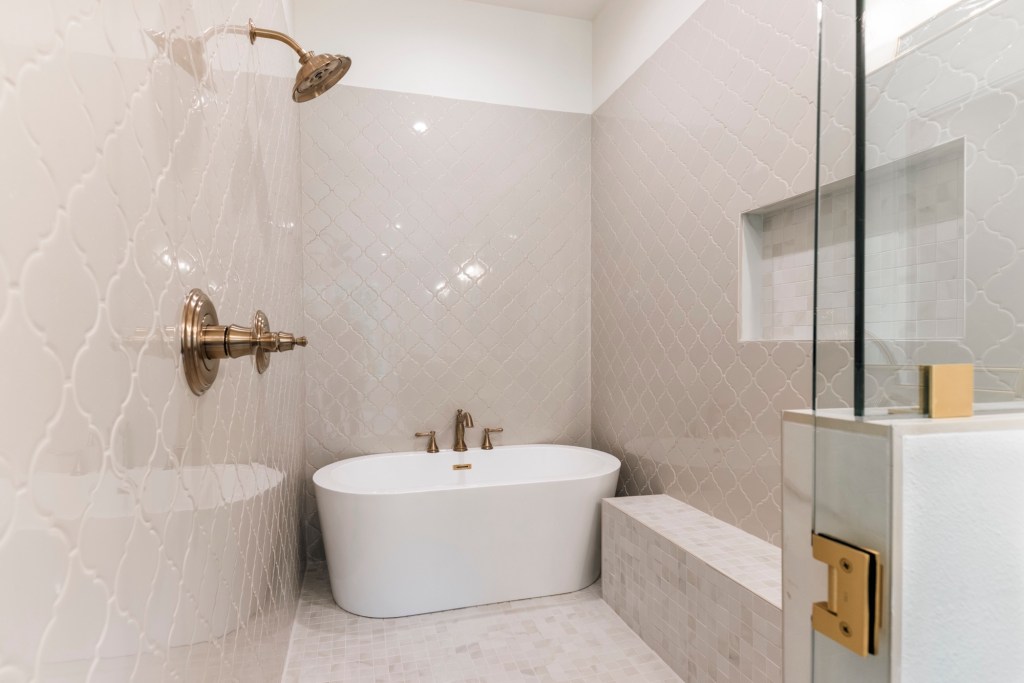
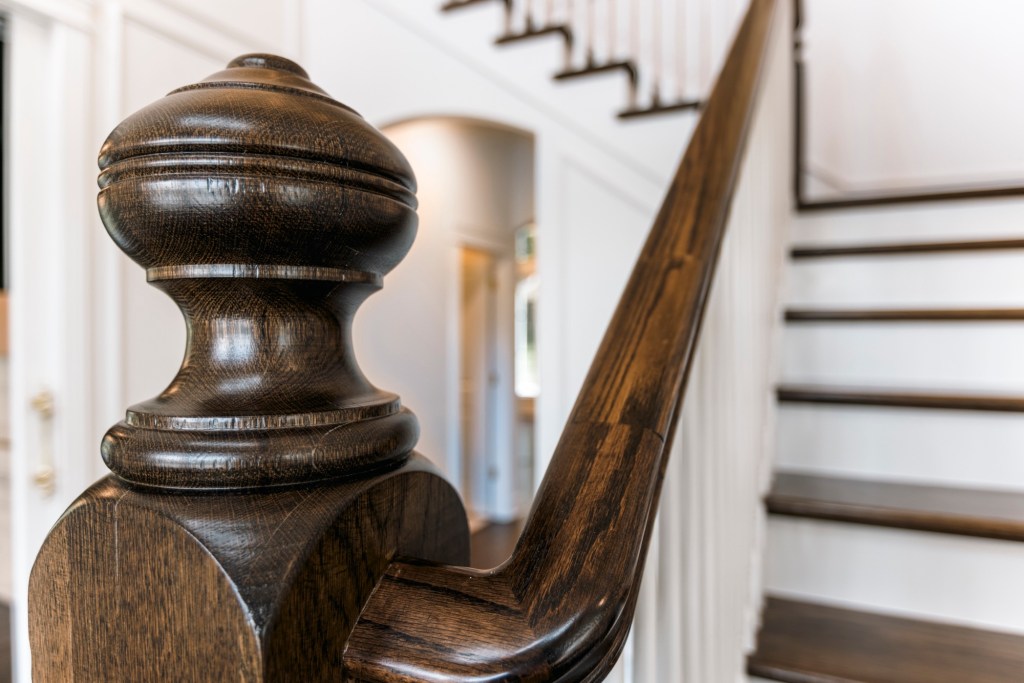
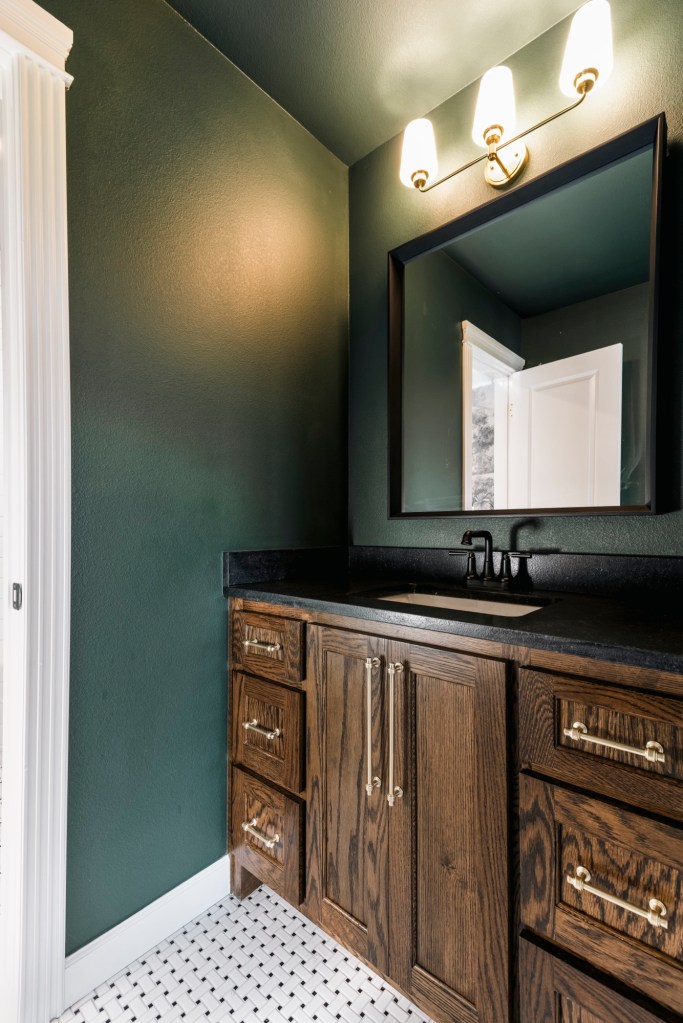
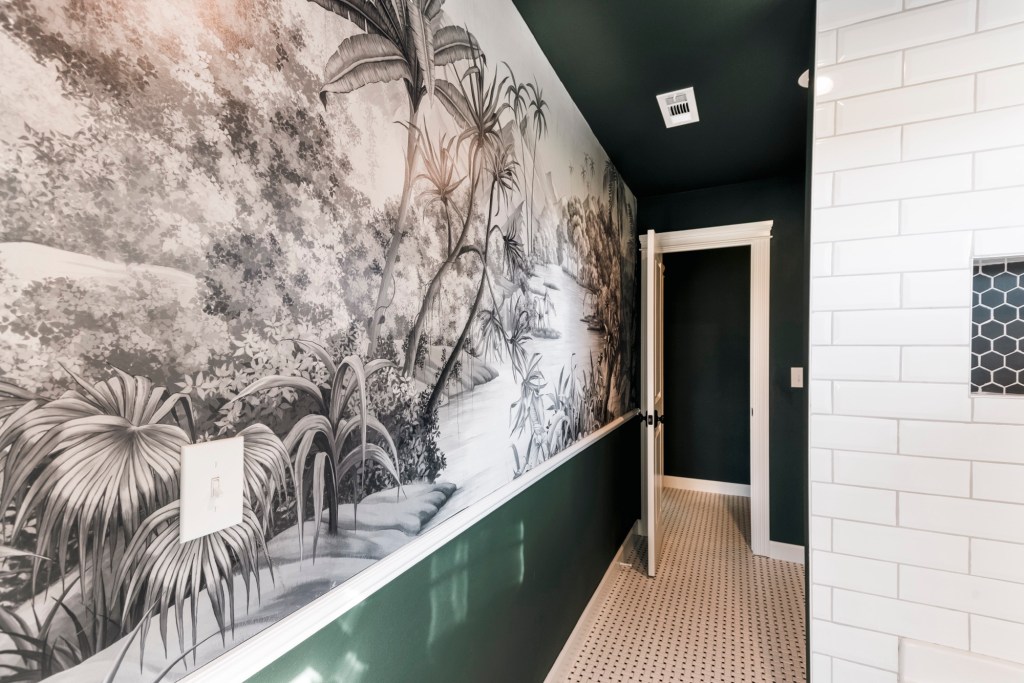
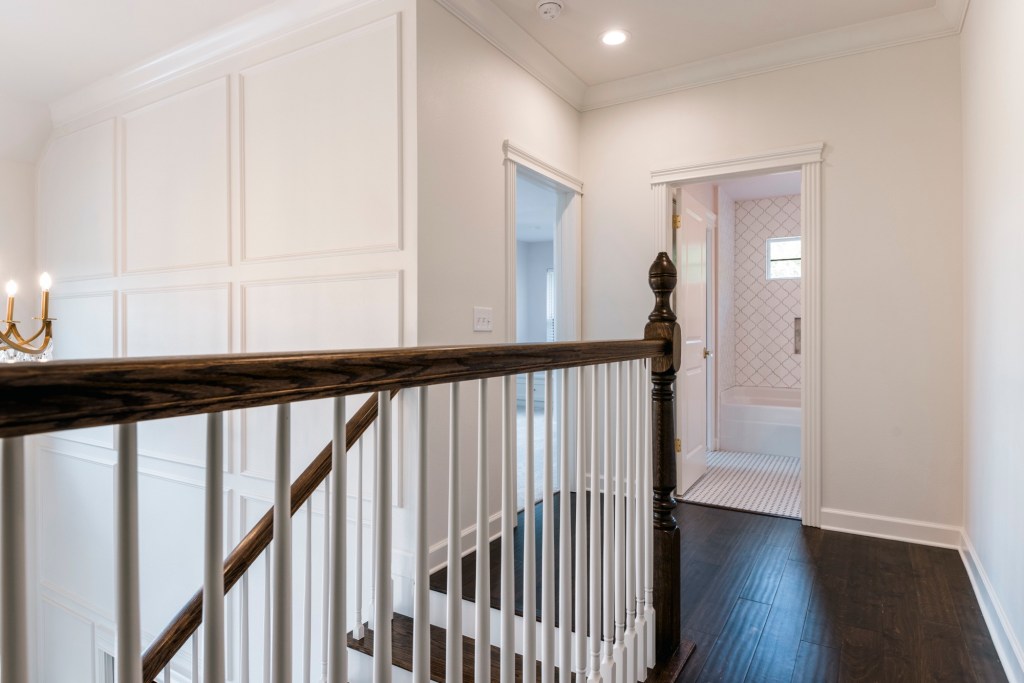
When my dear friend approached me about working with her on the design of her new home, I didn’t hesitate a moment before replying with a resounding, “yes!” We spent months together honing in on my client’s style and talking over details upon details…the newel post on the stairs, just the right engineered wood flooring for 3 kids and maybe a puppy someday, the cream color for the kitchen cabinets, just the right exterior color, and the wallpapers we used. Overall, it was a wonderful experience. I’ll write more about each space as we design the interiors, but for now, I’ll leave you all to feast your eyes on these beautiful photos of the finished home.
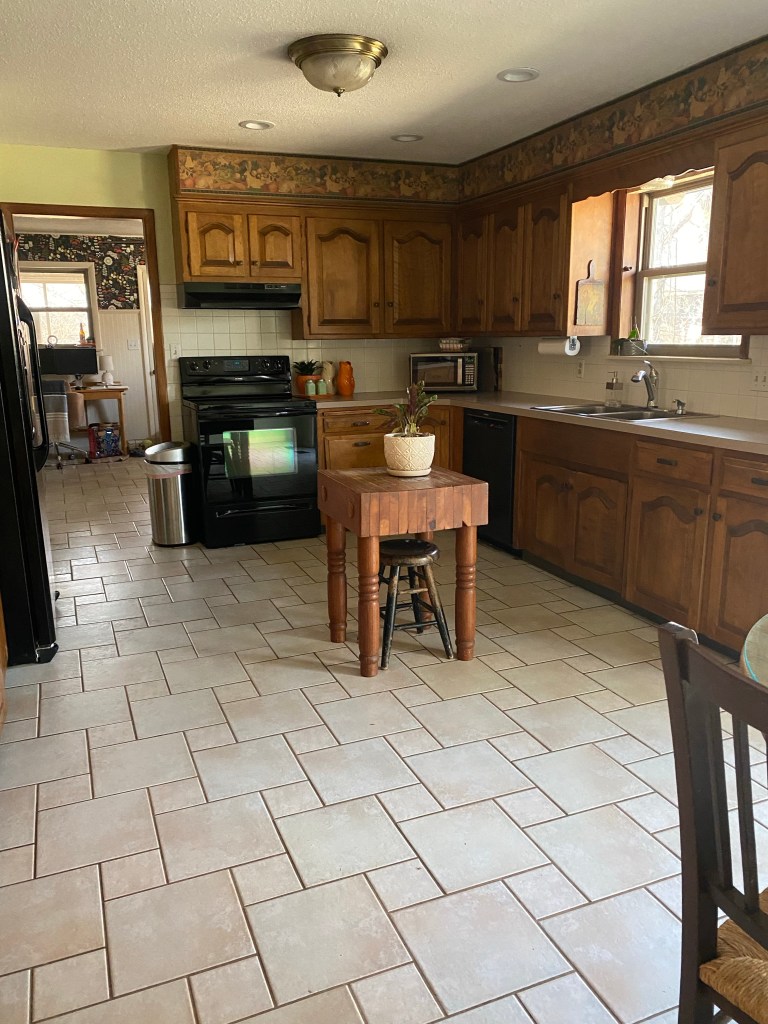
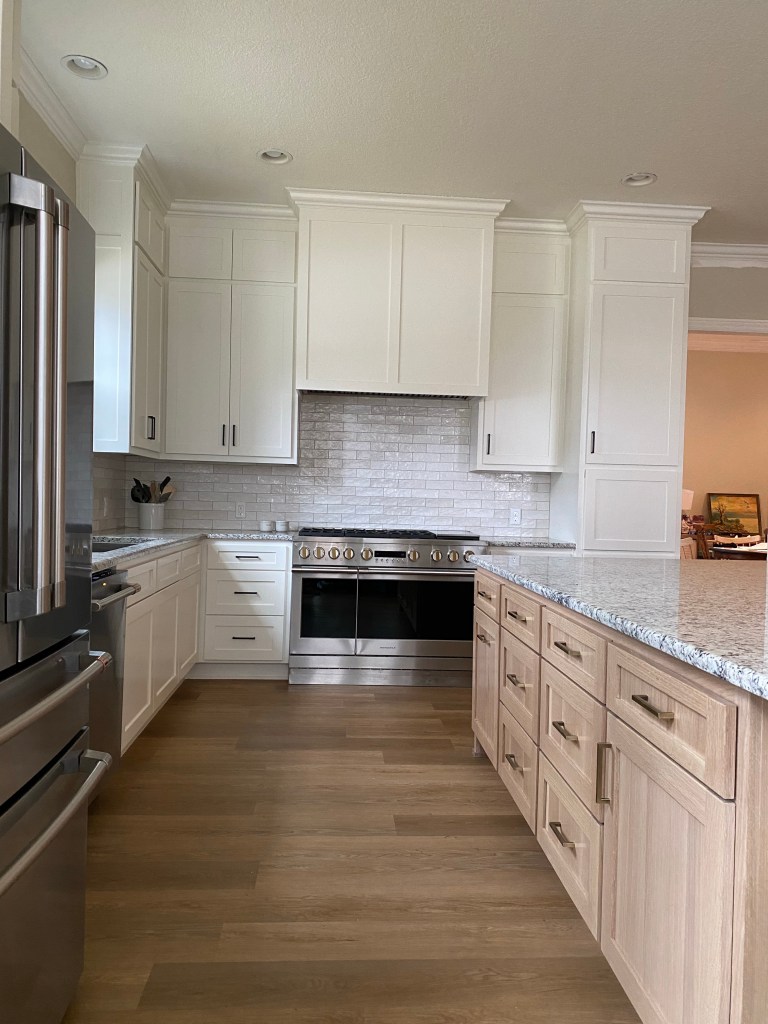
When my friends, John and Kim Marquette, asked me if I would help them design their kitchen remodel, I immediately said yes. Their home has always been a favorite of mine. It was built in 1967 and the kitchen had only seen minimal updates since then. The kitchen was very well constructed with solid wood cabinets, an extra sink, and a nice long peninsula with plenty of seating for the Marquette’s large family. Kim and John are the second owners of this home and have loved it so well! You can see a couple of before photos below.
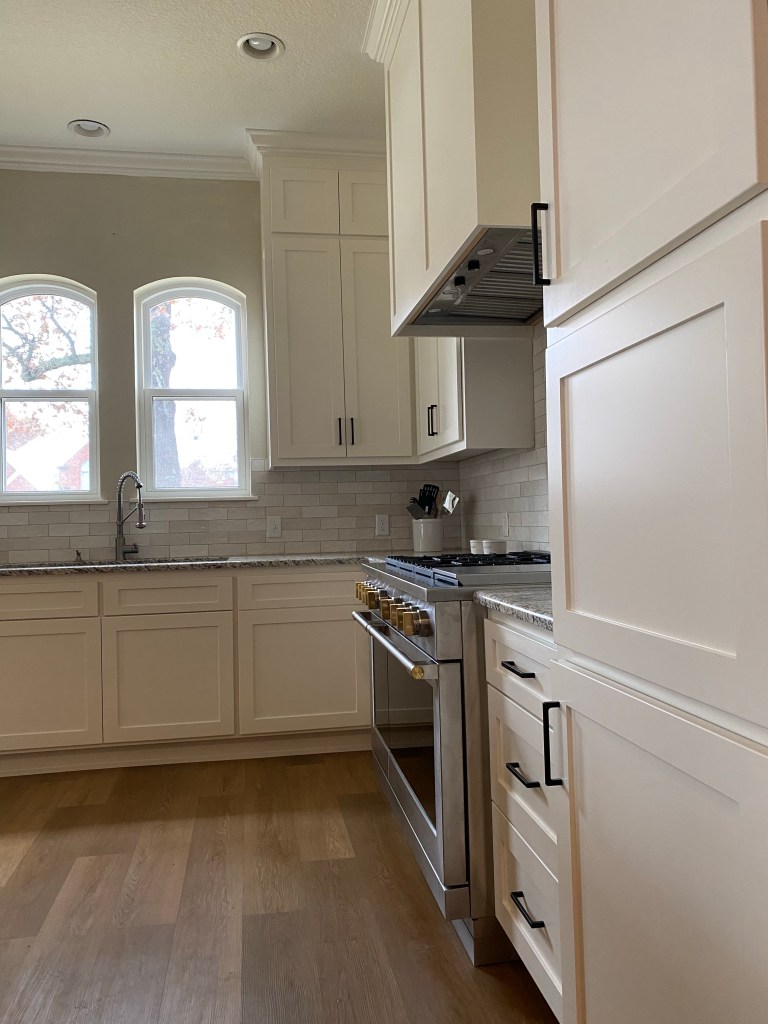
Because the kitchen was fairly well-designed originally, we chose not to change the original footprint. We had can lights and a couple of pendant lights added and some extra, much needed plugins were added by their son-in-law. Take note local friends, Marquette’s son-in-law is a skilled electrician who has done work for me and other clients. Feel free to message me for his contact info.
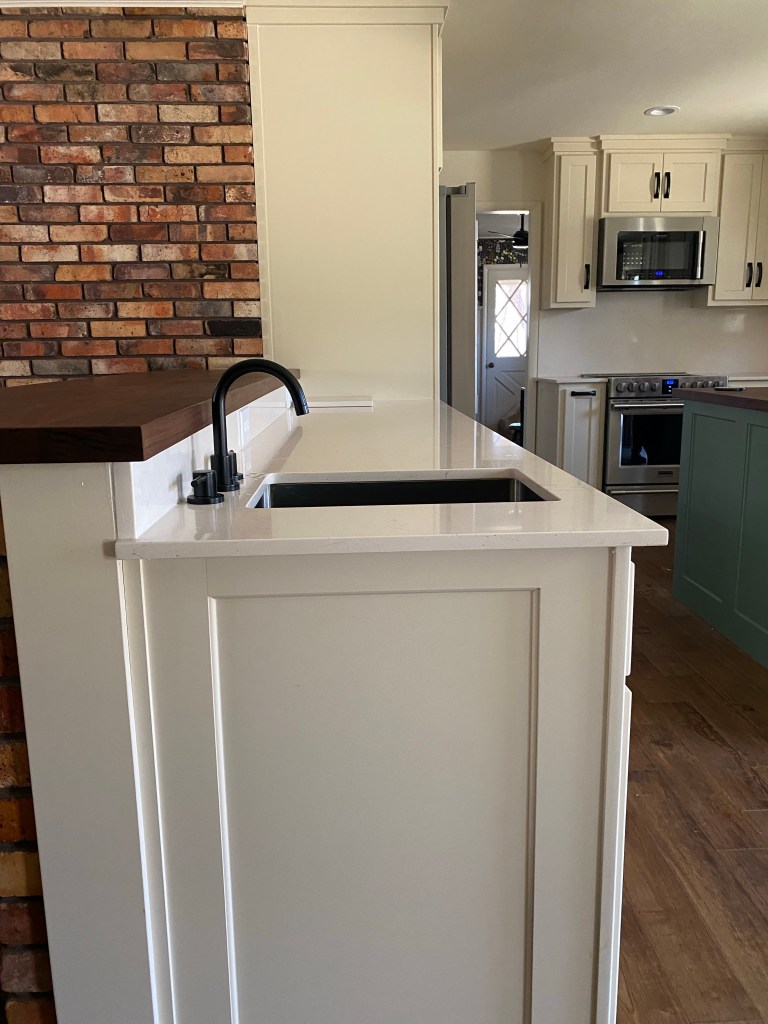
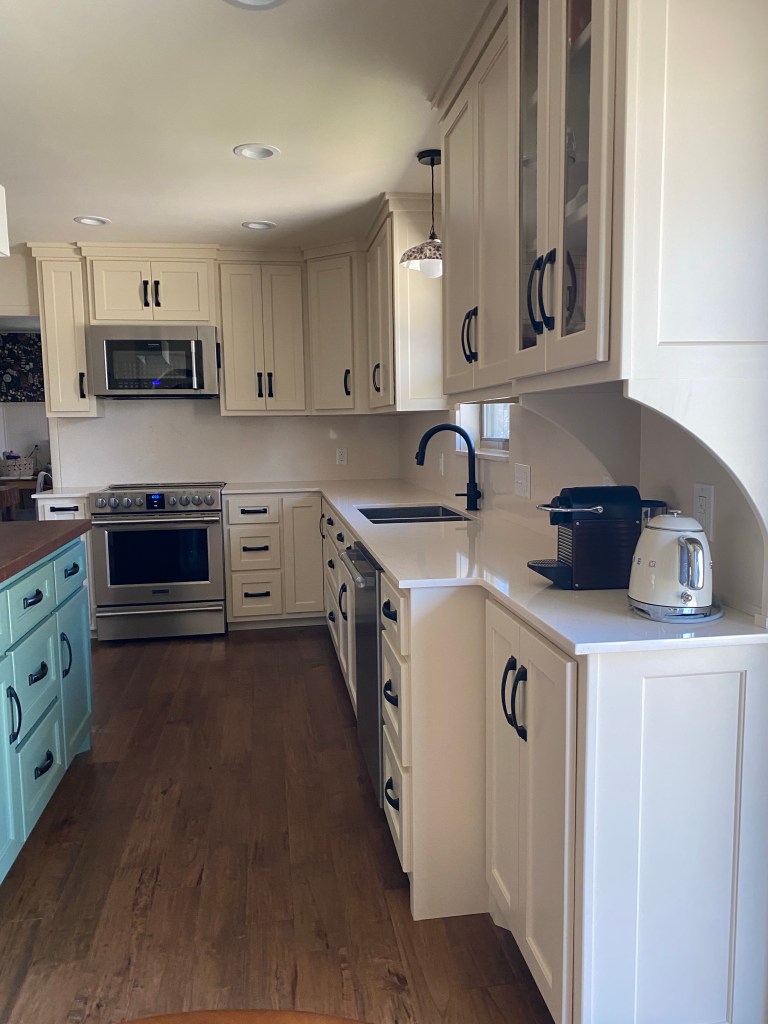
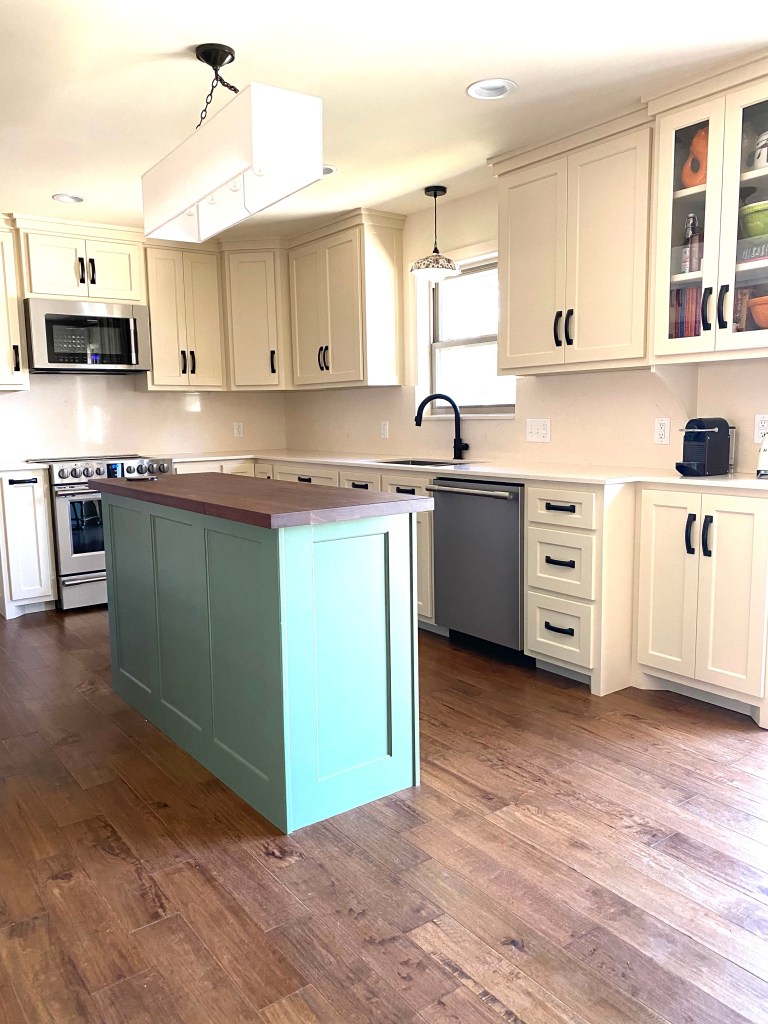
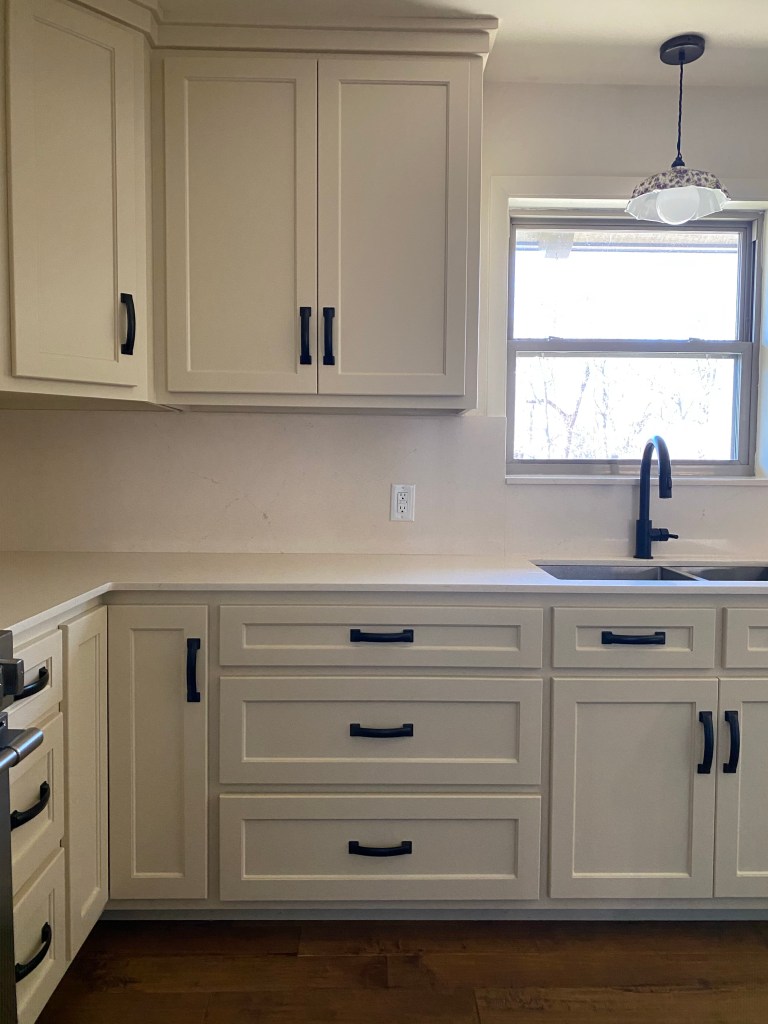
In addition to new lighting and electrical, we chose new cabinets, with plenty of special features. We also selected new cream-colored granite for the majority of the cabinets and backsplash. We worked with New Century Countertops in Springdale and had a wonderful experience. The bar top and island top is a custom walnut butcher block that John was thrilled about. John comes from a family of cabinet makers, so choosing this finish and material was something he really took ownership of. I love for my clients to really make the spaces we’re collaborating on representative of who they are as people. My goal as a designer is not to make every home I design look like my style. Rather, I choose to help my clients achieve the space they desire within their own taste and personal style. There is great joy and fulfillment for me in helping others create their dream space.
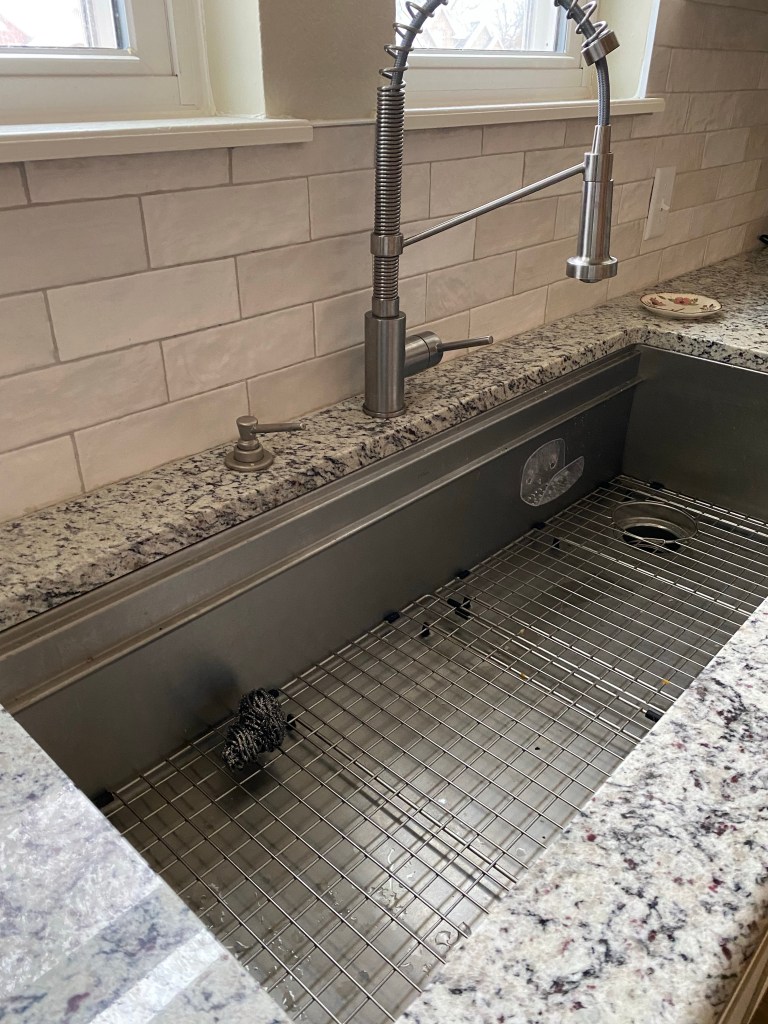
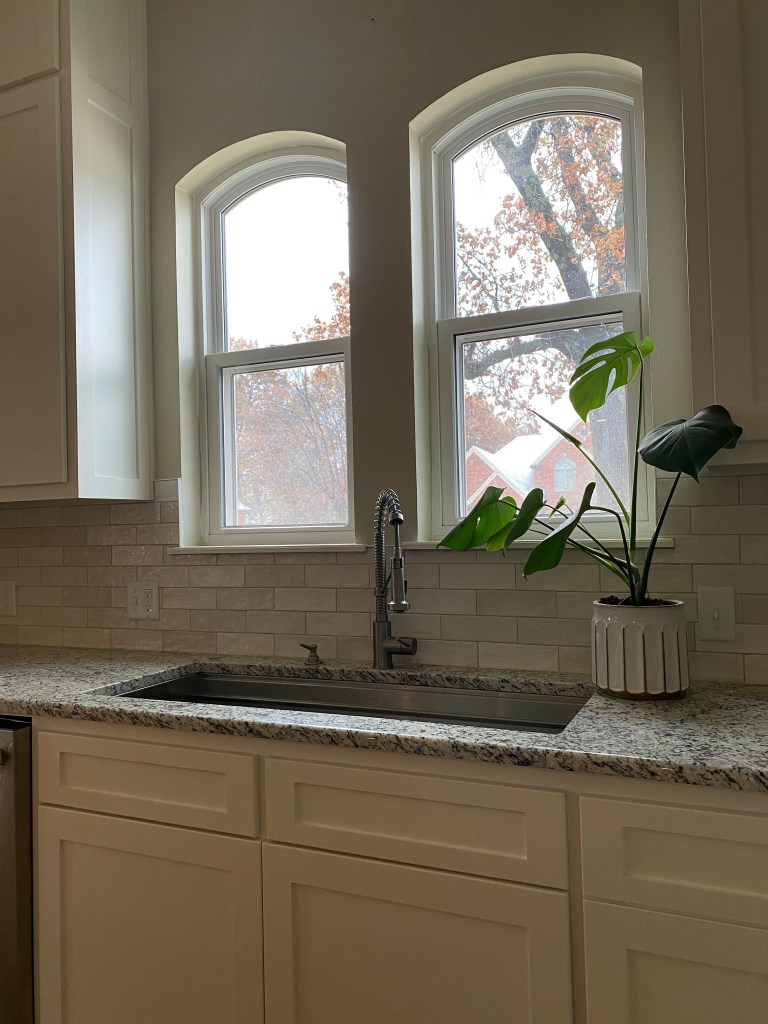
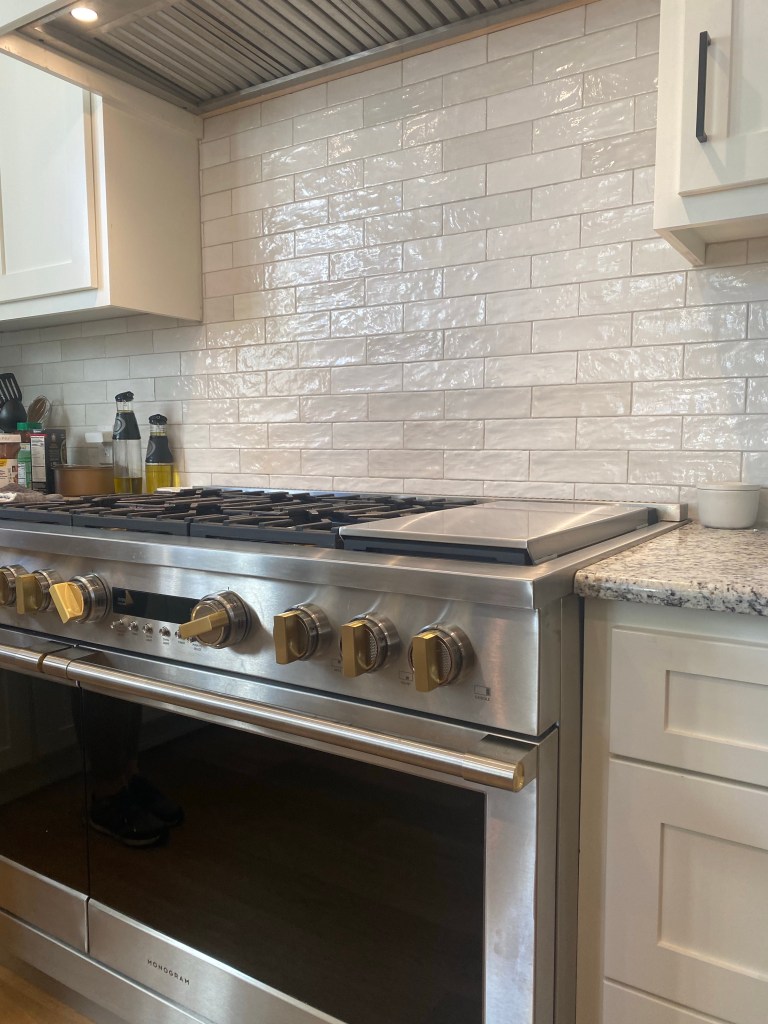
The Marquettes had already shopped for new appliances, and I helped them select this undermount 50/50 sink, as well as new plumbing fixtures. The cabinet hardware that we selected has been a surprising favorite for the Marquette’s. I chose a timeless, sturdy pull and the weight and size of the handles are just perfect.
The ceilings in the home were popcorn ceilings, so Kim did some research and heard that you could have the ceilings skim coated to update them. They hired Five Star Painting to do the skim coating, as well as all the painting, and the result is lovely.
Kim and I came across this purple pansy pendant online and had it shipped over from a small artisan shop in North England. Kim loves pansies because they’re such a strong, resilient flower that can withstand many different types of conditions. It’s such a fun accent piece that adds just a bit of personality and significance to the space.
We added this rectangular island, with electrical and it has been a much needed addition to the space. The cabinets were built and installed by Browns Custom Cabinets. This is certainly not the last time I will work with Browns. The quality and craftsmanship are top notch. Browns was able to work in the space and add some great special features that Kim wanted. See a few videos below of Kim showing us what these cabinets can do. Why do I feel like I’m narrating a scene from Beauty and the Beast? Moving on…
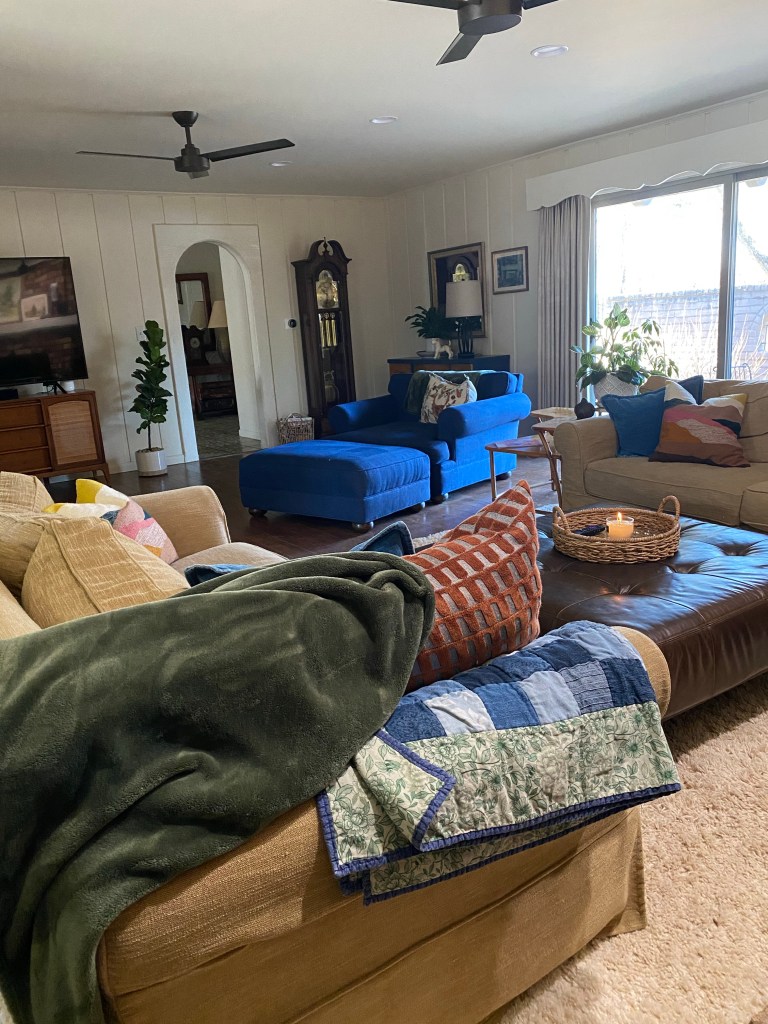
I added a couple pics of the Marquette’s adjacent living room, which was designed mostly by Kim with a tiny bit of help from her friends. Kim has a good eye and a really fun, bohemian style. We worked with a wonderful local seamstress for custom window treatments in both the living room and kitchen. Please reach out to me for her contact info. The fabric is from Fabric Gallery and they were amazing work alongside.
It may appear that this was a quick turnaround, but it definitely was not. The Marquette’s patiently dealt with supply chain issues and other delays. The final result is worth it and they are truly happy with their new space. I hope you like it, too!
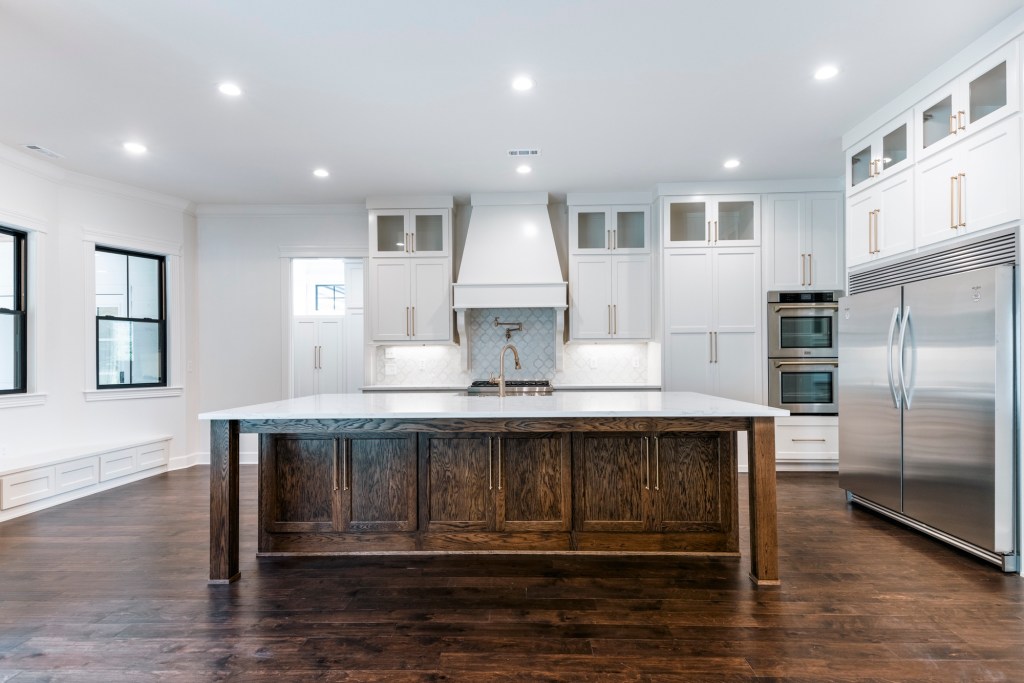
Are you ready for a dramatic transformation? I sure hope so, because this project is one of my biggest transformations to date. Designing the remodel of this space for my friends/clients (frients with a long I, maybe?) was really such a joy!
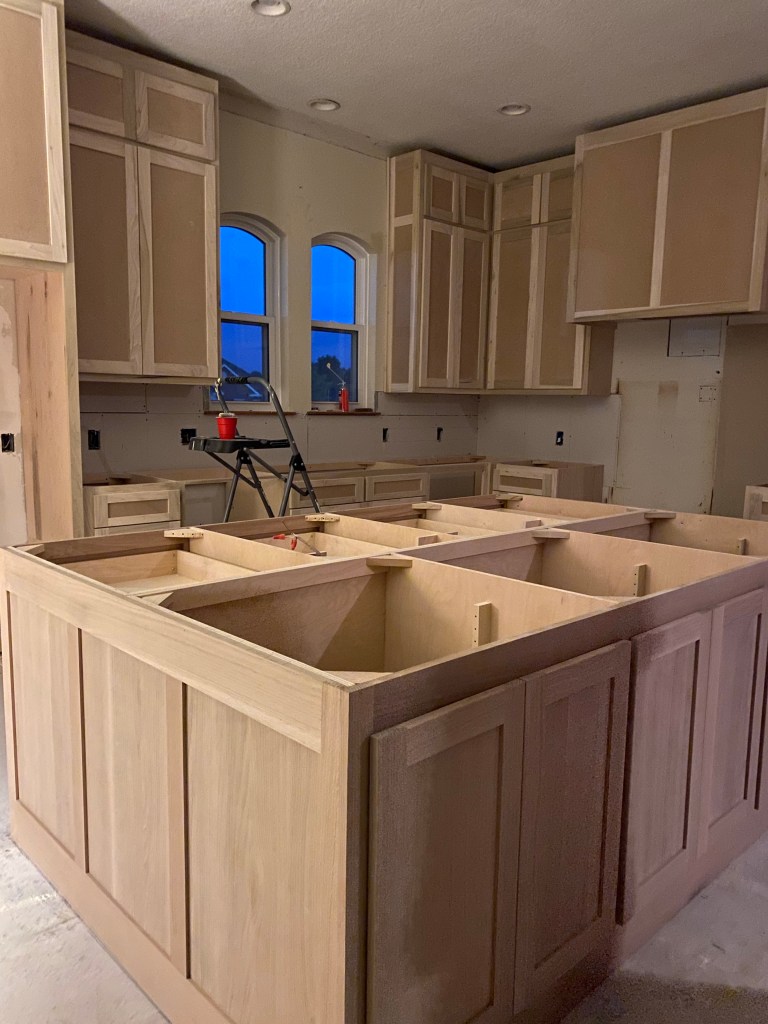
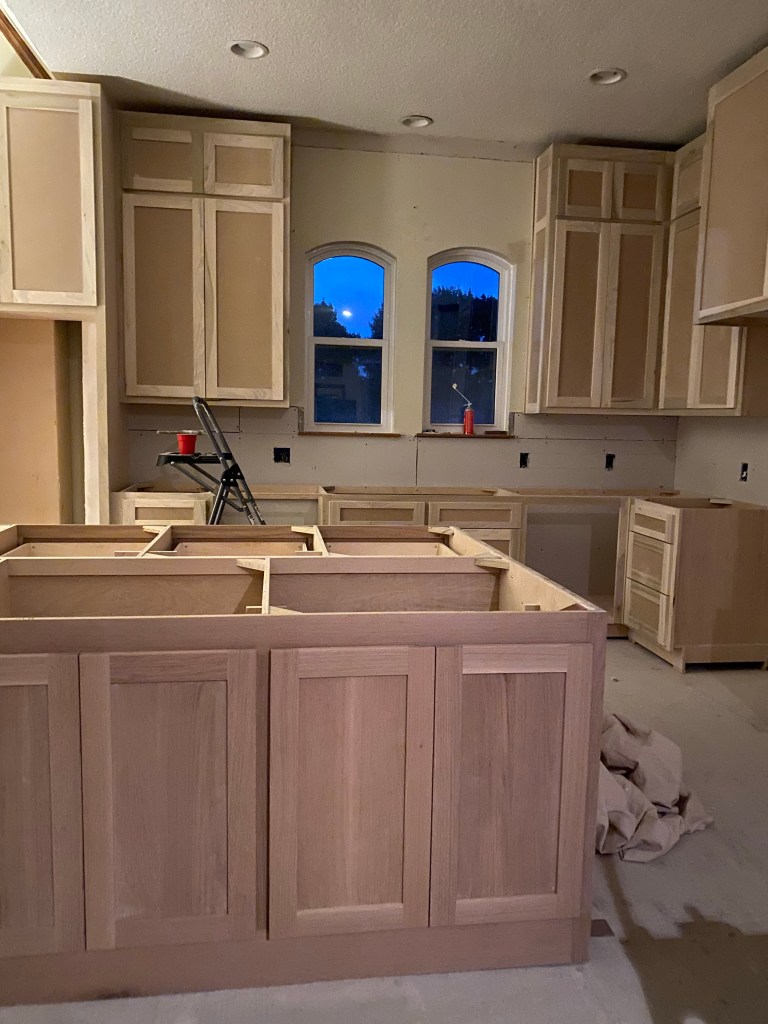
Above is the before picture and below are a couple of pictures taken during the remodel.
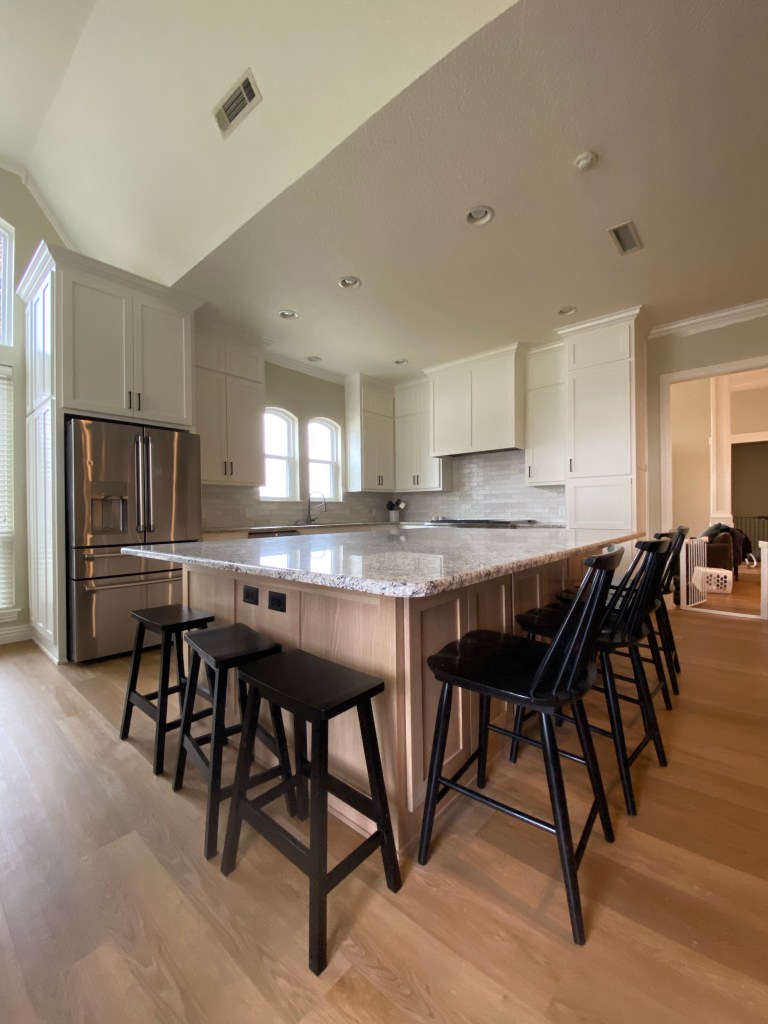
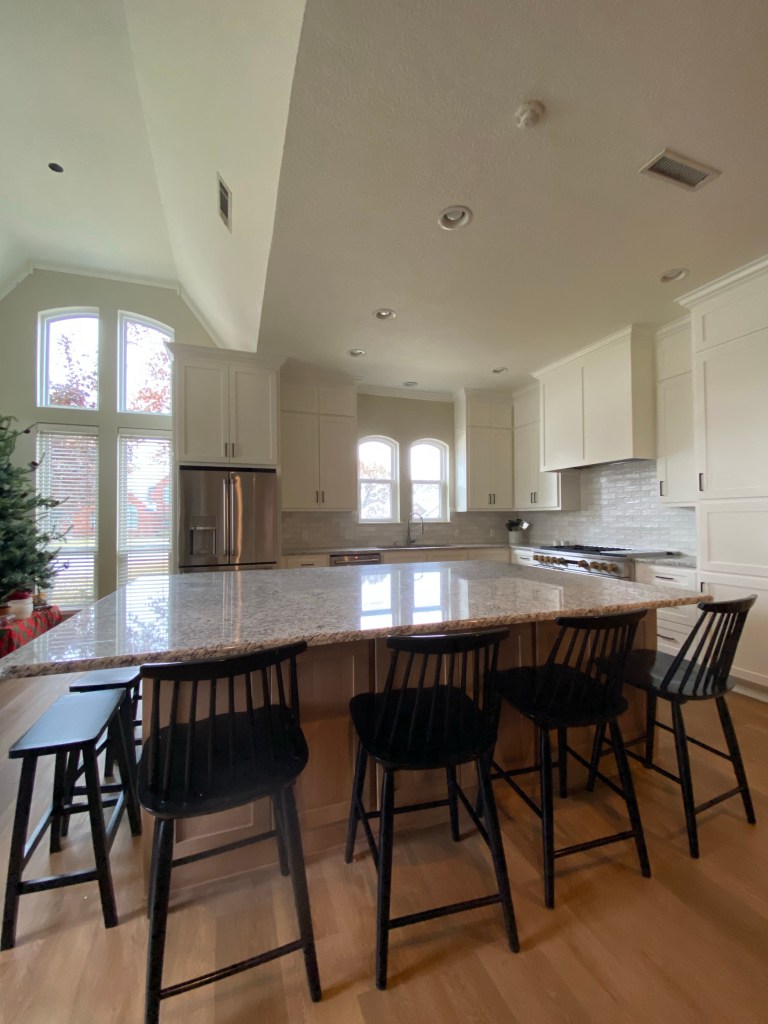
The original kitchen was cramped with two narrow islands that did not accommodate my clients and their large family.
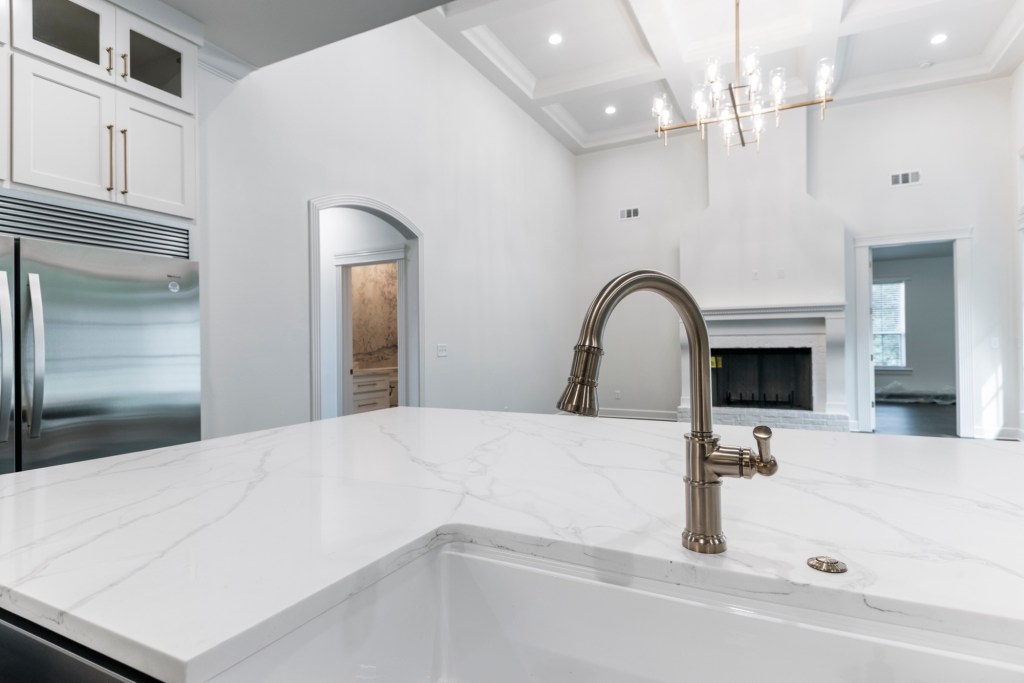
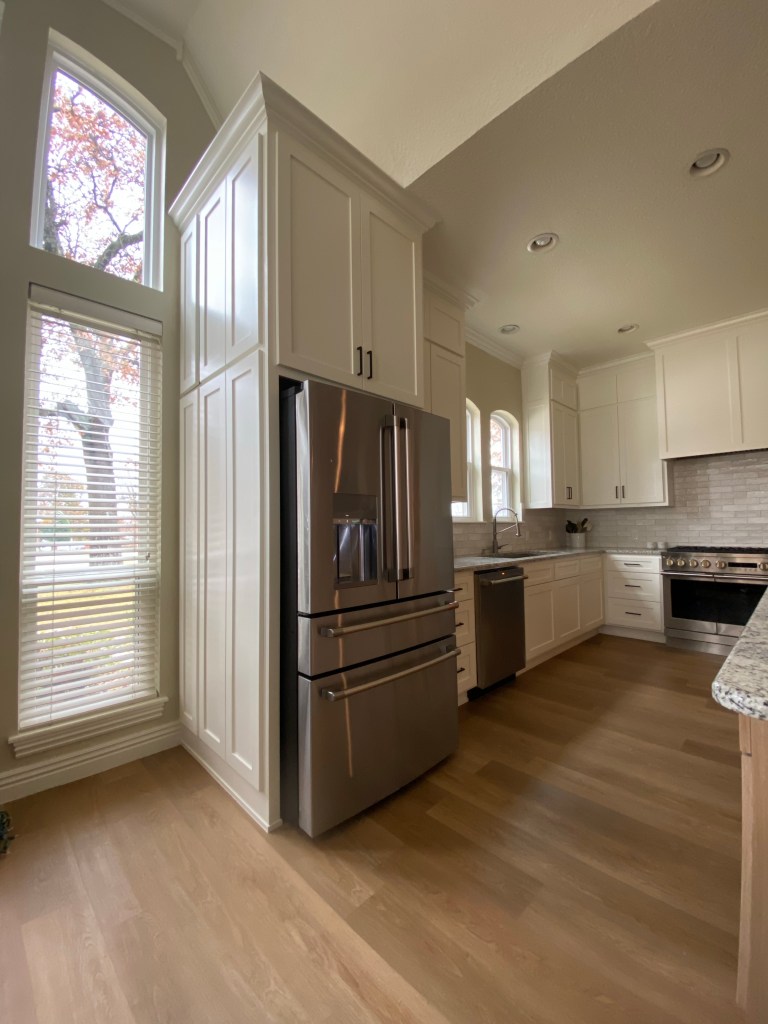
We moved the refrigerator from it’s original space to create a more fluid work triangle. The sink remained under the beautiful double window and we replaced the two small islands with one beast of an island with cabinets on the front and on the back.
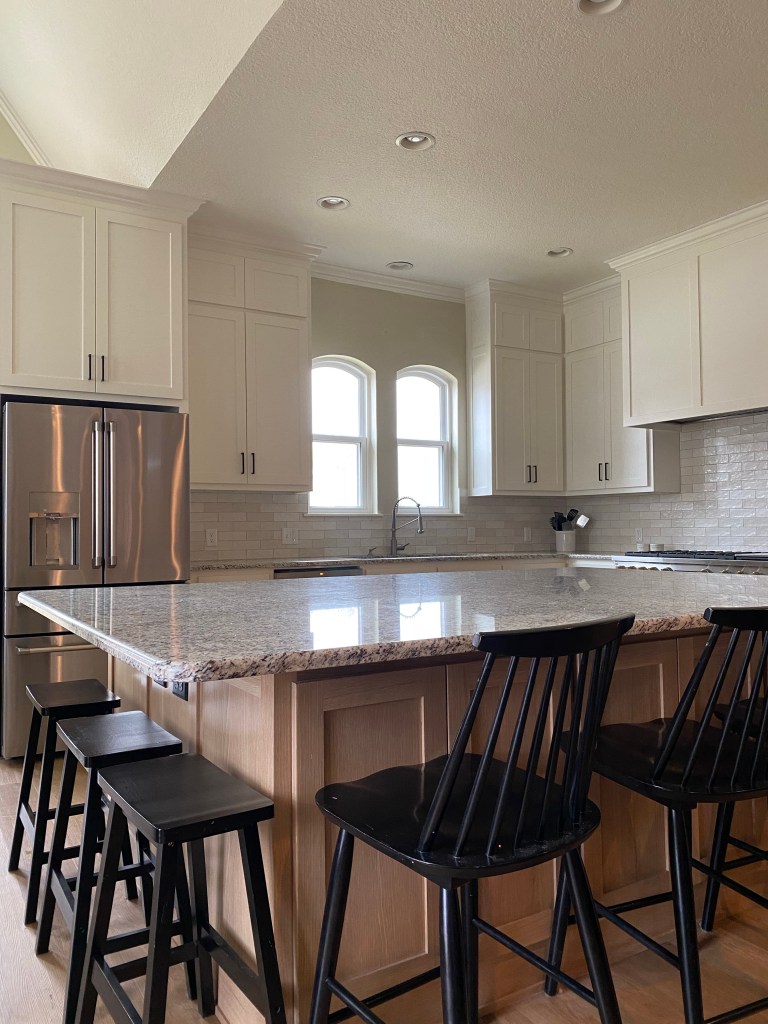
We opted to replace the tile flooring with a high quality luxury vinyl plank because this kitchen and living room area is adjacent to an outdoor pool. The LVP that we selected has a limestone core and is extremely durable in high traffic, and sometimes wet areas. It is the most wood-like LVP that I’ve found and I had lots of help from my friends at ProSource with finding just the right flooring.
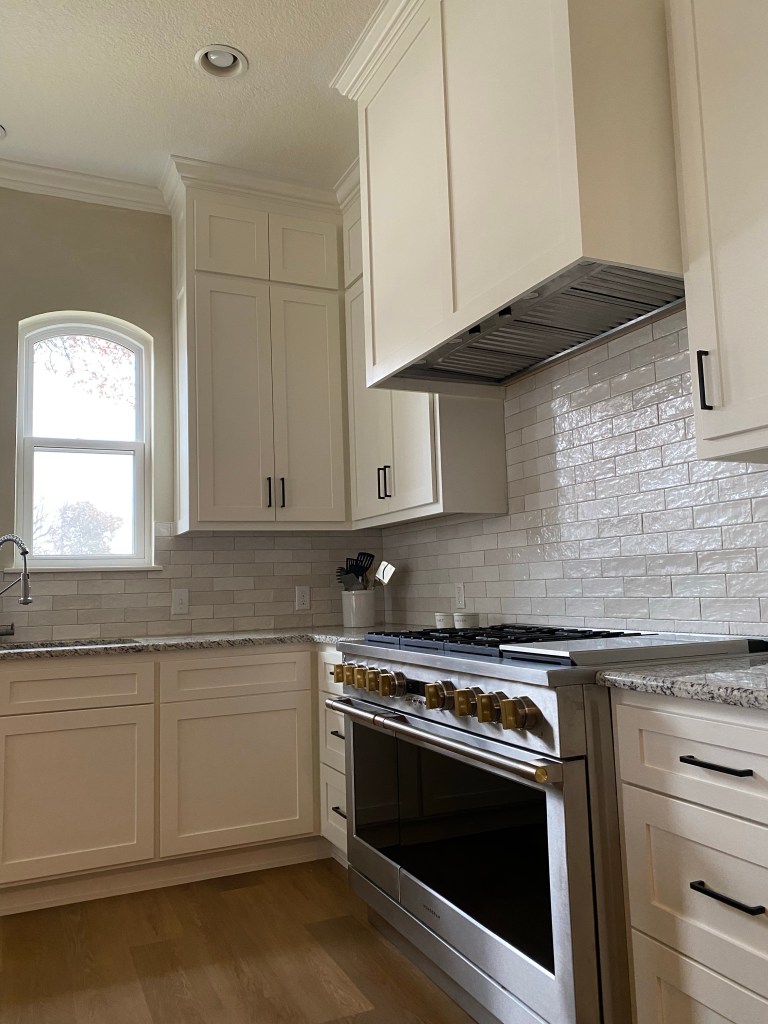
For the cabinets, we chose to paint the surrounding cabinets white and stain the island a natural shade of wood. This combination could not have turned out any better. For the backsplash, we went with an understated, textured subway tile that’s classic and timeless with just a hint of shimmer. My client LOVES her workstation sink, as well as her GE monogram 48” double oven and range.
We used a mixture of hardware, being careful to keep scale and functionality in mind. For the countertops, we went with a neutral builders’ grade granite. Granite is really an unsung hero in the kitchen world. It can handle heat, water, oil and a whole bunch of abuse. Plus, the builders’ grade price is a serious value.
My clients also opted to add a few special features to the cabinetry, as shown in the videos below.
This remodel, from start to finish, took several months and lots and lots of phone calls, meetings and texts with my clients. It was absolutely worth it in every way. I enjoyed being around my clients and their sweet family. Seeing them enjoying their newly designed kitchen is just icing on the cake!
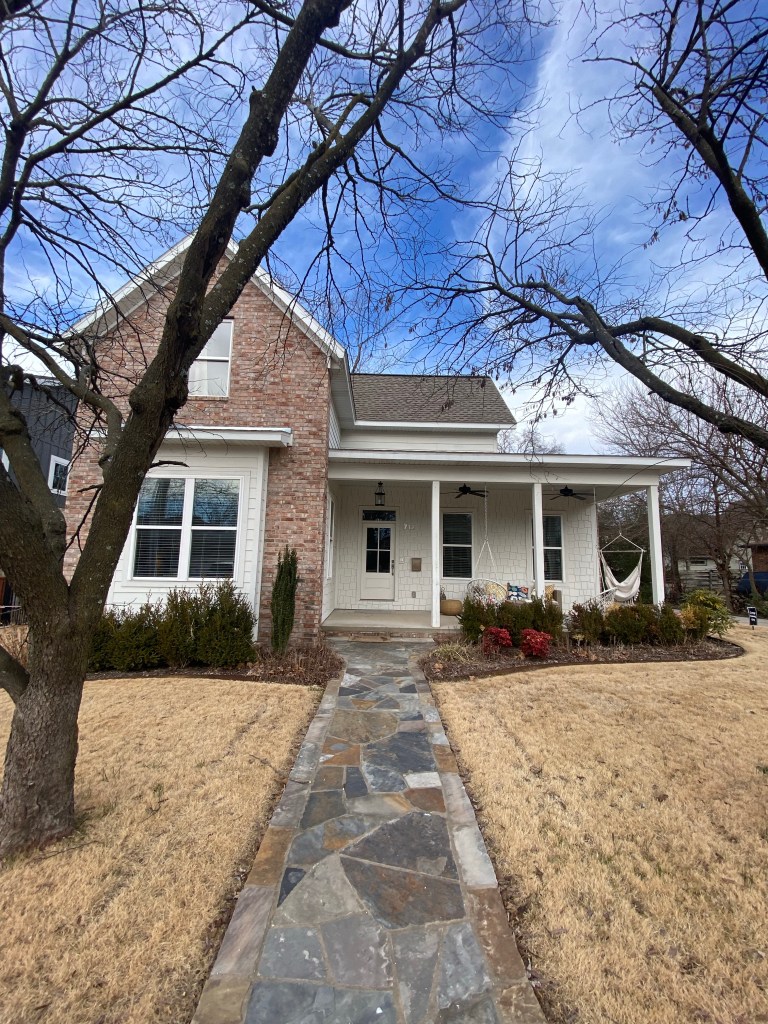
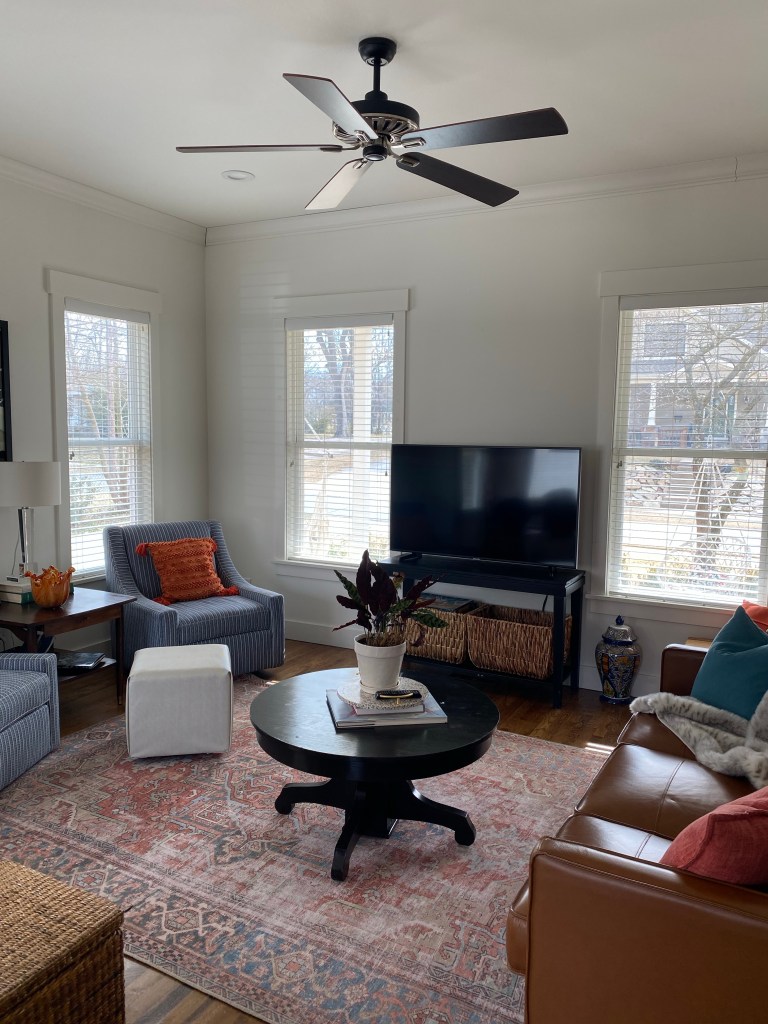
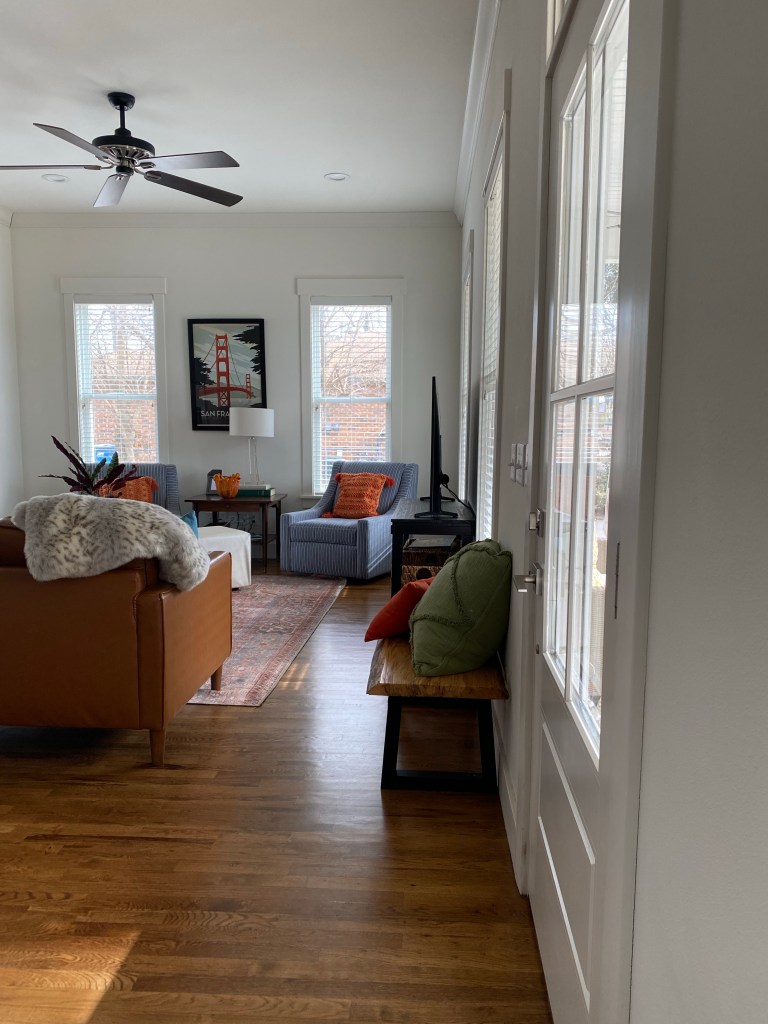
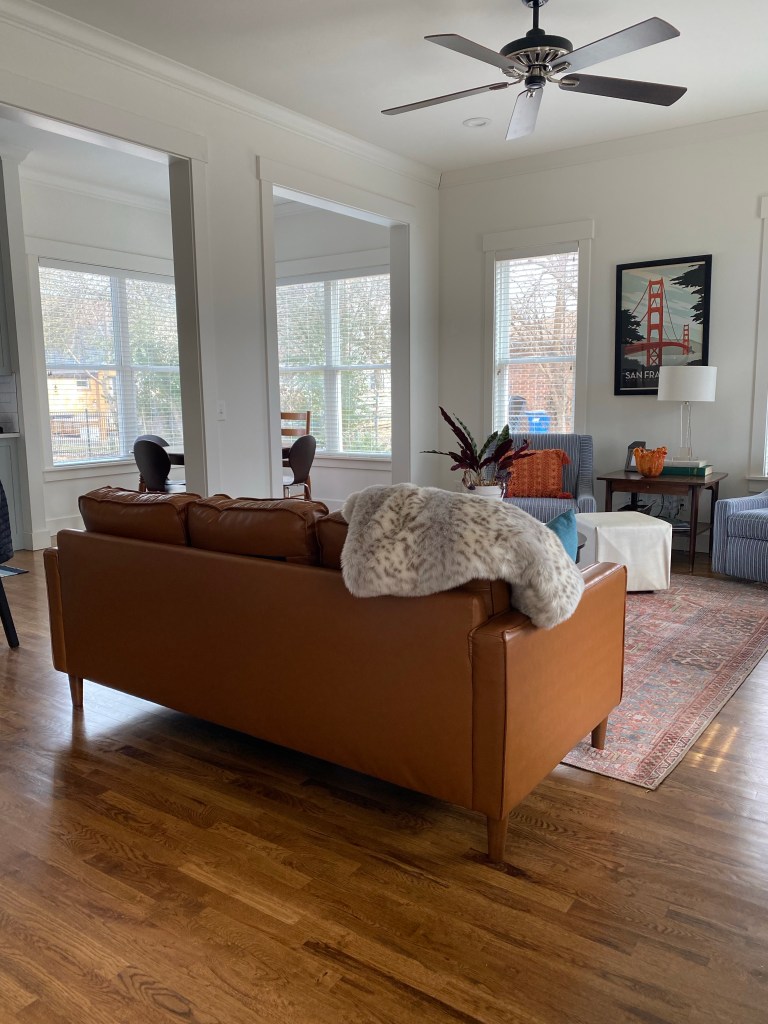
A couple of my girlfriends came into town this weekend for a very belated birthday weekend. We stayed at our dear friends, Mike and Belinda’s, Airbnb in downtown Bentonville. This place was just perfect for our girl weekend!
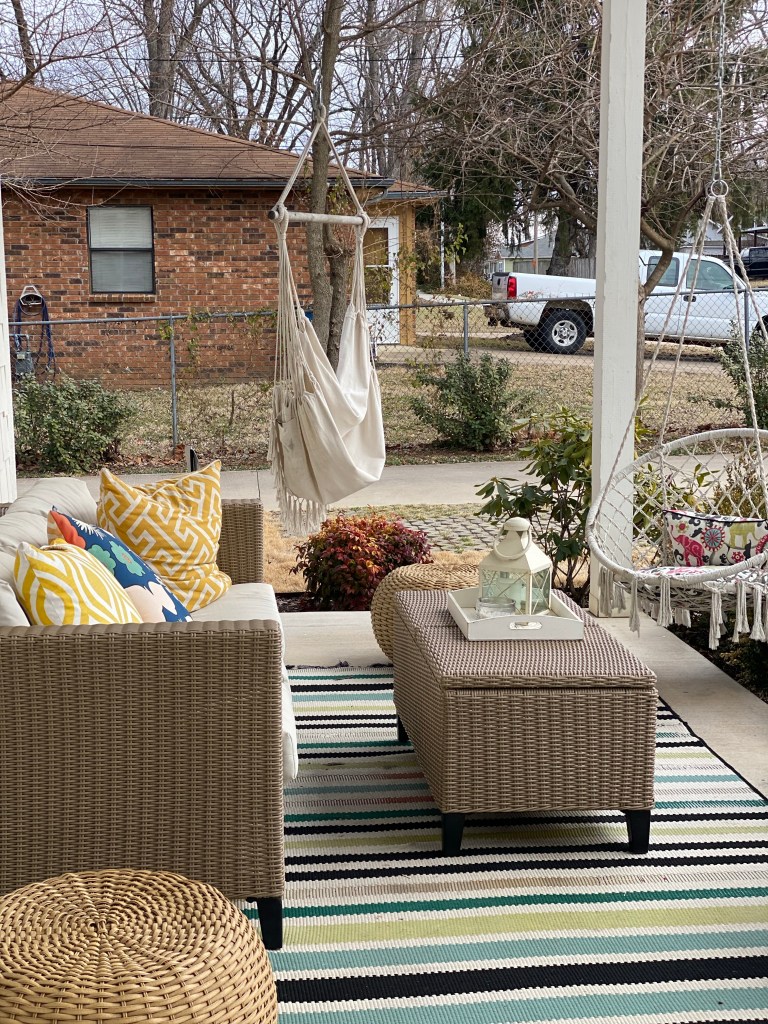
The front porch is the perfect place to sit and relax. It was really cold, so we stayed inside a good bit. We did venture out for a walk to downtown Bentonville from the cottage. The location is perfect…when we walked downtown we saw lots of beautiful homes, shops and the best restaurants.
I love the curated and collected look of this space. Belinda took her time putting the house together and it’s just absolutely lovely.
The house itself is really great for a group. The house has window after window after window, so we just felt like we were all in the most peaceful and beautiful space. Belinda had fresh flowers and plants throughout the house.
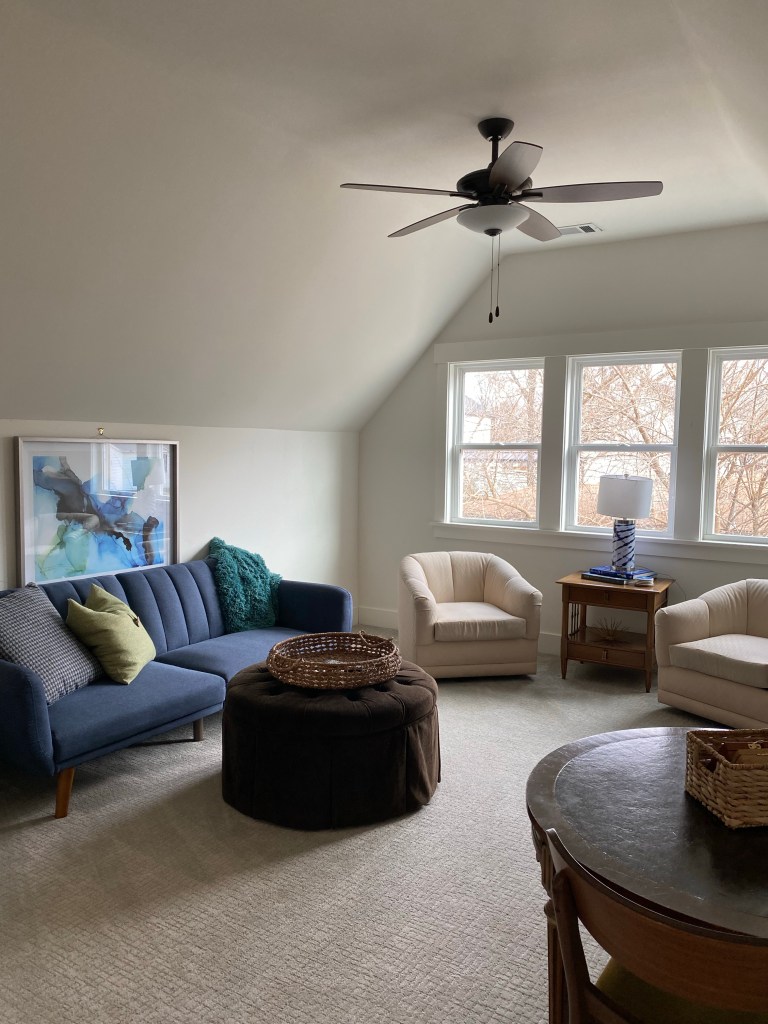
All the bedrooms and living spaces are so well set up. We really loved cozying up in the upstairs living room and talking. I highly recommend staying here if you’re looking for a getaway in a beautiful home. You can go to this link to book the cottage. Let me know if you end up staying there and please tell Belinda that I sent ya!
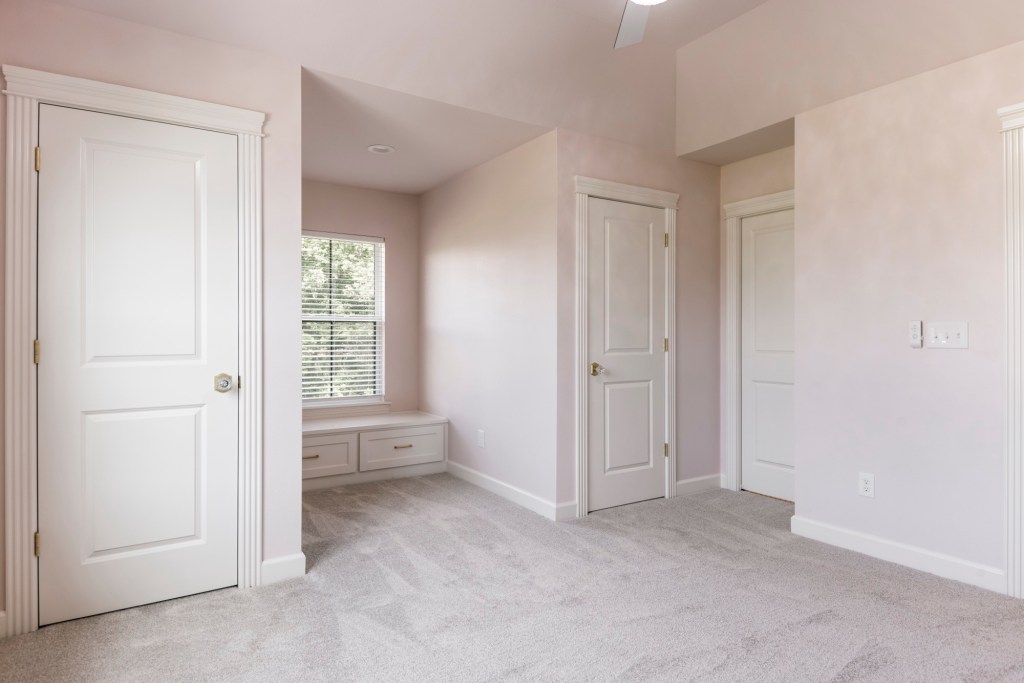
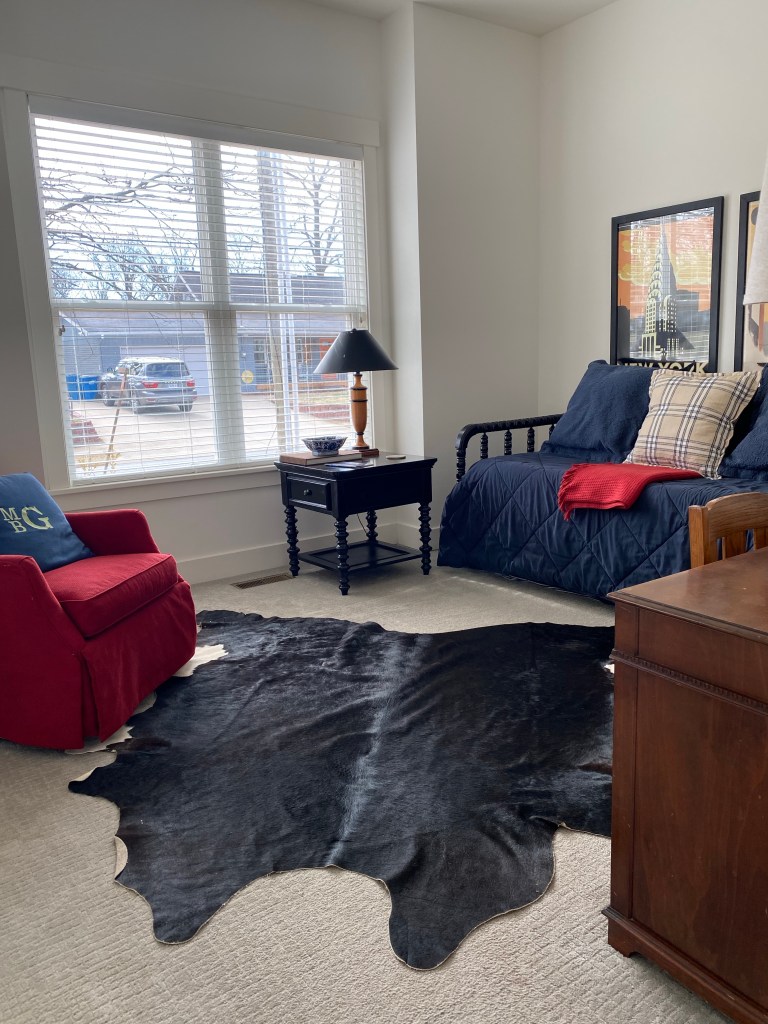
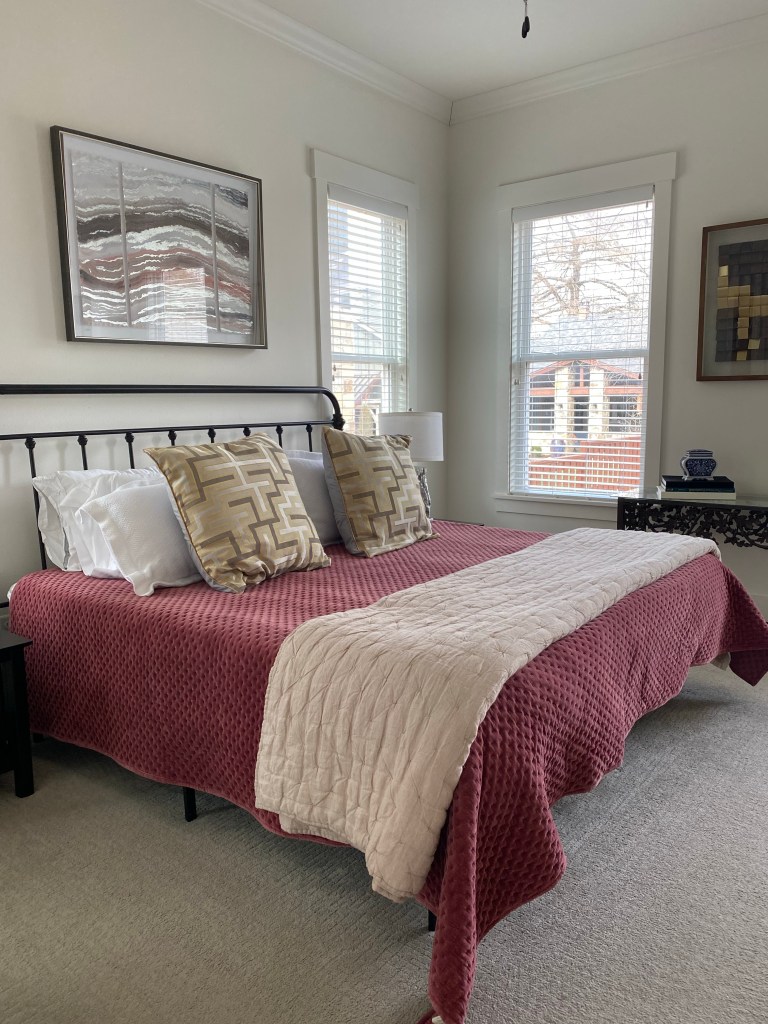
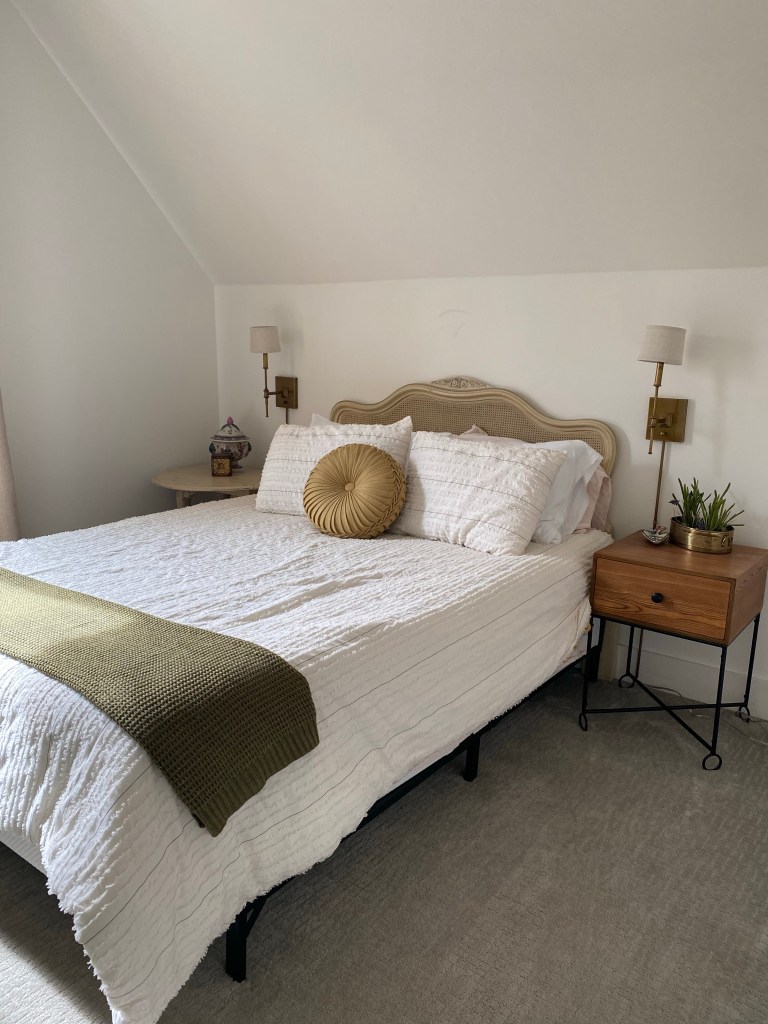
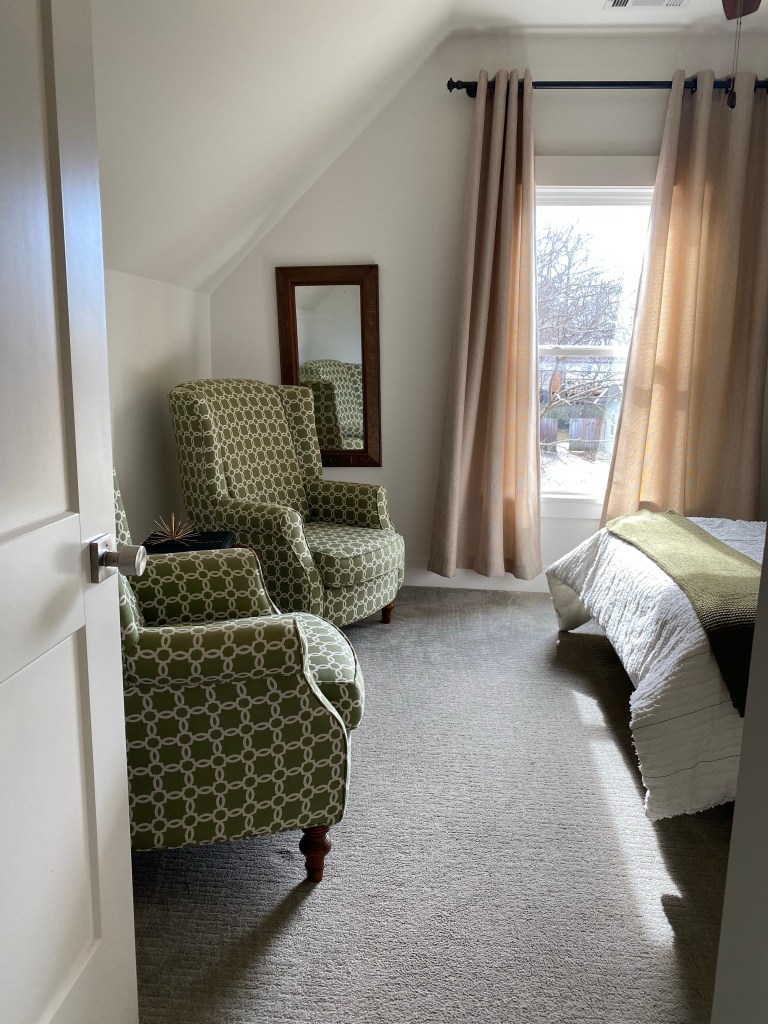
A few weeks ago, I spent a few days with some dear friends while traveling with three of my kids. The entire time I was staying in their home, I felt so relaxed. Traveling with kiddos can certainly be stressful, but this trip was remarkably smooth. As I was driving back home, I started thinking about why my stay was so delightful. I truly enjoyed the time with our precious friends. They made the kids and I feel so welcome and comfortable. I think much of what made the trip so lovely was the guest room where I stayed.
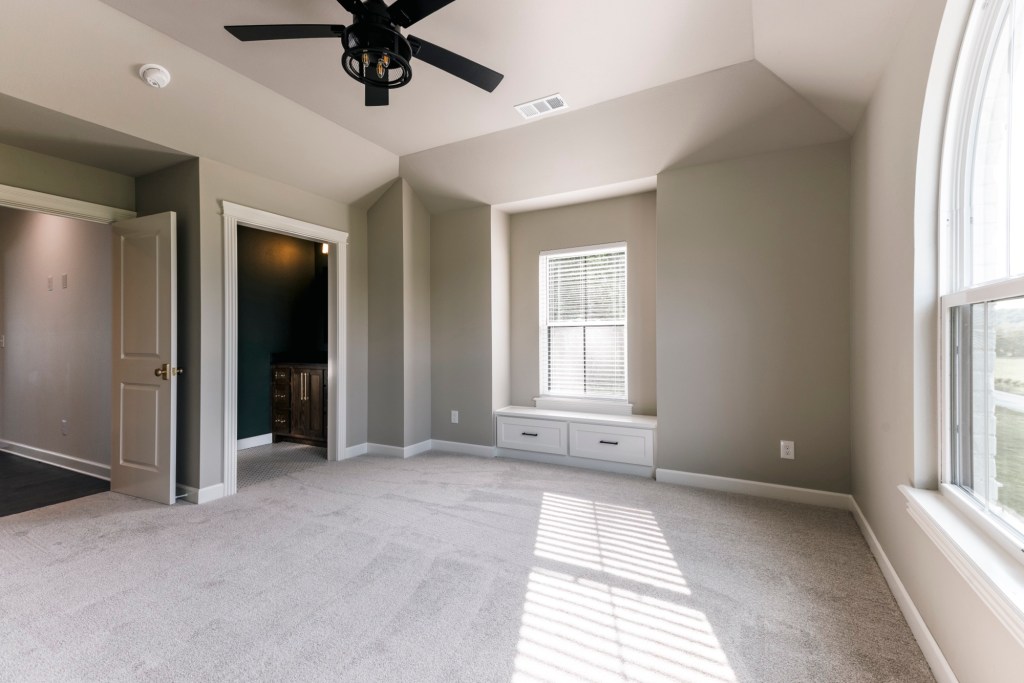
A few things really made the room stand out in my mind. The bed was comfortable and had plenty of pillows and blankets. The sheets were soft and there was a basket near the bed with extra blankets. Nightstands and lamps within easy reach of the bed were a huge plus.
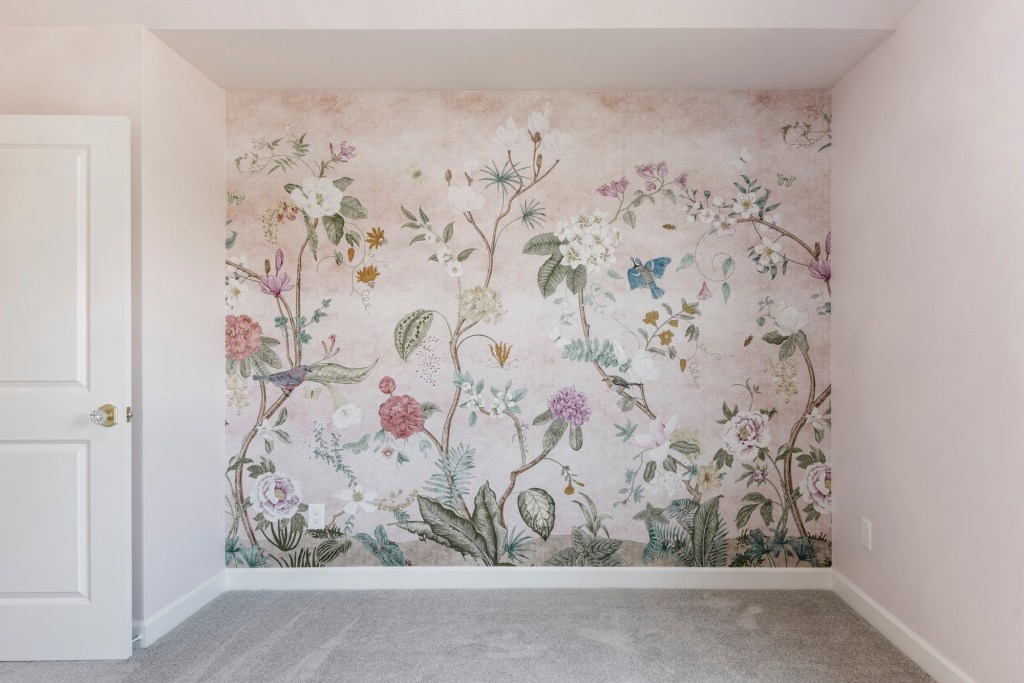
The room was uncluttered. As you can see in the pictures, the room was not at all sparse, but plenty of spaces are left open. I stayed in the cutest bed and breakfast with a bestie a while ago. It had so many knick knacks that we couldn’t find our own things amongst the decor. Having uncluttered spaces to put my jewelry, toiletries and clothes was a game changer for me!
This one is really personal preference, but having window coverings that kept the room dark at night and let light in during the day was surprisingly pleasant. I shared the room with my 8 year old son, so darkening the room at night was essential. When we woke up in the morning, it was so nice to open the blinds and look outside.
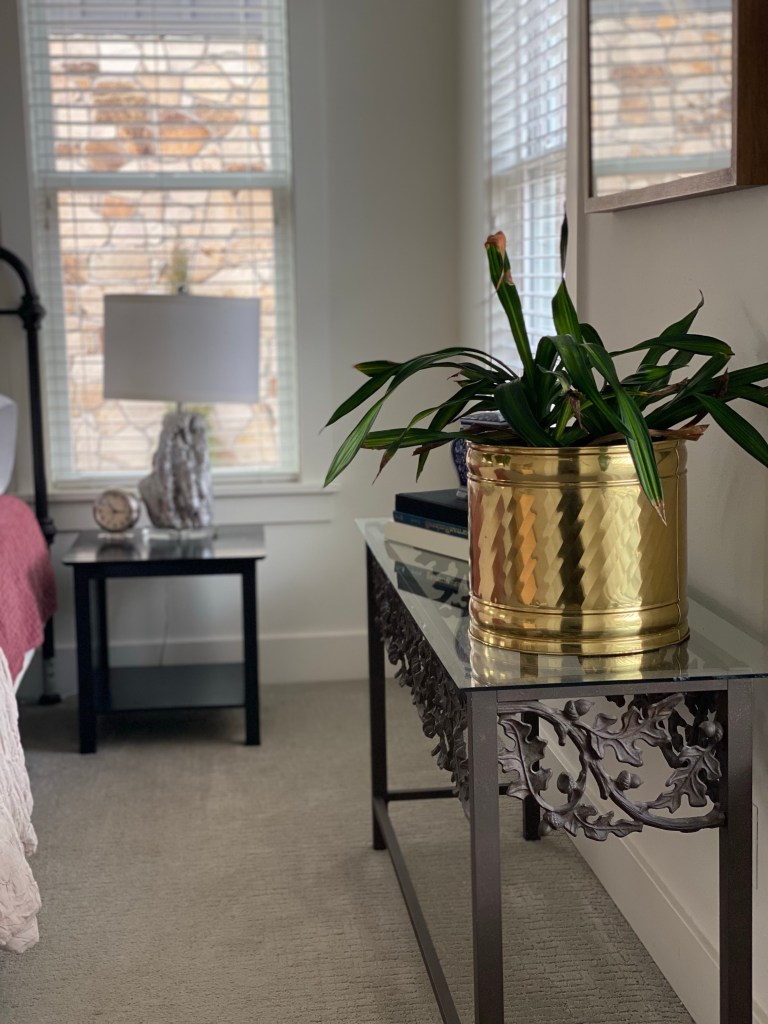
The ensuite bathroom was amazing and fully stocked with fluffy towels and toiletries. Having a bathroom so close was really convenient, especially since I was sharing the room with my little guy. A couple of years ago, my Mom and my Nana came to stay with us for a weekend. I mentioned to them that we were looking for a house. My Nana immediately piped up and said, “Try to find a house with a guest bathroom!” I laughed and laughed. Who doesn’t want to share a bathroom with four kids? 😉
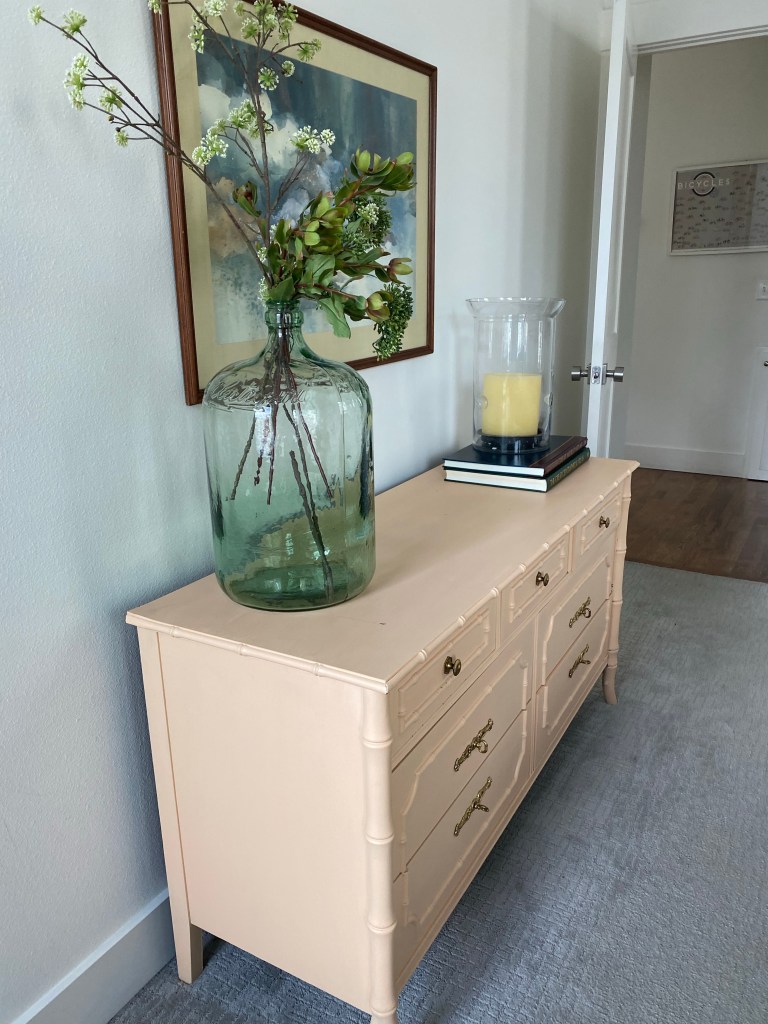
In the stage of life with a houseful of kiddos, I don’t have a designated guest room. But, staying here really helped me see how I can make the room where our guests stay more accommodating and comfortable. When you’re traveling, what makes you feel comfortable? Drop me a comment and let me know!