How to Breathe New Life into an Old Dresser

How to Breathe New Life into an Old Dresser

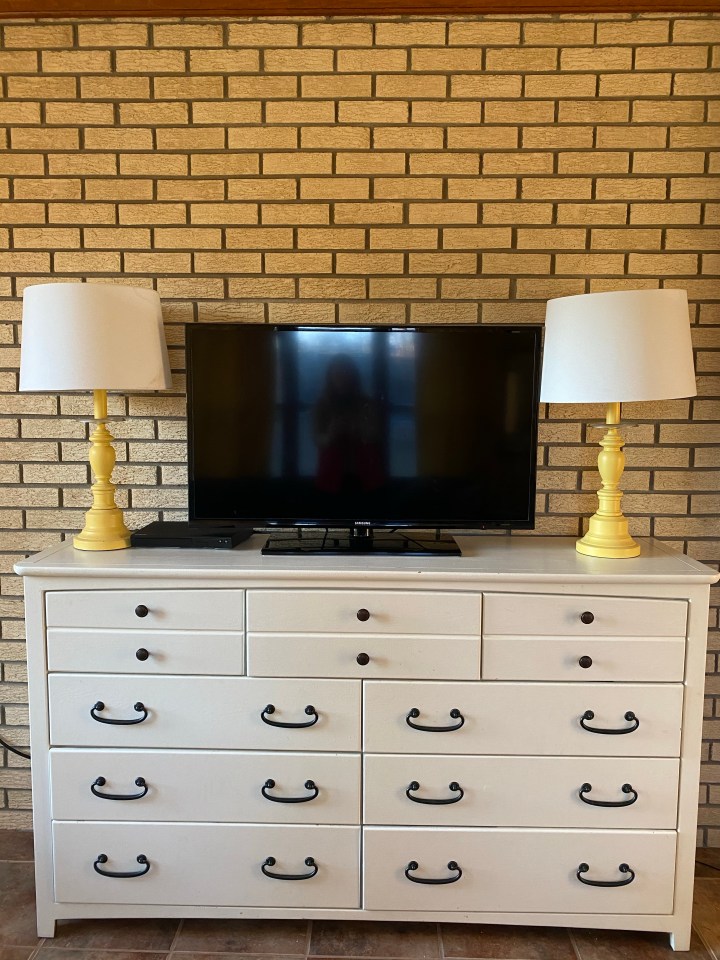
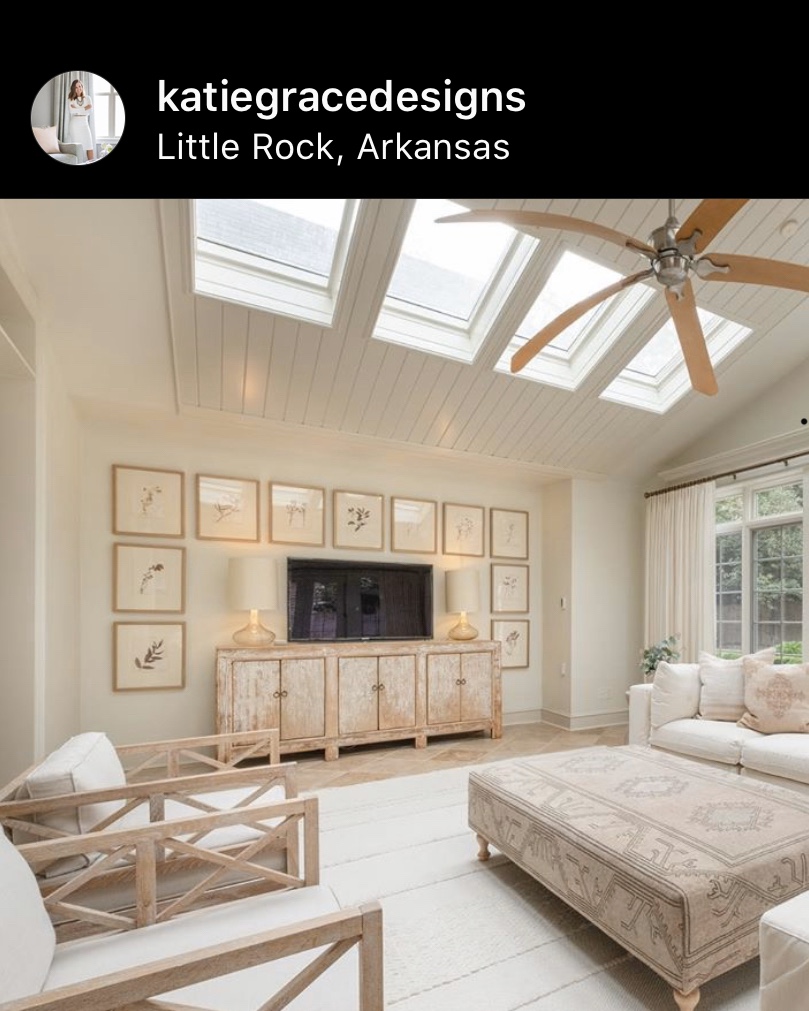
We bought our girls this tallish, fairly long dresser when they were toddlers. As they’ve gotten older, they’ve needed more space, so we bought them two separate dressers and moved their old dresser to the garage with plans to sell it. We’d just moved when we bought their new dressers and I wasn’t quite sure how to configure all our rooms. I was in need of a piece of furniture for our sunroom to hold our TV, some dvds, remote controls and video games. After scouring the internet for inspiration, and coming across the photo below, I realized that the girls’ old dresser would be a perfect fit for our sunroom and it would barely cost me a dime. I changed out the drawer knobs from pink porcelain knobs to oil-rubbed bronze nobs and voila, I had the perfect dresser for our sunroom. Inspiration photo here from one of my fave Arkansas designers:

After using the dresser in the sunroom for a couple years, I realized that at least two of the drawers have been sitting empty for some time. I asked my hubs if he could convert the two empty drawers into one big drawer to use as a filing cabinet. Our current filing system consisted of two hard plastic file boxes that are on a shelf in a closet. As you can imagine, this filing system isn’t user friendly and our paper clutter has been piling up and driving me batty.

The two bottom drawers on each side of the dresser looked like this before my man converted one side of the drawers into a single drawer to hold files.

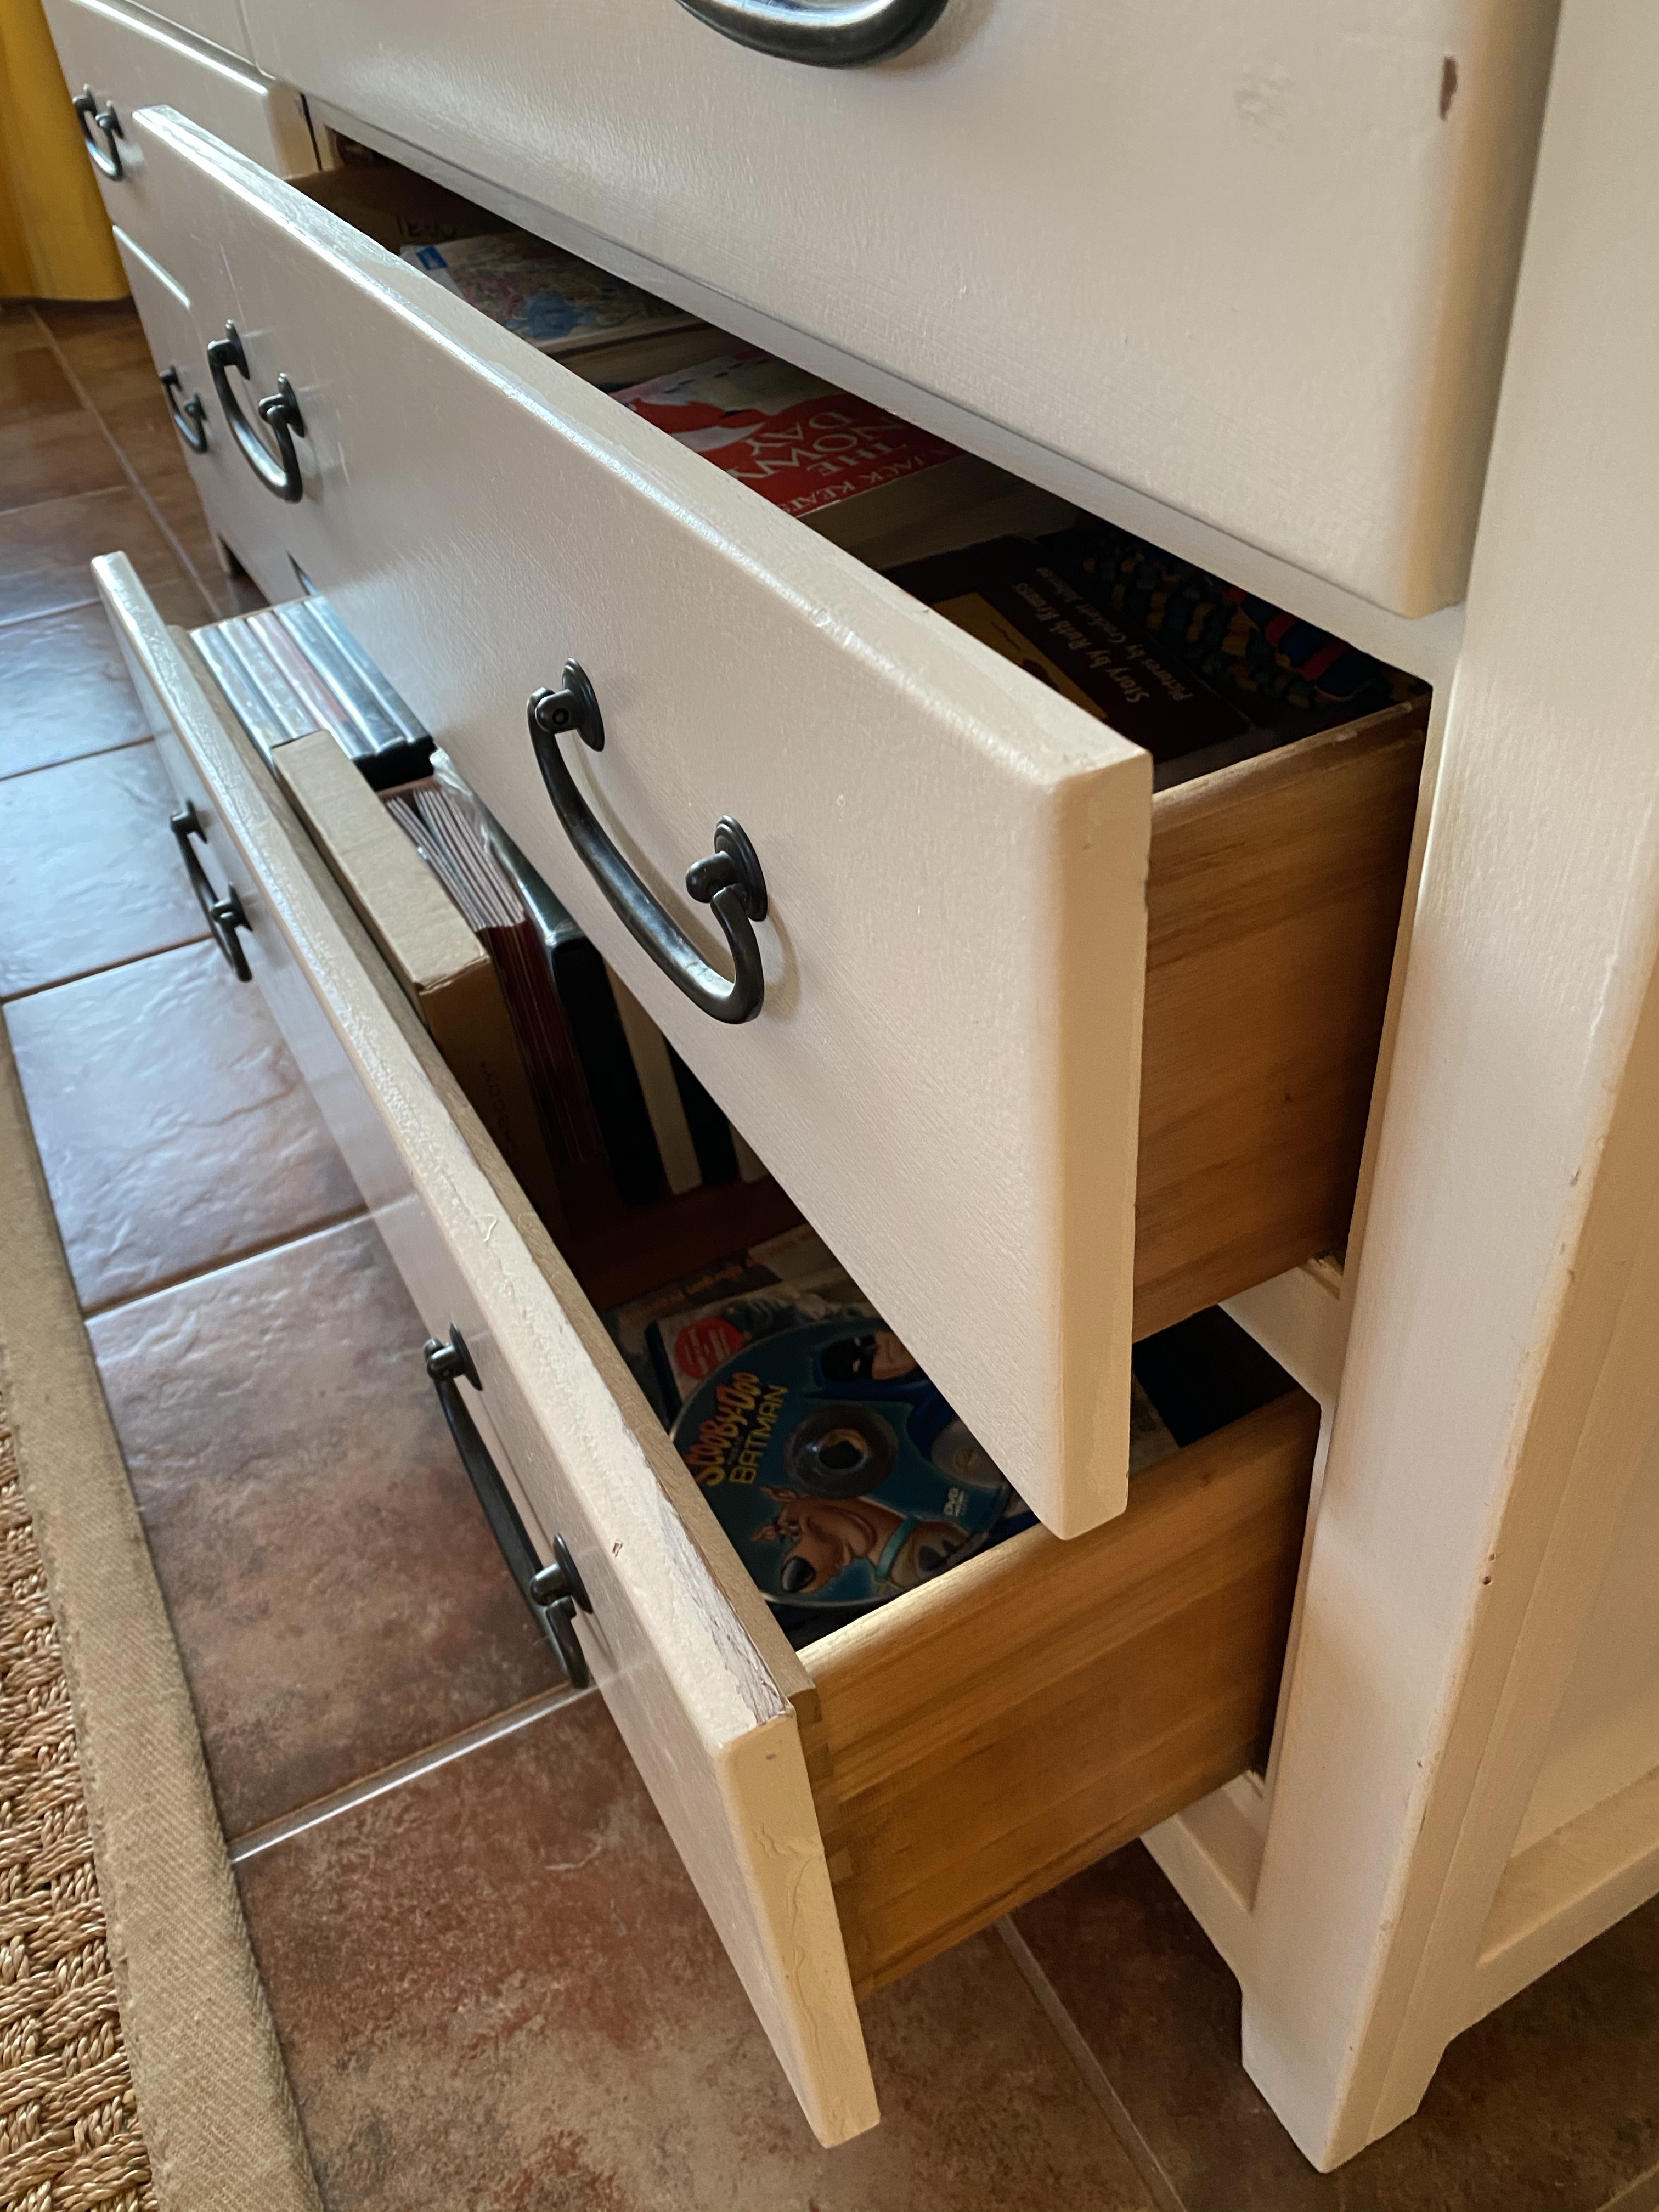
In order to convert the dresser drawers into one drawer, Justin removed the drawers from the dresser and then removed the screws that attached the drawer faces. He then built one large drawer box using half inch plywood and used pocket hole screws to assemble the drawer box. He bought heavy duty glides for the drawers and installed them onto the side of the drawer and the inside of the dresser. To hold the files, we bought this metal file frame at Office Depot. I went through my files while watching Taylor Swift’s Miss Americana on Netflix…the documentary was so good and it definitely made going through my files more fun. I used this article for reference.

Above is the file drawer with the frame in it and a few hanging file folders.

This little project has brought so much ease and organization into my home. Being able to get to my files quickly without having to squat down on the floor of a dark closet and dig through one of two file boxes is a game changer!

For reference, this dresser was originally a medium brown. I sanded it a little bit, primed it, painted it with one coat of flat paint by accident and then went back over it with one or two coats of semi-gloss latex paint in China White by Benjamin Moore. The finish has held up well for quite a while, in spite of my very imperfect paint job. 🙂

Our Kitchen Renovation, Part One

Our Kitchen Renovation, Part One

When we bought our house in 2016, I knew the kitchen needed more than a little bit of help! With shiny-orangey brown cabinets and a backsplash straight from 1984, we’d walked into the perfect setting for a renovation. 

After adjusting to a new city and new schools for our kiddos, we finally got around to painting out cabinets in May of 2018. We used Sherwin Williams Extreme Bond Primer and ProClassic Paint. I chose to have Sherwin Williams color match China White by Benjamin Moore for the paint color. We painted and primed the cabinets by hand, but we used these brushes for the top coat. The finish is very smooth and looks good! My only regret is that we didn’t let the paint cure for more than a day or so, and the paint is pretty chipped in some places. Moving forward, I’ll let cabinets painted during a humid Arkansas summer cure for a few days before reinstalling them. We opted to keep the current brass hinges and replaced the cabinet pulls with these lovely little ladies from Amazon. 

My hubs had a couple weeks off at the end of 2019, so we began tackling the rest of our kitchen renovation. Here’s what we’ve done so far:

  • Removed the backsplash (and the sheetrock that it was adhered to!) 
  • Removed a large bank of cabinets that was sitting on the counter and using up too much of my counter space
  • Hired an electrician to replace all the plugs and bring them up to code
  • Hired an electrician to update all the can lights and add one new one

On the docket to finish our renovation: 

  • Re-install the sheetrock so that the backsplash can be replaced
  • Order new countertops and backsplash
  • Order new sink and faucet
  • Schedule installation of countertops, backsplash and sink
  • Build and install open shelves to replace the bank of upper cabinets that were removed
  • Build and install shelves to replace an unused desk area directly behind the sink
  • Remove a randomly placed celing fan
  • Move the smoke detector just a smidge farther away from the stove so that I can cook dinner without being serenaded by the smoke alarm. 🙂 
  • Paint the ceiling…this little job was made necessary by an overzealous bottle of kombucha that exploded all over my kitchen. 

When it comes to DIY projects, we certainly don’t work at a fast pace. I’m enjoying the process that comes with updating our kitchen and I’m thankful to have you all follow along with me.