
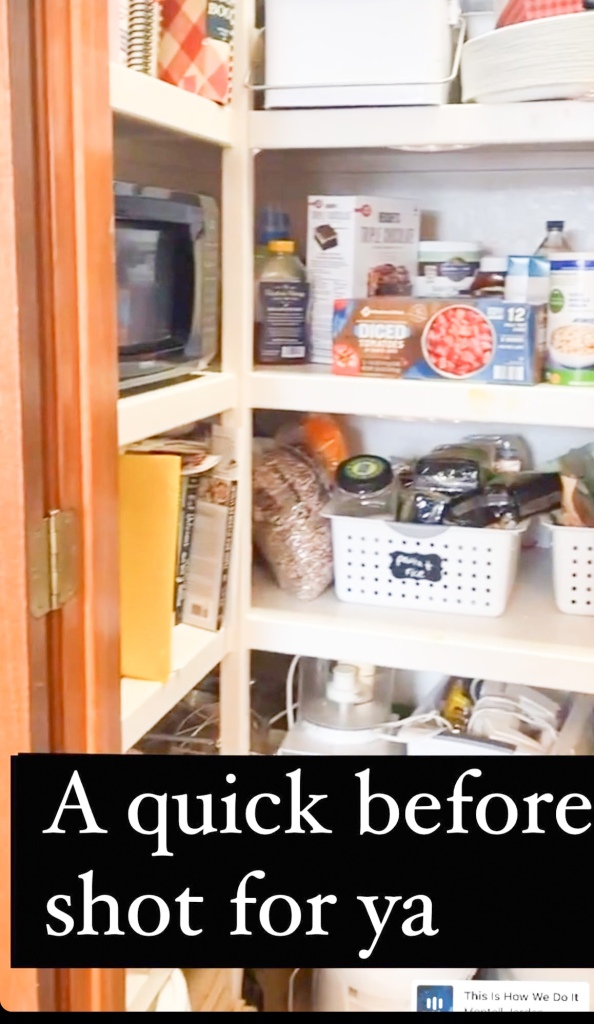
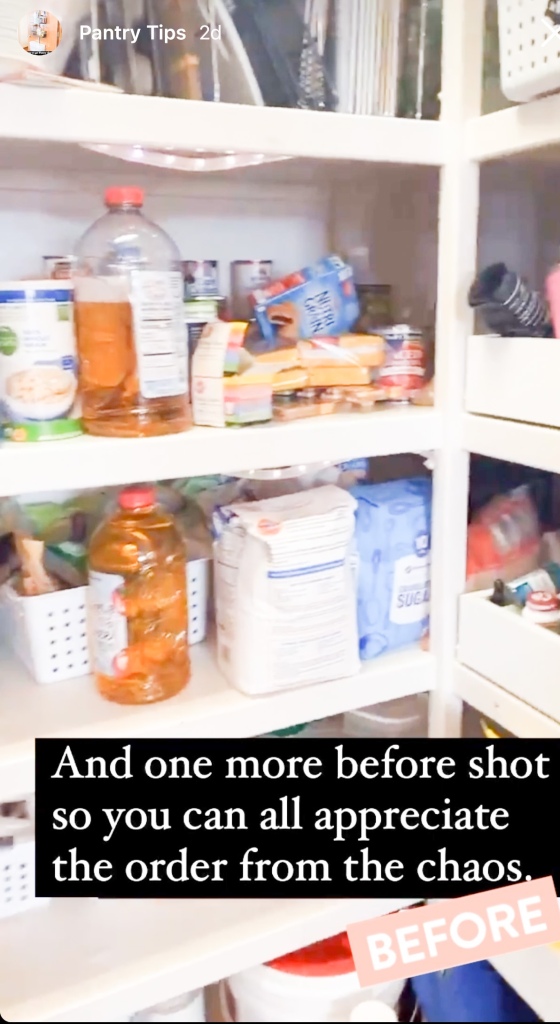
My hubby and I spent some time decluttering and reorganizing our pantry over the weekend. I love a good before and after, so here are a couple of very rough before photos taken straight from my Instagram stories.
Step 1: We unloaded each shelf, one or two shelves at a time. I didn’t empty the entire contents of the pantry all in one fell swoop. The goal of this project was to create more peace and organization. I knew that if I unloaded the entire pantry and covered every single space of my kitchen and dining room with the items from the pantry, I’d get overwhelmed. First, I took out all the cookbooks and went through them. I wiped down the cookbook shelves and put the cookbooks back. Next, I took all our paper plates, plastic cups, and basically any disposable product out of the pantry and organized them. I wiped down the shelves where they had been stored and put them back.

Step 2: We went through each group of items that we’d removed from the pantry. We dedicated one area of our kitchen as a space to put things that will be donated and placed unused items there. As we worked, Justin would bag things up from this area and take the bags to the garage to eventually donate. We were snowed in during this project. We would typically put the bags of items to donate directly in the back of my van so that I could donate them as soon as possible. That little trick actually helps me a ton. I really don’t like having random bags in the back of my van, which motivates me to take care of donations quickly.
Step 3: We wiped down the shelves and bins that were holding the items we’d gone through. I honestly didn’t think I’d do this at first. I like to think I’m a fairly clean person and felt that I was maybe a bit above needing to wipe out the shelves of my pantry. Pride comes before a fall…the shelves and bins needed to be cleaned out in a bad way!
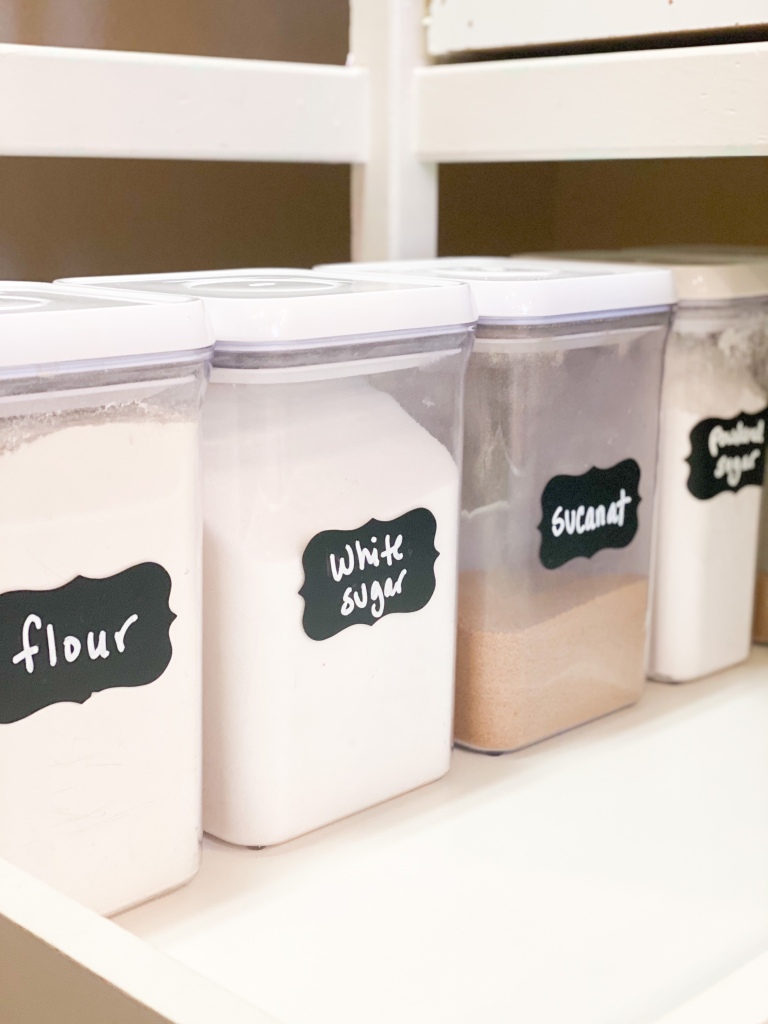
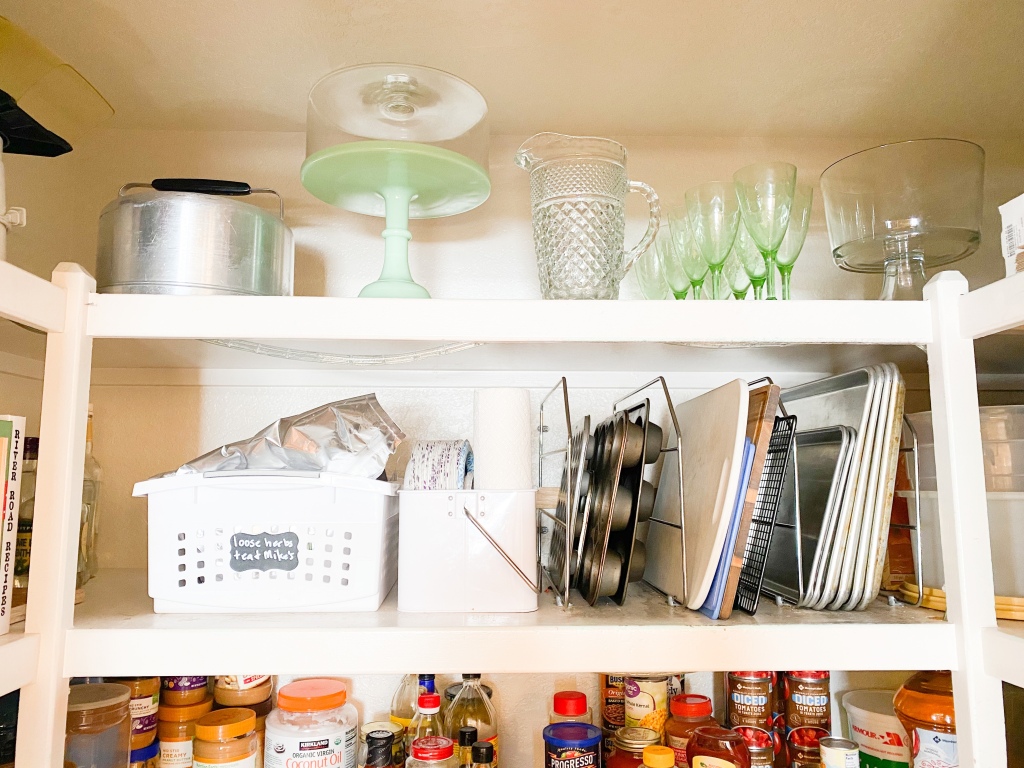
Step 4: We put everything back in a way that functions well and looks good. This final step is key! To help your storage space make sense, it’s good to group similar items together. I try to keep canned goods, glass bottles and condiments all on one shelf, but in separate groupings. Storing all of my baking supplies in one space brings great efficiency to my pantry. I love these Sterlite bins for open storage, these Oxo containers for baking supplies and this set of chalk markers and labels to keep it all labeled. If you have some serving pieces that you’d like to see, put them on shelves that you can see when you open the door. I stored my cake plate, a vintage cake carrier, some family heirloom wine glasses and a glass trifle dish on my top shelf so that I can see them whenever the pantry door is open. What I don’t see every time I open the door, are two shelves stacked with not-so-pretty large storage containers that I use often. I like that they’re easily accessible, but they’re not in my direct line of sight. We also keep our microwave on one of the side shelves of our pantry. This is purely a personal preference, but it’s a big priority for me and I’ve had my microwave in the pantry of all our homes. I like being able to use it fairly easily, but I don’t want to lose counter space, or over the oven space to a microwave.

Finally, there are a few things that my husband and I do to help us stay on the path to productivity when taking on a big project like this. First, we really try to start early in the day so that we can finish the project by dinnertime, or even bedtime that night. I don’t know about you, but a cleaning project that takes multiple days is not my cup of tea. Secondly, we each take breaks as we go. Our kiddos were in the kitchen just a chitty-chatting with us during this entire process. We both needed to step away from time to time so that we could have patience with the kids and get back to work with renewed energy.

Another thing that really helps me to stay sane and productive when doing projects at home is to not compare my home to others. My home doesn’t need to look like the cover of a magazine. I do love the look of a perfectly appointed pantry, with every single thing decanted and in matching bougie bottles, but that’s just not my reality. I have four kids who are all learning to cook right now. I often cook three homemade, from scratch meals on the daily. I don’t have the time or energy to stop them and say, “oh honey, please empty that dried pasta into the breakable container that’s labeled in Italian, okay?” Maybe that will be my reality someday. When I’m an empty-nester, you can all come and look at my pantry and ask me how I made it so perfect. I’ll tell you that it’s because the kids moved out and quit needing all our money and emotional energy. And one final tip on how to get a big ole project like this done is to try to laugh and have a good time. I know that sounds so cheesy, but it’s true! There are plenty of stressful moments, just ask our kids, but we’ve found that if we can laugh at and with each other, we have more fun and are more productive. Here’s the final after shot of our pantry clean out. Drop me a comment below and share any tips that help you conquer the big projects in your home!

