Bent Tree Remodel

Hey, hey! Y’all prepare yourselves for an amazing transformation! Before I go into all the deats from this remodel, feast your beady little eyes on this after pic and scroll down for the before.

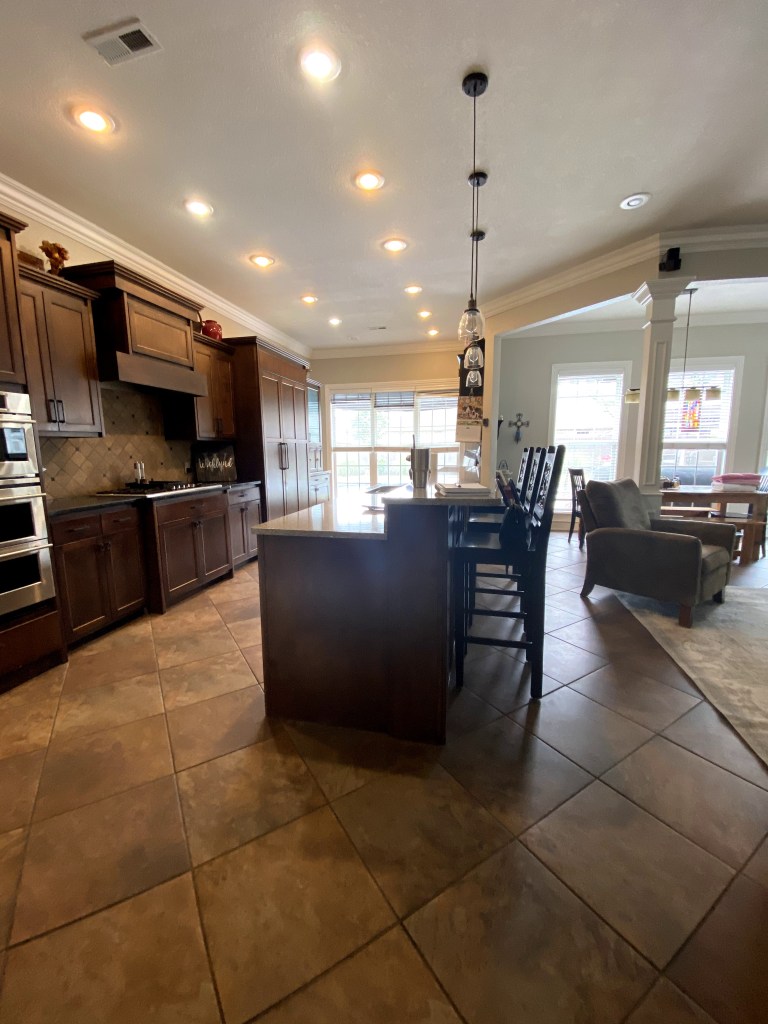
One of my favorite things about being a designer is the relationship I develop with my clients. I didn’t know this sweet family before showing up for a design consultation and we quickly became friends. They were down to earth and funny. They had updated their kitchen and family room several years prior without the help of a designer. As time went on, they didn’t like the dark look of things and how chopped up the space felt. We opted to unify the flooring between the family room and adjacent living areas with a Shaw engineered hardwood from ProSource in Rogers, Arkansas. It’s worth noting that ProSource offers high end products at extremely reasonable prices and this flooring is a great example. Here’s another before picture to give you an idea of how the space felt.

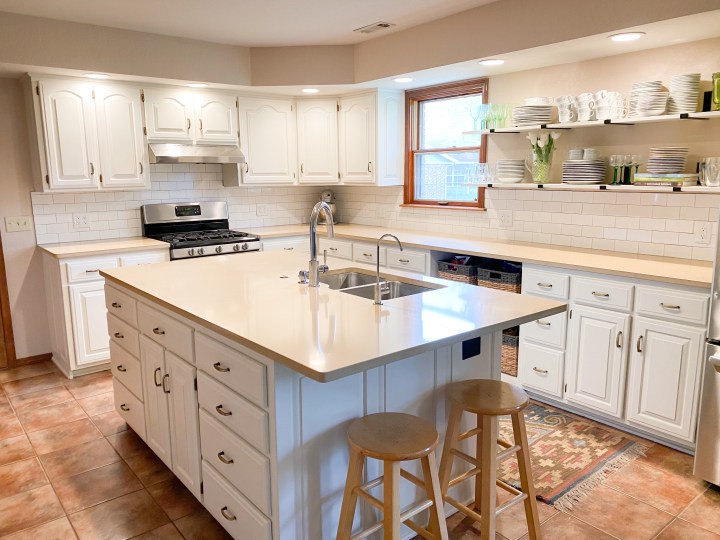
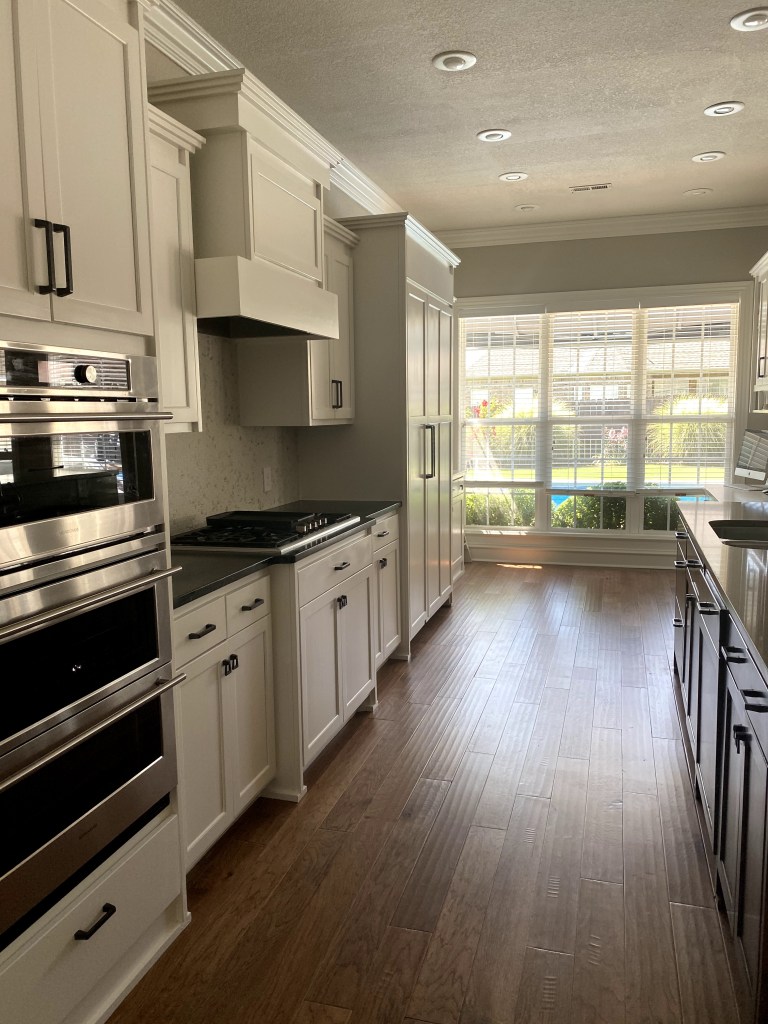
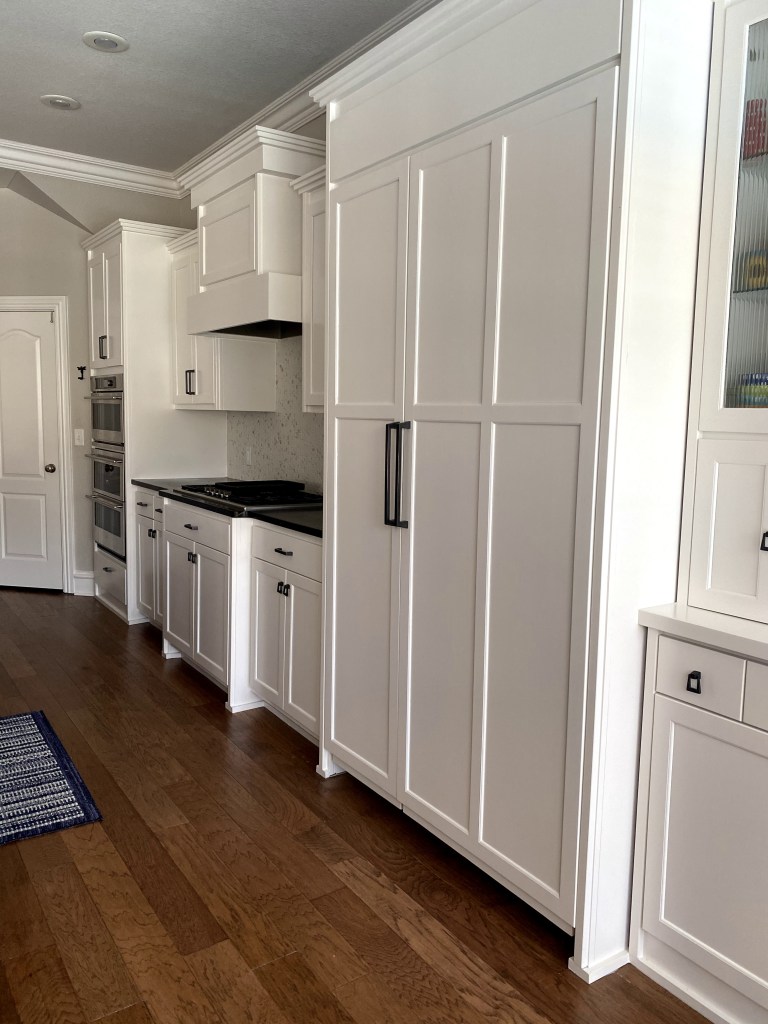
A well-chosen paint color is a powerful tool. My clients have three teenagers and they liked the durability of wood for the island, so we left that as is. We painted the surrounding cabinets Alabaster by Sherwin Williams. The wall color for the room is Worldly Gray from Sherwin Williams. We kept the existing countertops and replaced the backsplash with an understated hexagonal tile from Daltile, which we also purchased at ProSource.

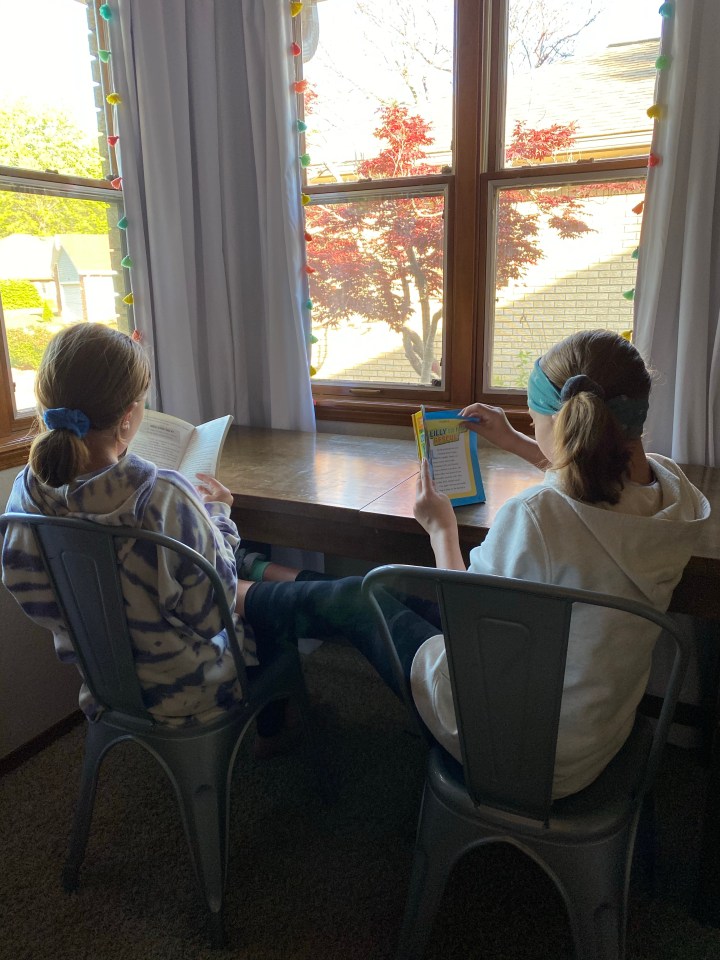
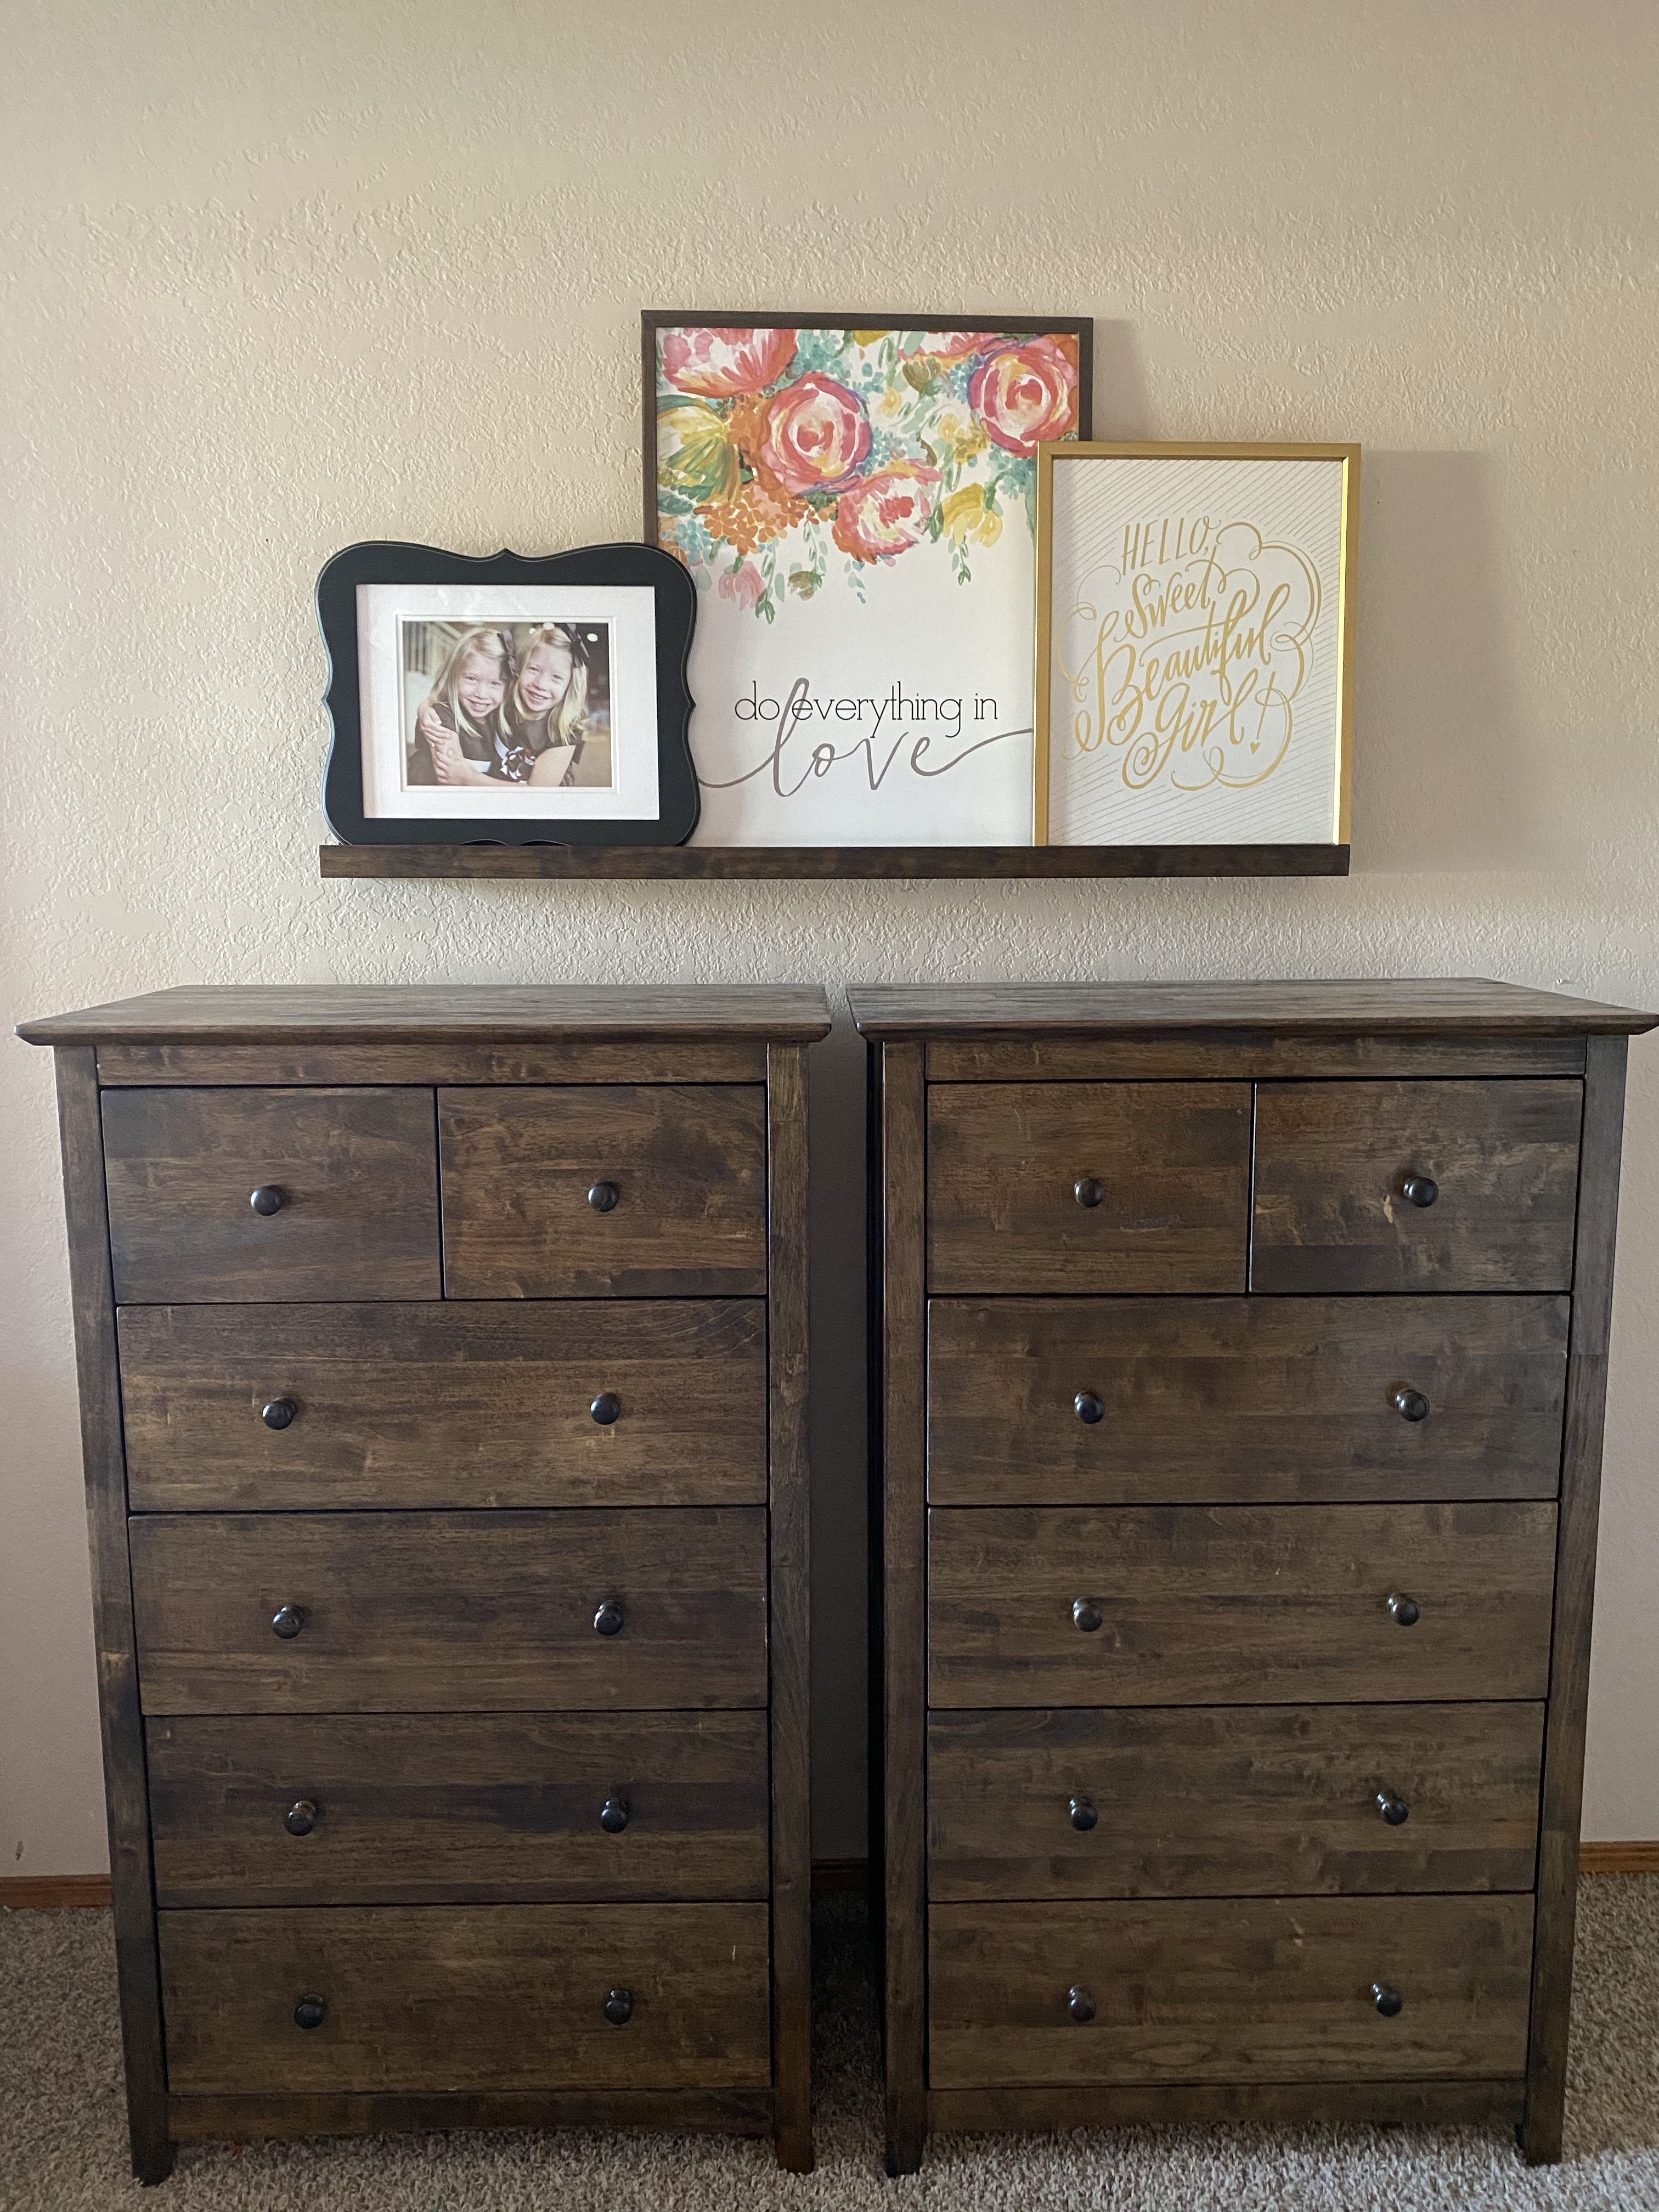
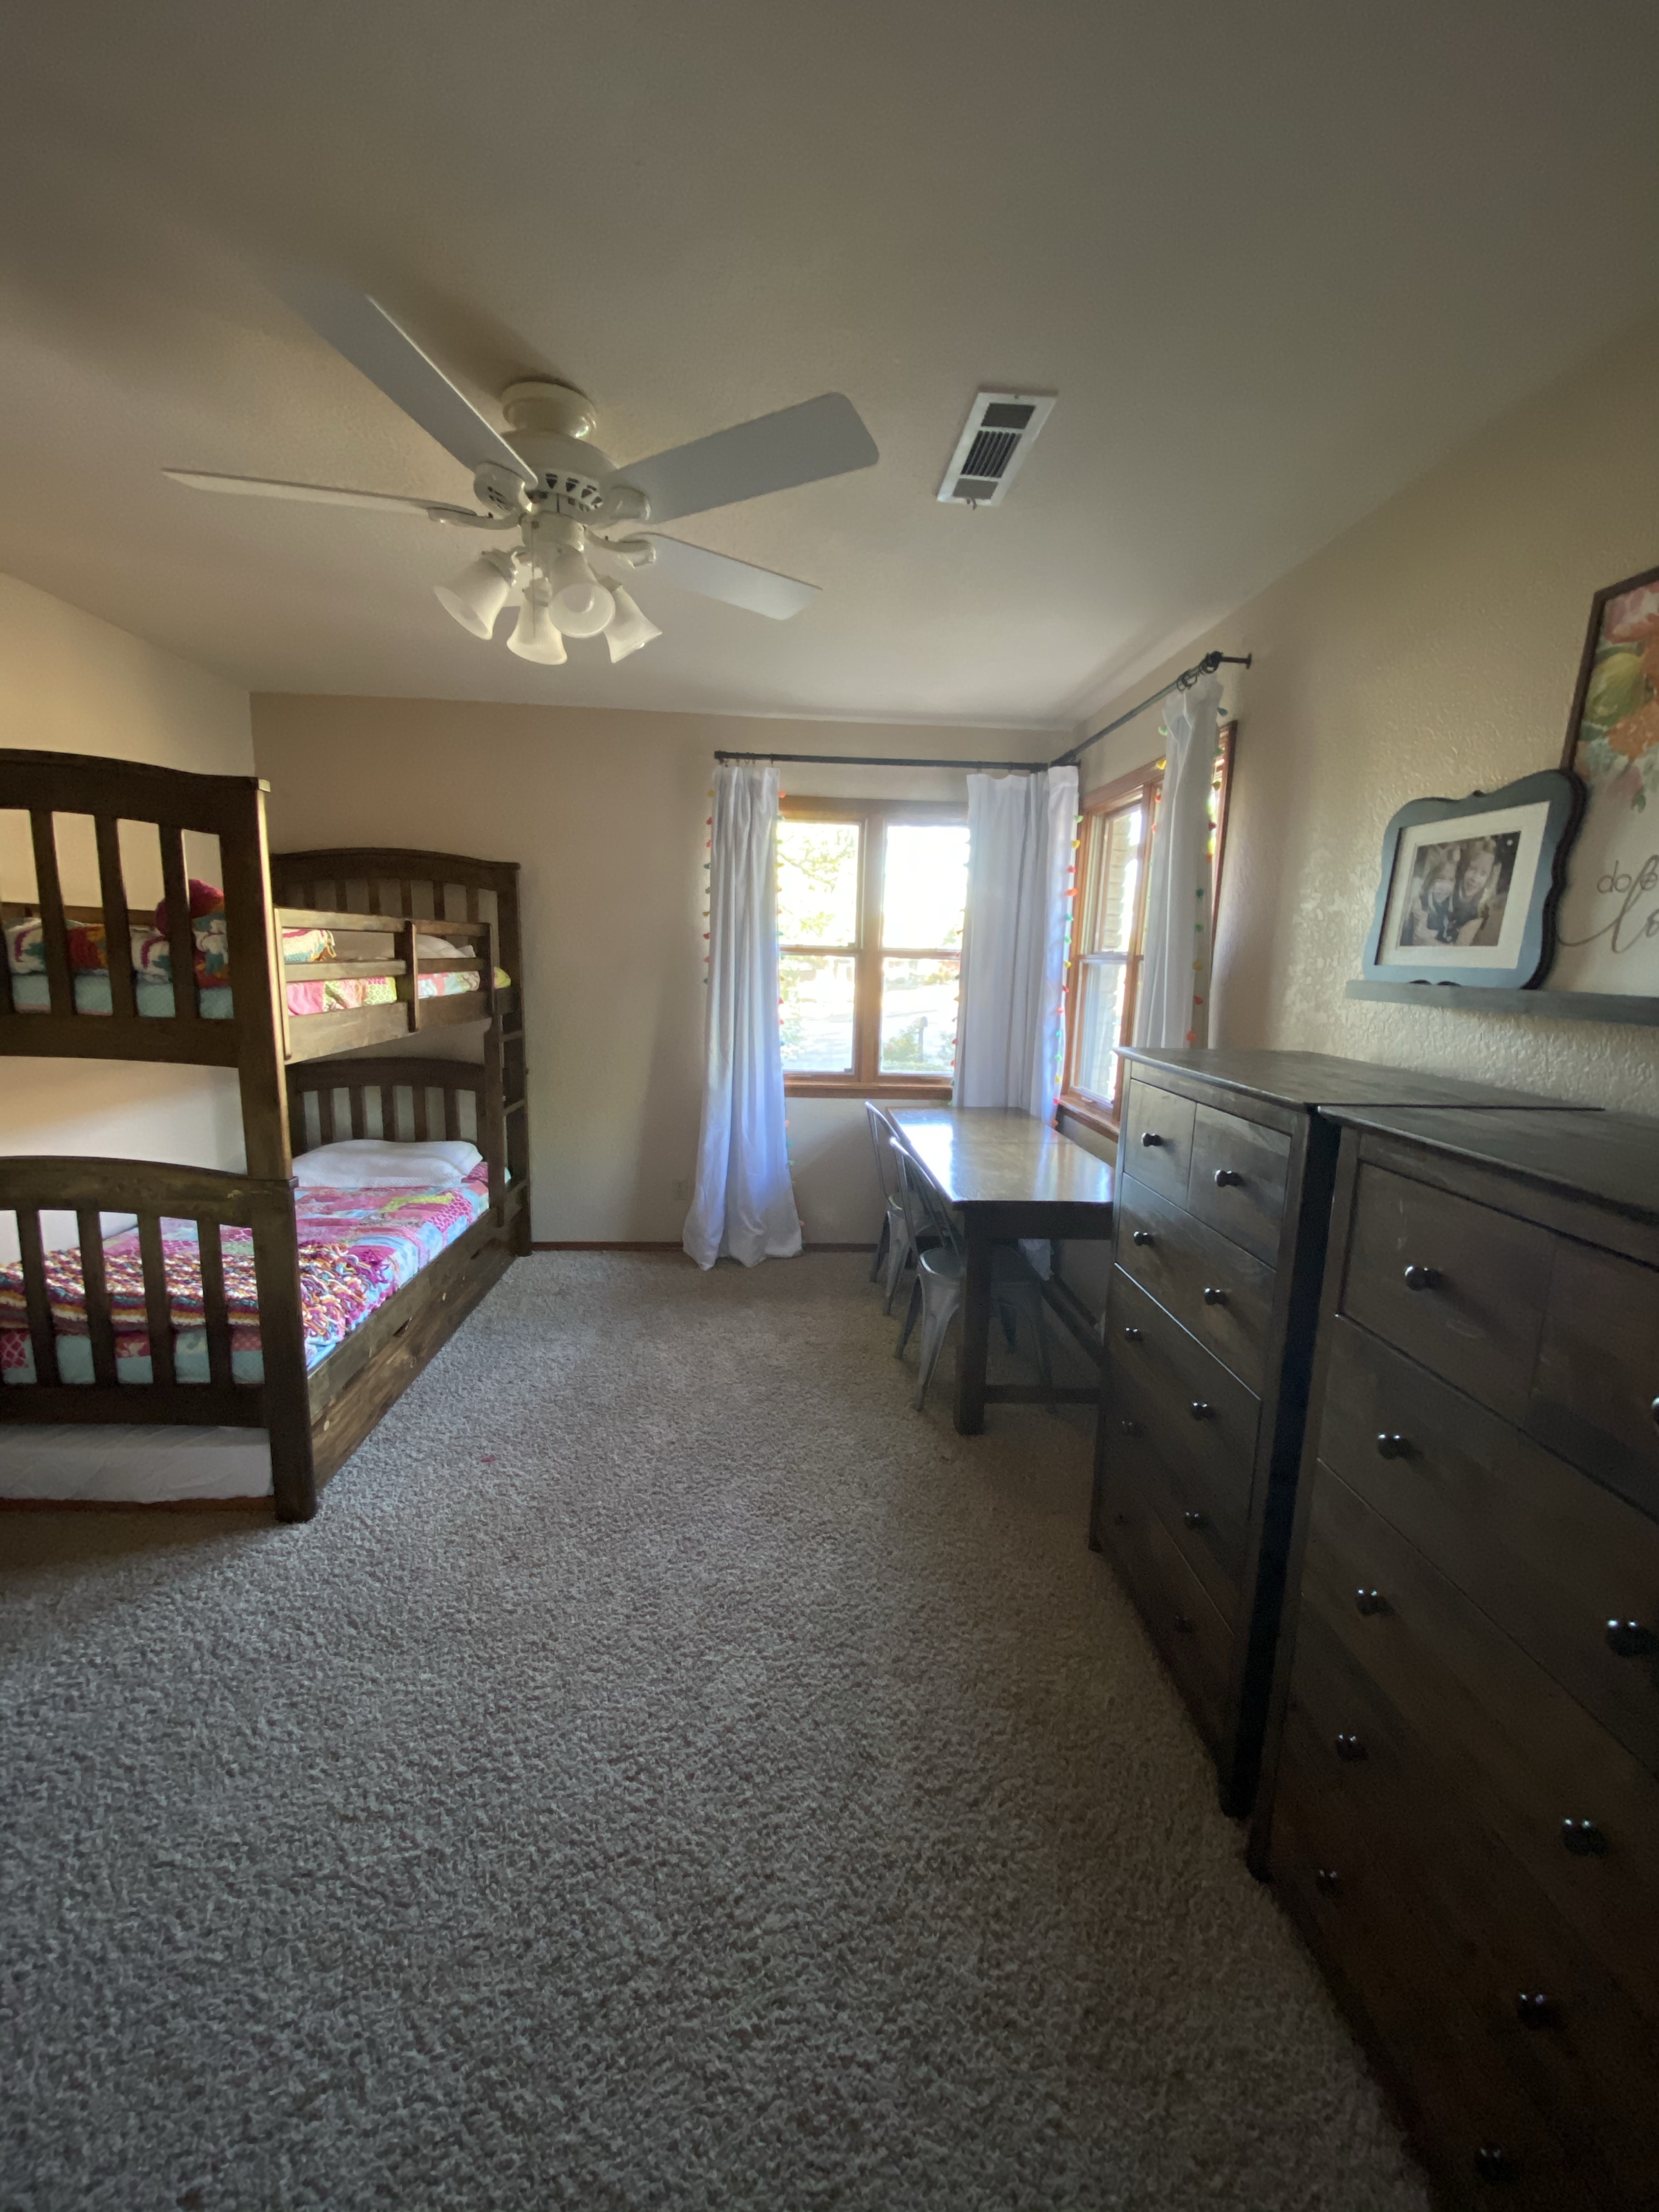
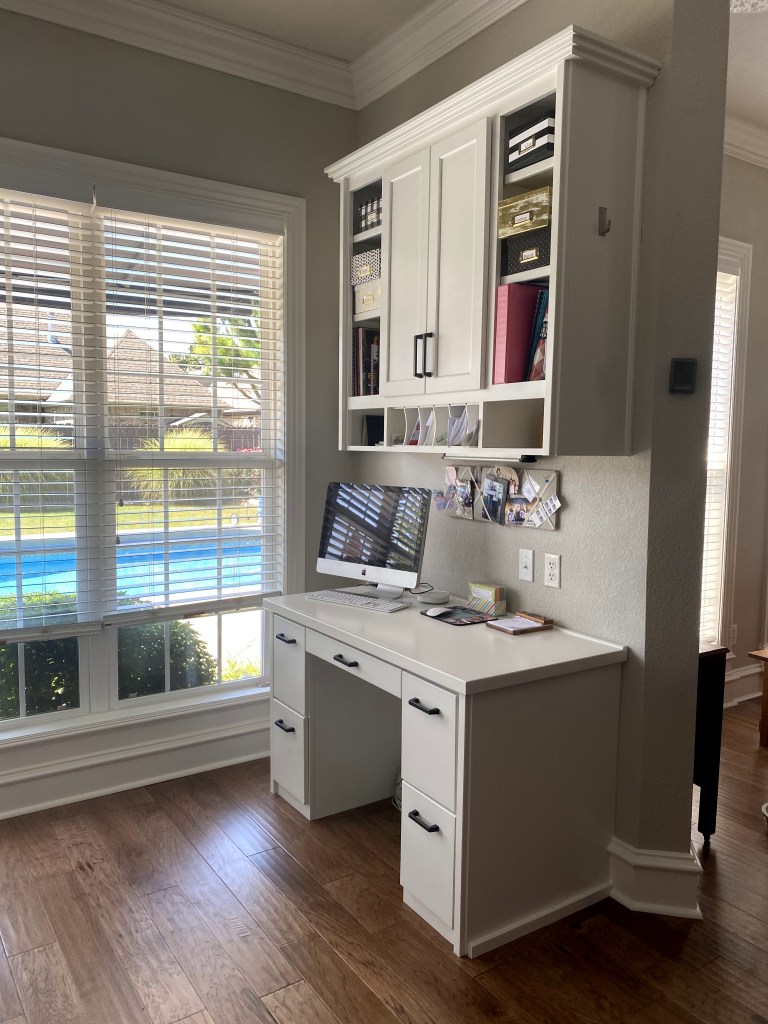
I love this built in desk. These clients are amazing about cataloguing memories and make photo books of each one of their kiddos. This space provides the perfect place to work on photo books as well as keeping life organized and running smoothly for an active family.

While it’s hard to tell from this picture, the mantle that my clients had before the remodel was warped and sagging on one side. They wanted to replace it and give the fireplace a bit of a facelift. I found an inspiration picture and we hired a craftsman to build a new mantle. Here’s the before shot of the fireplace:

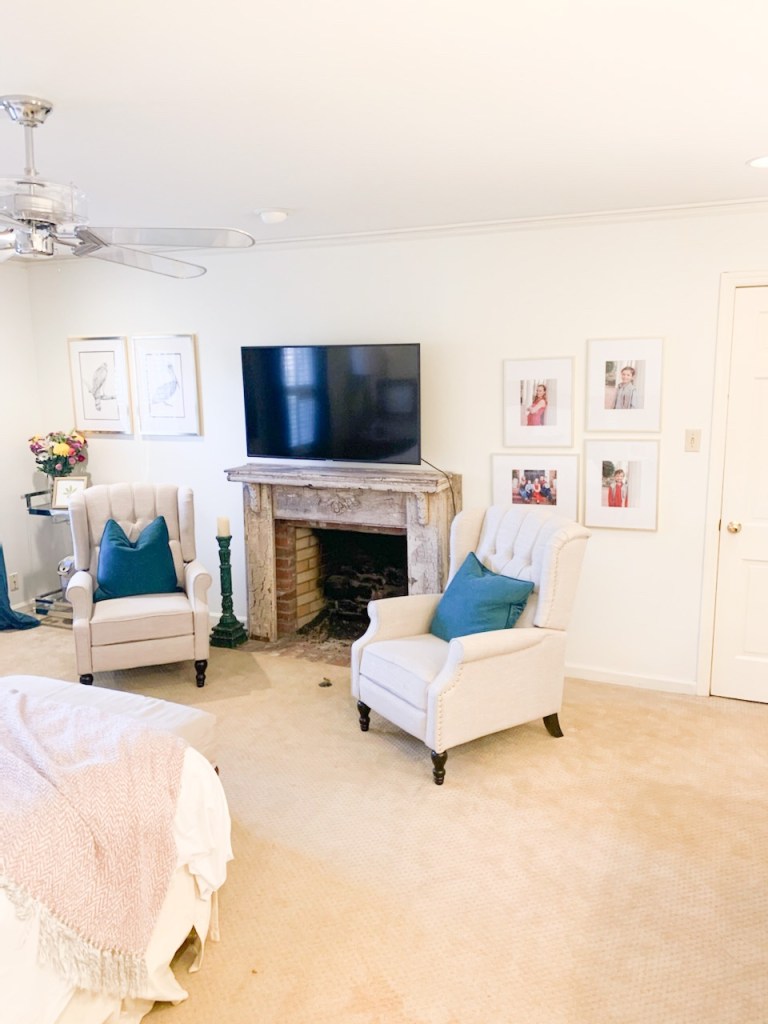
And here’s the fireplace after the remodel. We were able to use the existing stone surround, paint the built ins, replace the mantle and put up that beautiful Samsung frame TV. If you look closely, you can see where my client displays her family photo books. I’ll give you a hint. They are stacked on the third shelf from the top on the left side of the fireplace.

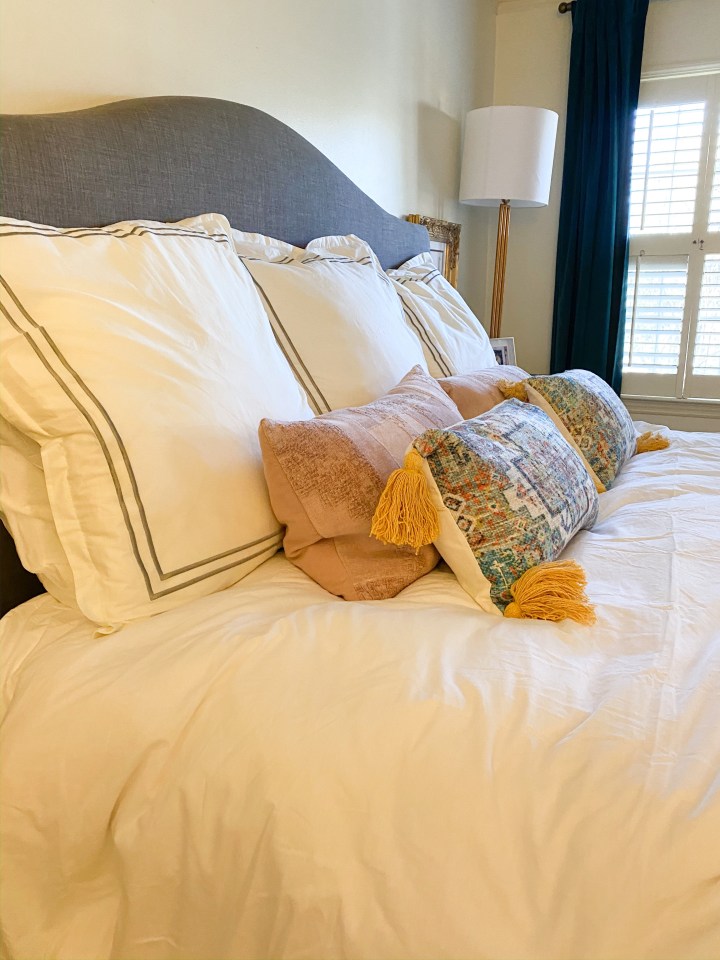
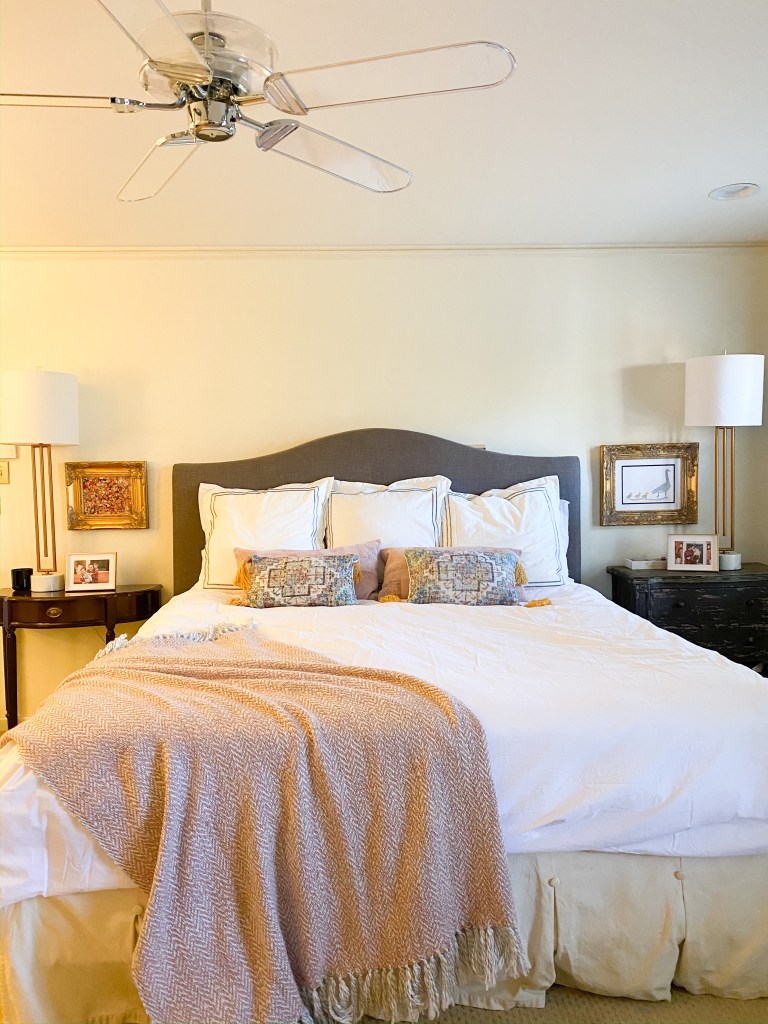
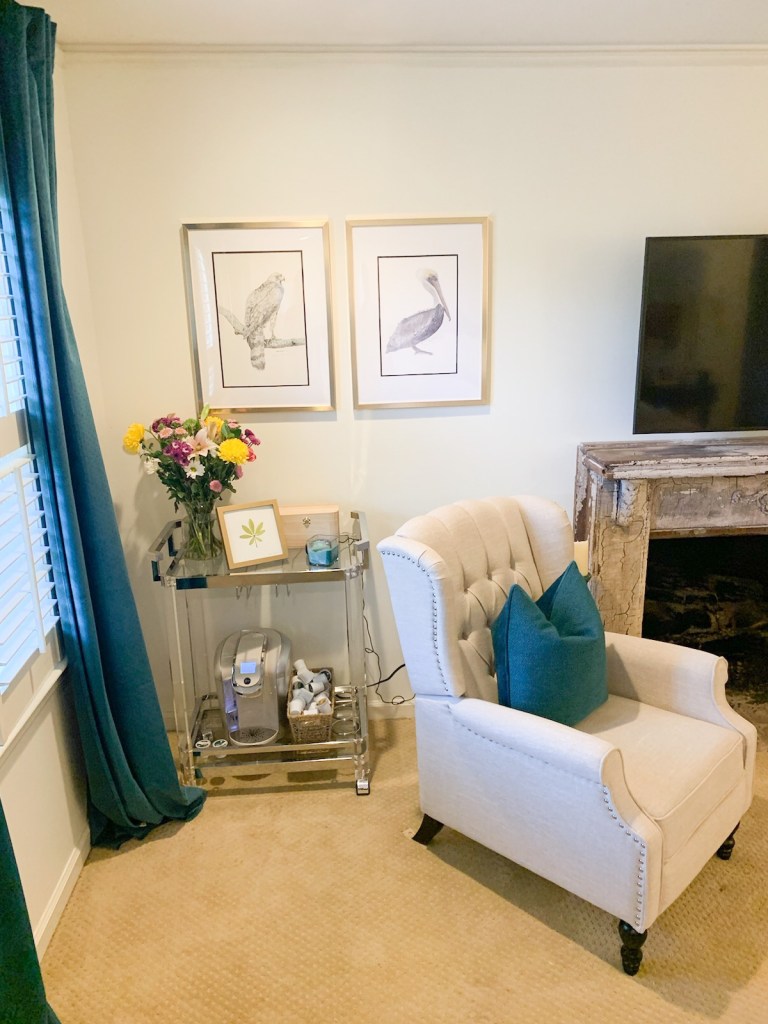
We kept the existing furniture in the family room and added a throw and pillow from Pottery Barn. We took our time looking for just the rug and I found a wool rug, also from Pottery Barn, that my clients are so pleased to have. Wool is one of the most durable fibers, so it’s really great choice for a space that gets a lot of use. The lamps are from Hobby Lobby and my clients made these side tables themselves with plans from anawhite.com. They did a great job and saved a little money.

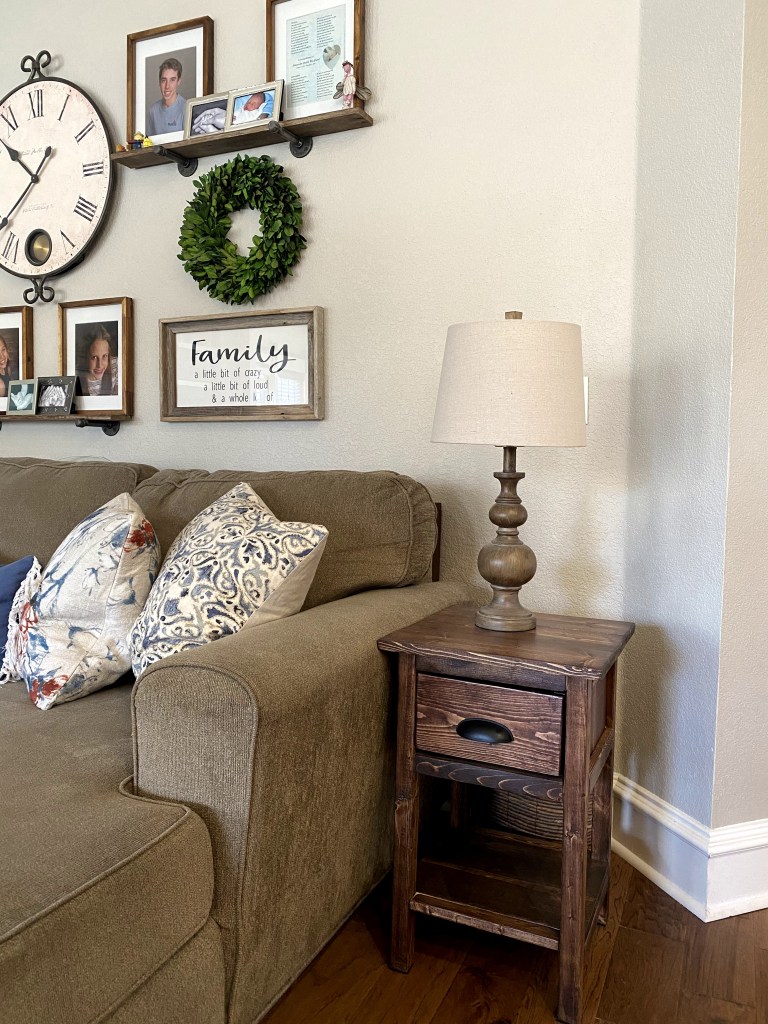
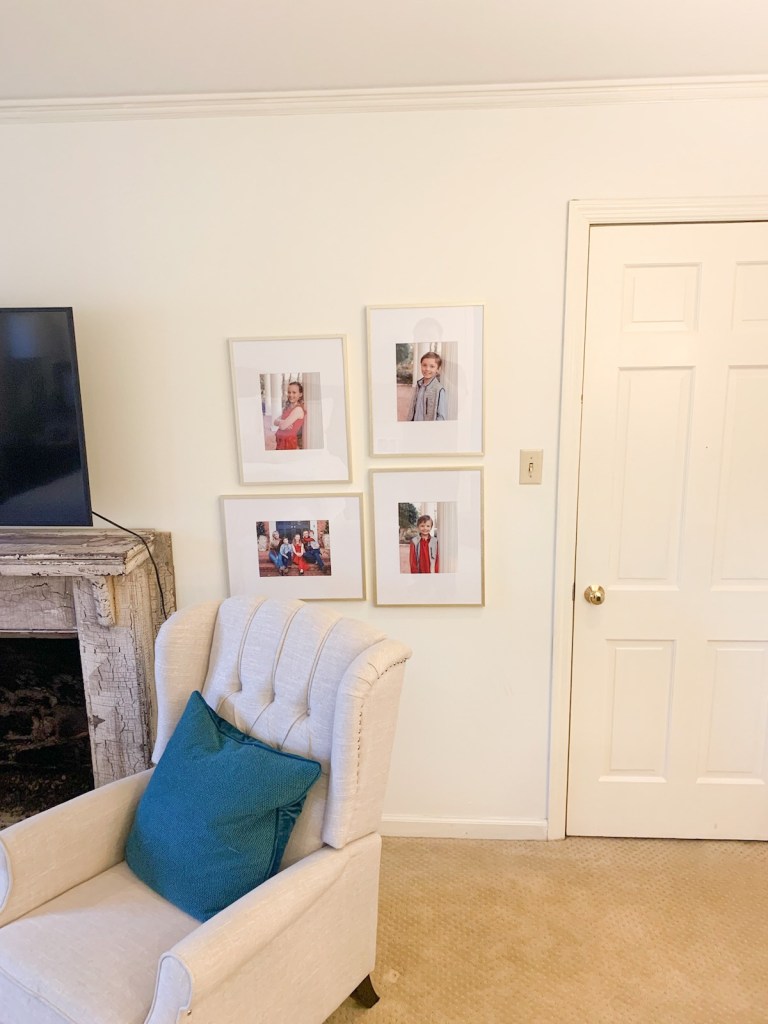
One thing that I try to make my goal in design is to help my clients find their own personal style. I don’t want every home I design to look like my style. I’m very passionate about helping others discover the look they love and then I try my darndest to help them achieve that look. When we styled the living room, I kept my client’s wall arrangement pretty much the same and just updated a few picture frames. When we finished the job, she sent me this text:

“Seriously, you were so easy to work with. You never made my style not feel like your style…if that makes sense.”

That’s truly one of the highest compliments I can receive as a designer. My goal is to equip homeowners to feel confident in their spaces. She also told me that her teenagers were so excited to show the remodel to their friends. It made my clients happy to see that their kids were proud of their home and pleased with the remodel.

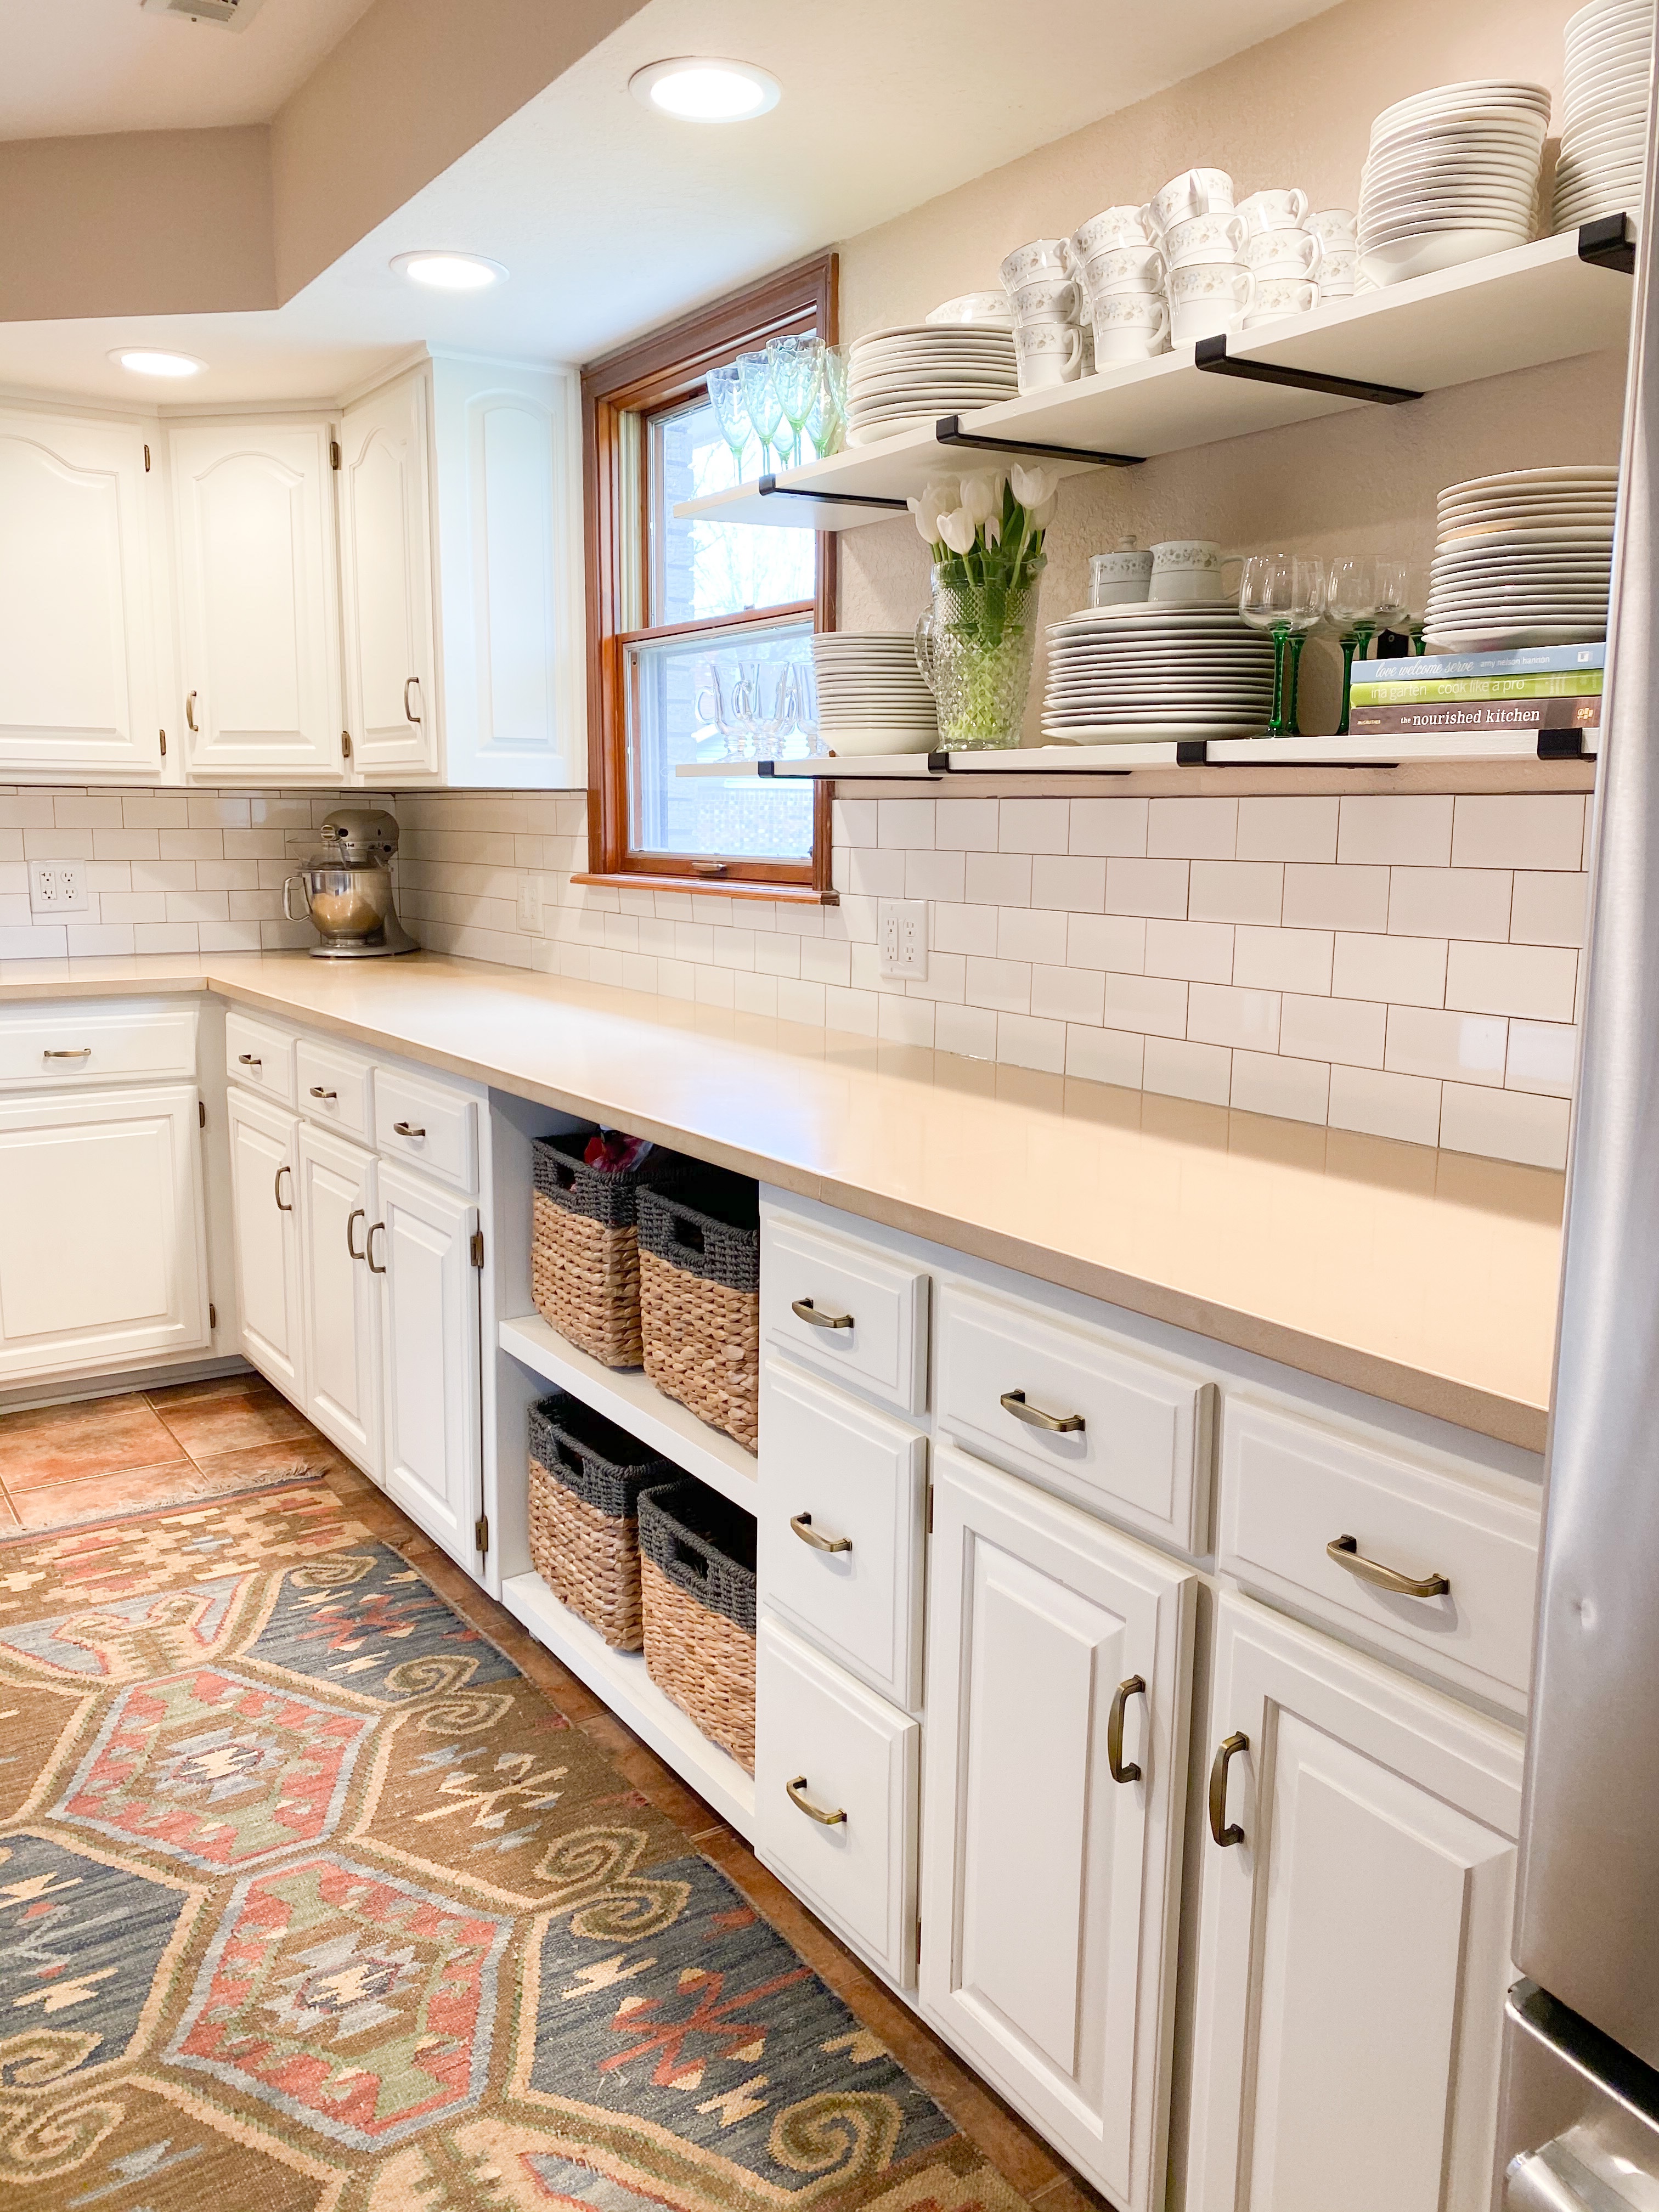
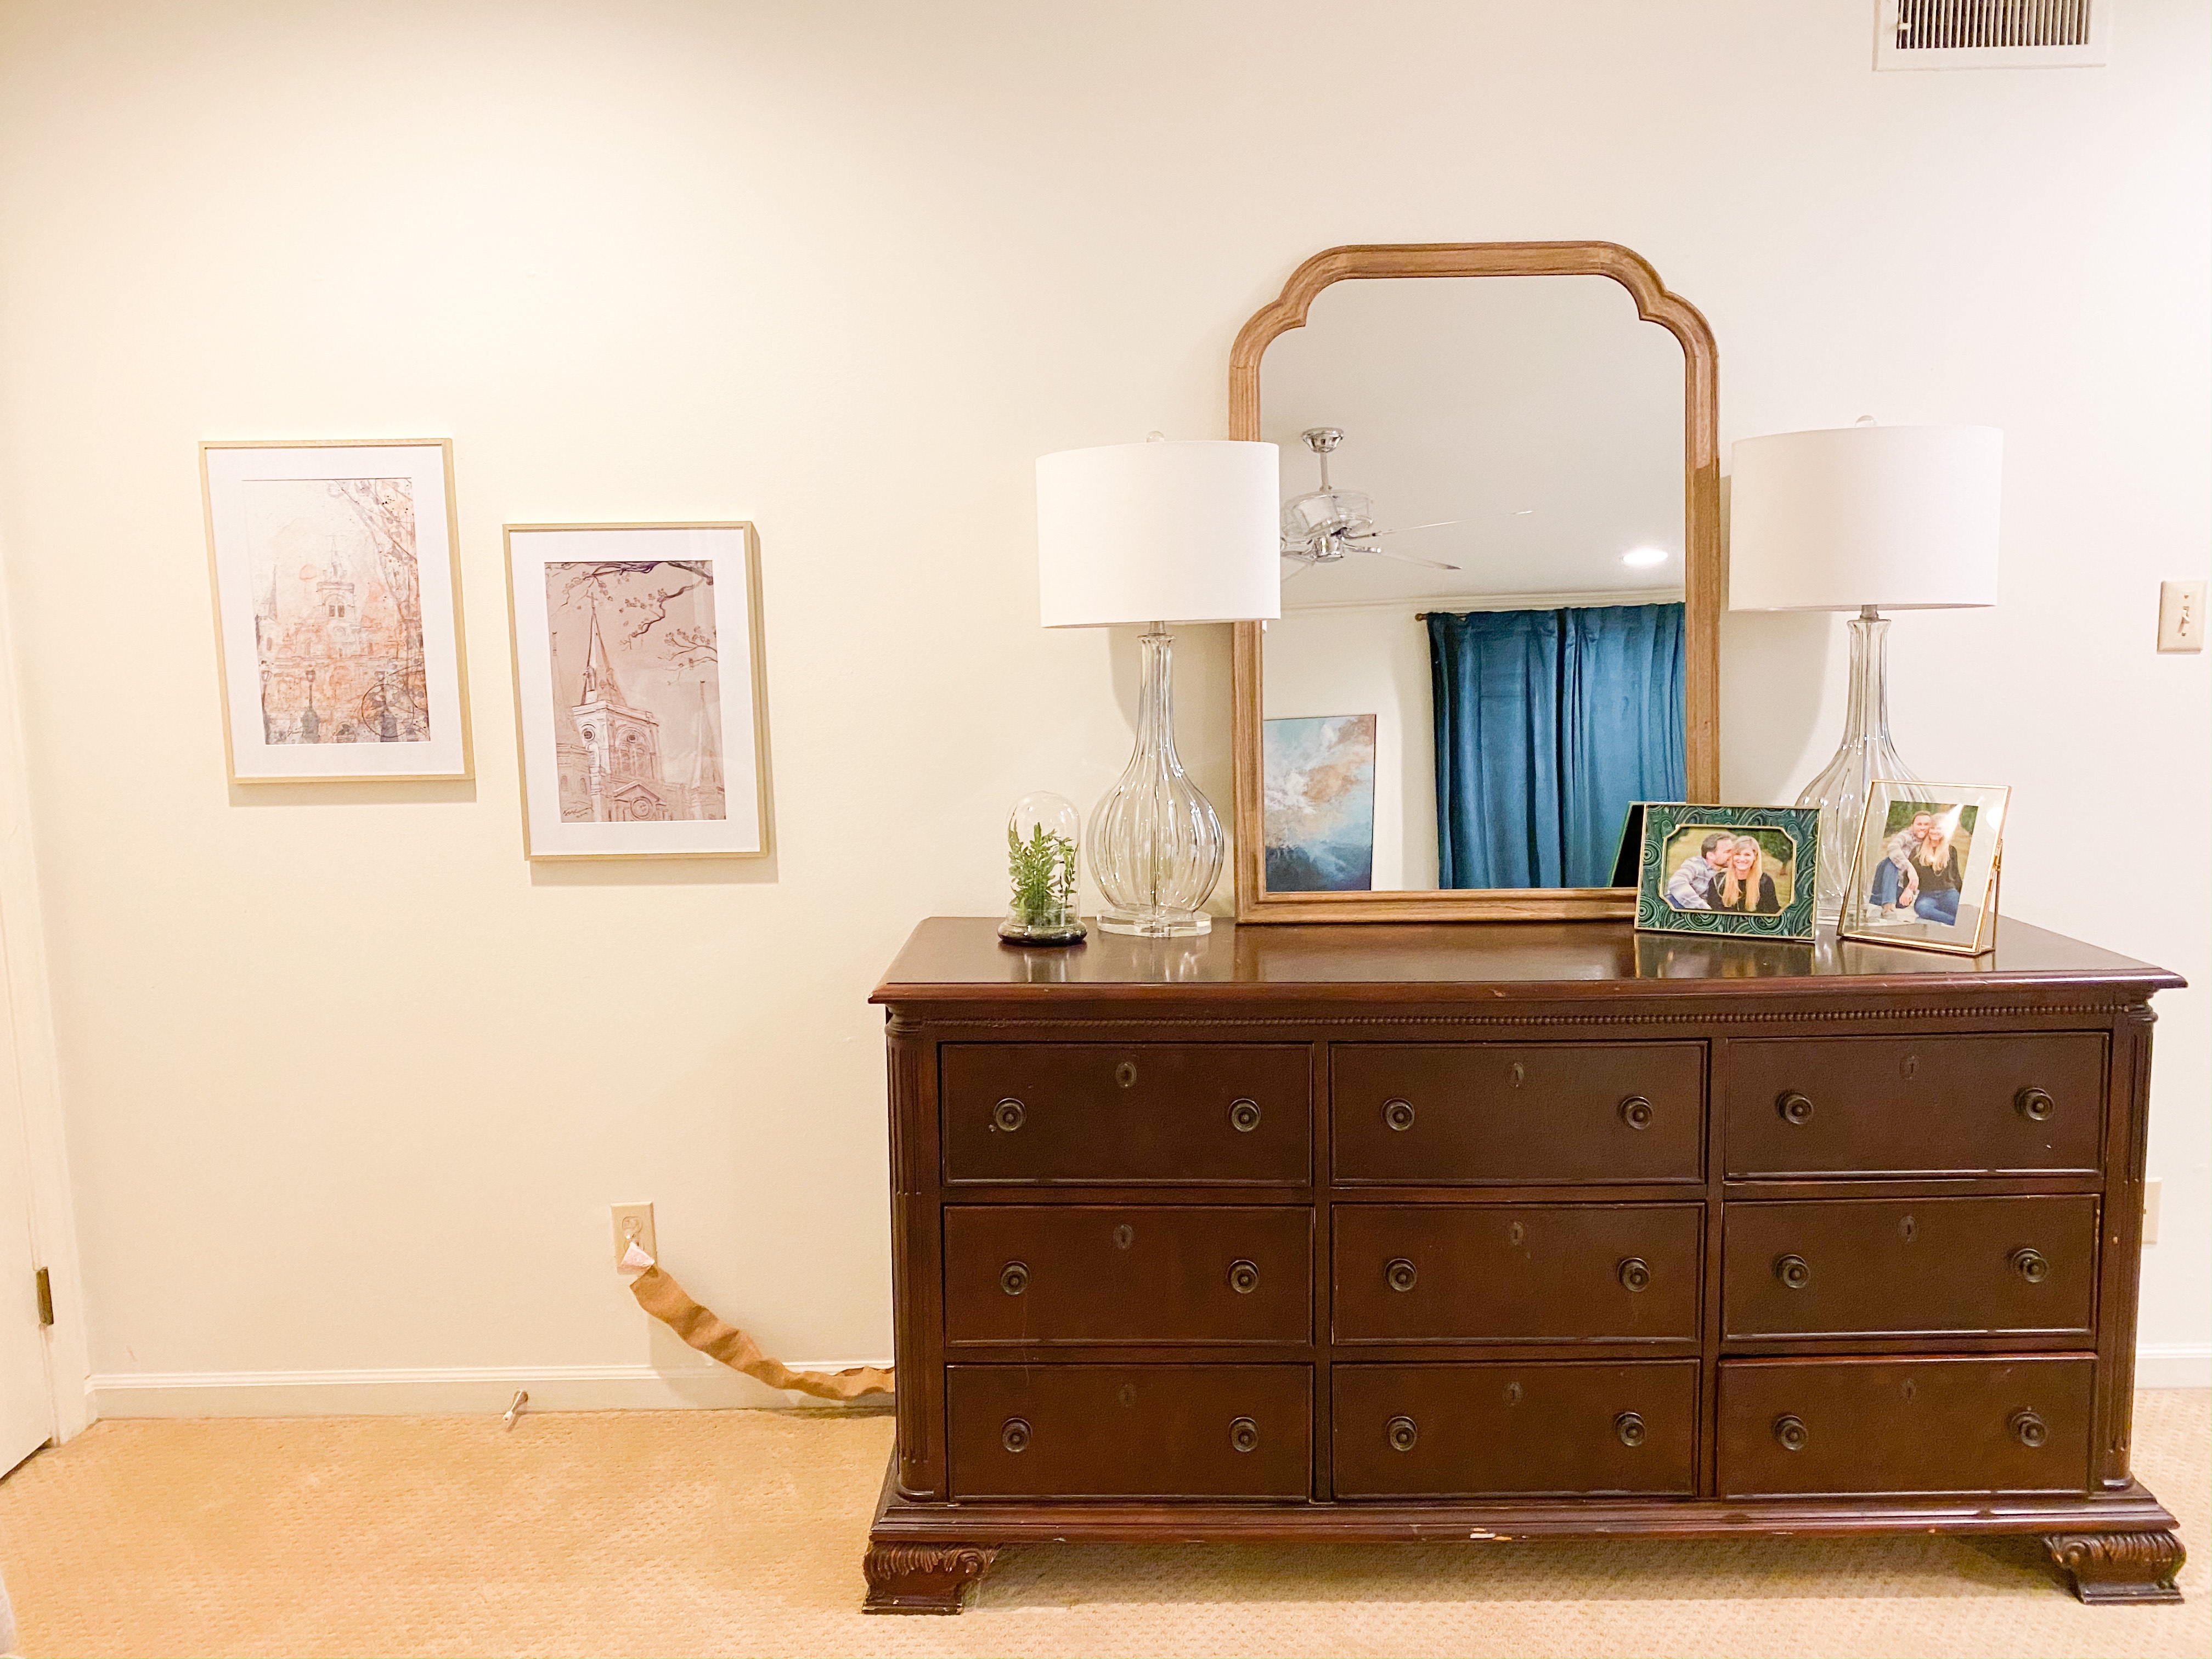
I’ll leave you with this picture of their kitchen in it’s everyday, unstyled glory. We chose this runner from Ruggable and it’s holding up quite well . We searched high and low for just the right desk chair on Facebook marketplace. While we’re all so accustomed to seeing quick before and afters on the interwebs, it’s worth letting you all in on the timeline of this job. From our first meeting to our final meeting to help style the family room, six months had passed. Slow design really is good design. After six months of working together, my clients are in love with their home.

Our Kitchen Renovation, Part Three and We’re Done!

Our Kitchen Renovation, Part Three and We’re Done!

We finished our kitchen renovation a few weeks ago and I’m finally ready to share an update and pictures. If you’d like to see the process, here’s a link to part one of our kitchen renovation and part two of our kitchen renovation. To finish up this stage of our renovation, we needed to:

  • Build and install open shelves to replace the bank of upper cabinets that were removed
  • Build and install shelves to replace an unused desk area directly behind the sink
  • Paint the ceiling…this little job was made necessary by an overzealous bottle of kombucha that exploded all over my kitchen. 
  • Paint the wall behind the open shelves

I’m happy to report that we got every bit of this done and we are loving the result! Here’s the before:

And some after shots:

Overall, we’ve been so pleased with how our renovation turned out. I’m enjoying our quartz counters from Traders Market. They were very reasonably priced and are holding up well. The open shelves make me smile on the daily because I love seeing all my china on display. I also love the lower open shelving. That little space is a power house of storage. One basket holds bread, one basket holds crackers and chips, one basket holds onions and potatoes and one basket holds lunch box snacks. I love the convenience of having each one of those things close by when I’m cooking.

It’s worth noting that my man is a beast who gets it done. He spent hours upon hours working in the kitchen to make my plans come to fruition and I’m so thankful. He even wore a mask before the coronavirus hit! Isn’t he the trend-setter??? It’s been so nice to hear feedback from you all about our kitchen renovation. I can’t thank you enough for following along on our journey.

Tween Room Makeover

Tween Room Makeover

My husband and I recently set aside a day to give our girls’ room a makeover. Our twins have shared a room their whole lives and I’ve learned a lot over the years about how to keep their room organized. Before I jump into how I spruced up their room, I’ll share a few tips on how to tackle your kid’s room.

First things first: toy cycling….if I want my girls’ room to stay neat, I can’t let them keep all their toys out all the time. What this means for our girls is that they have a few big bins of toys that take turns being stored in the top of their closet, or some lesser used toys are stored in the garage or attic. Each bin holds a different category of toys. For example, they have a bin full of dolls and doll accessories, another bin for stuffed animals and another bin for crafts. At some point, the girls will ask to switch out their toys or I’ll notice that they’ve not played with the toys that are in their room. We’ll get the bins down and swap out their toys. This has saved me so much time over the years and it definitely helps my girls keep their room neater.

Another way I’ve kept their room from getting overwhelming is by periodically going through their rooms and getting rid of things that they aren’t using. Sometimes I involve them in this process, and sometimes I don’t. Of course, I don’t get rid of anything that is particularly special to them if I can help it. If you are familiar with the Marie Kondo method, this is what I used when we organized the girls room recently. We brought everything in their room other than clothing and furniture and organized it in our dining room (see below). This process took hours and I really felt like I deserved some type of medal by the time it was done. My hubs and I started out with the girls helping us, but we eventually sent them to go play in another room so that we could really organize all this random stuff.

The girls also have a shelves in their closet where the bulk of their toys are stored. These bins came from Target over 10 years ago and, while they’ve seen better days, they’re still going strong. Quick tip on how I keep my sanity where a kid’s room is concerned: I don’t spend a ton of money on my kid’s rooms. If I want to really invest in a space in my home, it’s usually a main living area or the master bedroom. My kids play in their rooms a lot, so I find it’s best to keep the spaces fairly utilitarian. In the bins below my girls have stored makeup, crafts, hair bows, shopkins and who even knows what else? Note the bookshelf in the right of this picture. I intentionally left a good part of the shelf empty. I know this space will eventually be filled with something, be it library books or art projects. Keeping space open in our kiddo’s rooms gives them space to breathe and gives us the freedom to not feel like the room is packed to the gills.

Lastly, I highly recommend being very choosy about kid’s clothes. A child’s room can be overrun by clothes in a hurry. My kiddos each have a smallish chest of drawers and I try to keep their clothing limited to what will fit in their chests and what will hang loosely in their closets.

As for decorating their room, I bought them new curtains and rearranged their furniture just a bit. Before we spruced up their room, I had a chest of drawers on each side of the room, but their long, narrow room felt crowded. I moved the two chests together and hung a photo ledge that my husband made years ago above the chests. I styled the ledge with artwork that was already in their room. Hanging the ledge above the chests unifies the two pieces to make them look like one unit. This also helps the room to feel more open and airy.

For their bedding, we’ve had good luck with these soft sheets from Amazon. I made their quilts for them a couple years ago and my sister knitted beautiful afghans at the foot of their beds. Again, I keep their bedding very simple. We have duvets and duvet covers that they use in the winter, but for now they are folded and in the closet.

We bought the majority of their bedroom furniture at a local furniture store that is now out of business. The girls’ desk was made by a cabinet-maker several years ago and we got their desk chairs at TJ Maxx.

Revamping my girls’ room has been such a fun process. I mostly used what I already had on hand, with the exception of buying new curtains. They are enjoying having a freshened-up space and they’ve each thanked my husband and I multiple times for helping them get better organized.

Below is the design board that I created for this space. I had such a good time pulling all of these elements together in a simple, kid-friendly, inexpensive way. If you need me to help design your kiddo’s room, shoot me a message and we’ll work together to create a space that you and your kiddo will love.

Light and Airy Master Bedroom Redesign for The Thorpe Family

Light and Airy Master Bedroom Redesign for The Thorpe Family

When my dear friend, Catherine, came to me and asked me to help her with her master bedroom, I immediately said yes. Catherine’s home is absolutely lovely, but like most of us, she’d put off decorating her master bedroom in favor of taking care of other areas of the house. We worked together remotely for a couple months and I installed the final design just a few weeks ago. Here’s a before shot for reference.

Master Bedroom Before

Let’s take a minute to talk about the before picture. Catherine had already chosen some great pieces on her own. I love her bedside lamps and the super fun acrylic ceiling fan (because hello, this is Arkansas people, we gotta have ceiling fans). We’d picked the rug together but I didn’t see it in the room till the day of the install. This is a really great example of a rug being too small and not quite the right color for the room. Mixing warm beige carpet and a cool grey rug just did not work in this space. It made the room look cluttered and unfinished. Catherine had already decided she didn’t love the rug, so I took it out, with the help of my trusty assistant, my dear, sweet Nana. While we’re talking about rugs, it’s worth noting that placing a rug on top of existing carpet is not always an easy fix. Catherine plans to eventually replace the carpet in this room with hardwood flooring. The existing carpet, on it’s own, was a better fit for the room than trying to make a rug work. This is a great example of the less is more approach. Choosing to remove the rug actually made the room look more put together and feel more peaceful.

Master Bedroom After

Once the rug was out of the way, I added in some art that the Thorpe’s bought while traveling that I’d had framed at Hobby Lobby. I replaced their duvet cover with a simple white cotton duvet and replaced the Euro sham covers as well, both from Bed, Bath and Beyond. Catherine and I found the throw and the pink lumbar pillows, both from Homegoods, and the patterned lumbar pillows, from Hobby Lobby, on shopping trips together.

The Anthropologie drapes are one of my favorite finishes in the room and one of the first purchases we made during this project. The drapes set the tone for us as we chose the remaining finishes. Catherine chose the art between the windows on her own and it compliments the space well.

Opposite the bed is a fireplace and a cozy sitting area. Catherine had already done a great job choosing chairs and a coffee stand in the corner with it’s own Keurig, complete with all things morning coffee. Catherine and I found the pillows during a Homegoods trip. The Thorpes had several pieces of art that they’d purchased while traveling and I had most of it framed at Hobby Lobby with ready-made frames or with semi-custom frames during a big sale.

The Thorpes had recently had family pictures taken and I was able to frame several great pics of their crew. I used this frame from Target in several different sizes for a very custom look at a great price.

The dresser on the wall opposite the windows was a great place to style with more art from the Thorpe’s travels. Again, I used the Target frames linked above and I love the way they turned out.

While I was steaming the duvet and euro shams and doing all the things that come with sprucing up a bedroom, my Nana was carefully placing most of the pictures and pieces of artwork into frames. She helped me every step of the way and we had such a great time working together. When she was done helping with the pictures, I found her downstairs cleaning the Thorpe’s kitchen. This woman is gold and I hope to be more like her!

My Trusty Assistant and Me

The most rewarding part of this project was seeing the joy on Catherine’s face when she saw the completed room. She was and is so thrilled with her master bedroom. Catherine is a business owner, her sweet husband is a doctor and they have three kiddos. To say that these two hard-working people need a peaceful retreat is an understatement. I’m so thankful that my dear friends let me play a small role in creating a soft place to land in their home. Look for a blog post soon about how we brought some life and order into the Thorpe’s master bathroom.